VACUUM PUMP(for 3ZR-FAE) INSTALLATION
PROCEDURE
-
INSTALL VACUUM PUMP ASSEMBLY
-
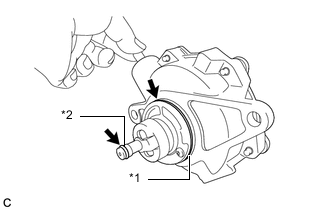
Text in Illustration *1 No. 2 O-ring *2 No. 3 O-ring Apply engine oil to the No. 2 and No. 3 O-rings on the vacuum pump assembly.
Note
When removing and installing the vacuum pump assembly, replace the No. 2 and No. 3 O-rings with new ones.
-
Apply engine oil to the inner surface of the installation hole.
-
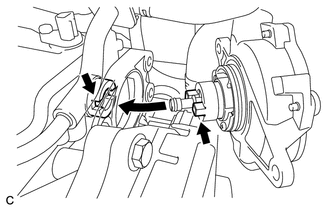
Install the vacuum pump assembly so that the oil pipe engages with the hole of the camshaft and the coupling teeth with the grooves on the camshaft tip.
Tech Tips
Apply engine oil to the O-ring.
Note
-
Ensure that the vacuum pump assembly is installed securely.
-
Be careful not to pinch the O-ring.
-
-
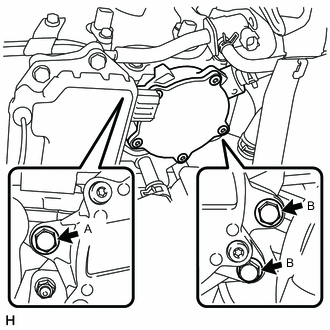
Install the vacuum pump assembly with the 3 bolts.
- Torque:
- 21 N*m { 214 kgf*cm, 15 ft.*lbf }
Tech Tips
-
Bolt length
Bolt A: 25 mm
Bolt B: 45 mm
Note
-
After installation, check that there are no gaps between the matching surfaces and that the vacuum pump assembly is not installed at an angle.
-
As 2 different lengths of bolts are used, make sure to check the proper installation positions before installing them.
-
After tightening the bolts, ensure that the contact surface of the vacuum pump assembly is flush with the cylinder head.
-
-
CONNECT UNION TO CONNECTOR TUBE HOSE
-
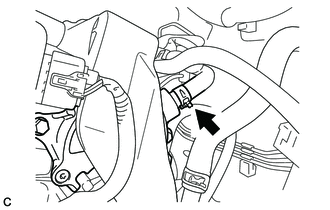
Connect the vacuum hose and move the clip.
-
-
INSPECT VACUUM PUMP OPERATION
-
CONNECT ENGINE WIRE
-
INSTALL AIR CLEANER CASE SUB-ASSEMBLY
-
INSTALL AIR CLEANER CAP SUB-ASSEMBLY
-
INSTALL NO. 2 CYLINDER HEAD COVER