REAR COIL SPRING REMOVAL
PROCEDURE
-
PRECAUTION
Note
After turning the ignition switch off, waiting time may be required before disconnecting the cable from the battery terminal. Therefore, make sure to read the disconnecting the cable from the battery terminal notice before proceeding with work Click here.
-
DISCONNECT CABLE FROM NEGATIVE BATTERY TERMINAL
Note
When disconnecting the cable, some systems need to be initialized after the cable is reconnected Click here.
-
REMOVE REAR WHEEL
-
REMOVE REAR HEIGHT CONTROL SENSOR SUB-ASSEMBLY (for LED Headlight)
-
REMOVE REAR STABILIZER LINK ASSEMBLY LH
-
LOOSEN REAR NO. 2 SUSPENSION ARM ASSEMBLY LH
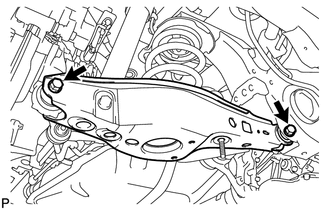
-
Loosen the 2 bolts of the suspension arm.
Note
-
Do not remove the bolts and nuts, only loosen them.
-
Since a stopper nut is used, loosen the bolt.
-
-
-
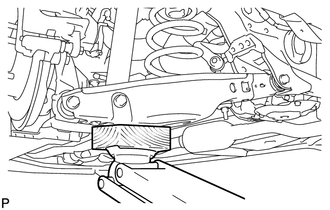
DISCONNECT REAR SHOCK ABSORBER ASSEMBLY LH
-
Support the rear No. 2 suspension arm with a jack using a wooden block to avoid damage.
-
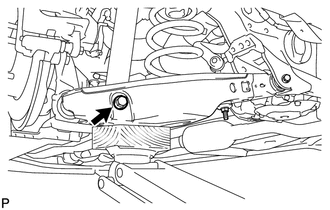
Remove the bolt and nut, and then disconnect the rear shock absorber from the rear No. 2 suspension arm.
Note
Hold the nut and then remove the bolt.
-
-
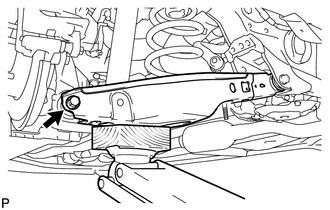
REMOVE REAR COIL SPRING LH
-
Remove the bolt and nut located on the rear axle carrier of the rear No. 2 suspension arm.
-
Lower the jack gradually to remove the rear coil spring with rear upper coil spring insulator.
-
-
REMOVE REAR UPPER COIL SPRING INSULATOR LH
-
Remove the rear upper coil spring insulator from the rear coil spring.
-
-
REMOVE REAR LOWER COIL SPRING INSULATOR LH