TRANSMISSION CONTROL CABLE REMOVAL
CAUTION / NOTICE / HINT
Tech Tips
-
Use the same procedure for RHD and LHD vehicles.
-
The procedure listed below is for LHD vehicles.
PROCEDURE
-
REMOVE NO. 2 CYLINDER HEAD COVER
-
REMOVE AIR CLEANER CAP SUB-ASSEMBLY
-
REMOVE AIR CLEANER FILTER ELEMENT SUB-ASSEMBLY
-
Remove the air cleaner filter element sub-assembly from the air cleaner case sub-assembly.
-
-
REMOVE AIR CLEANER CASE SUB-ASSEMBLY
-
REMOVE NO. 2 ENGINE UNDER COVER
-
DISCONNECT HEATED OXYGEN SENSOR CONNECTOR
-
REMOVE FRONT EXHAUST PIPE ASSEMBLY
-
REMOVE FRONT FLOOR NO. 1 HEAT INSULATOR
-
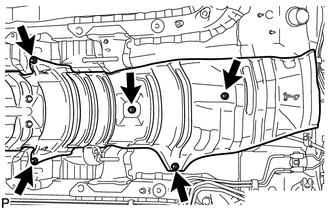
Remove the 5 nuts and front floor No. 1 heat insulator.
-
-
REMOVE CONSOLE BOX ASSEMBLY
-
REMOVE TRANSMISSION CONTROL CABLE ASSEMBLY
-
Move the shift lever to N.
-
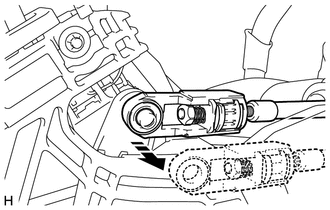
Disconnect the end of the transmission control cable from the shift lever.
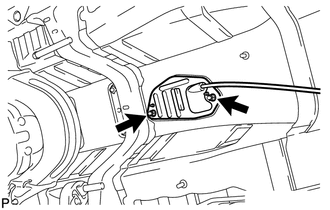
Text in Illustration 
Disconnect in this Direction -
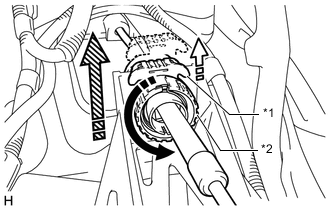
Text in Illustration *1 Stopper *2 Nut Rotate in this Direction 
Pull out in this Direction 
Disconnect in this Direction Pull out the stopper of the transmission control cable.
Note
Do not remove the stopper. If the stopper is removed, reinstall it to its original position.
-
Rotate the nut counterclockwise approximately 180° and, while holding the nut in that position, disconnect the transmission control cable from the shift lever retainer.
Note
Do not over-rotate the nut as it will come off the internal spring and the transmission control cable will not be reusable.
-
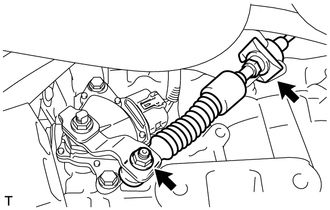
Remove the nut and disconnect the control cable from the control shaft lever.
-
Remove the clip and disconnect the transmission control cable from the No. 1 transmission control cable bracket.
-
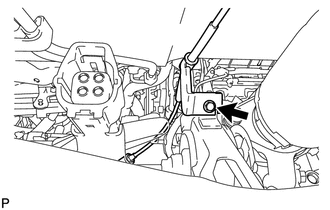
Remove the bolt and disconnect the transmission control cable support.
-
Remove the 2 nuts and disconnect the transmission control cable assembly.
-
Pull out the transmission control cable assembly to remove it.
-
-
REMOVE NO. 1 TRANSMISSION CONTROL CABLE BRACKET
-
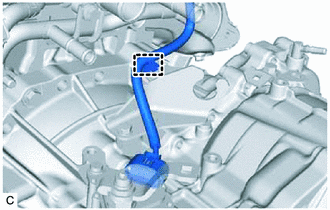
Detach the clamp.
-
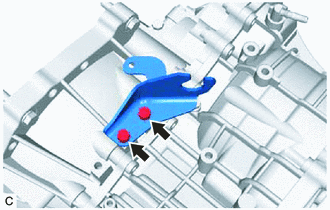
Remove the 2 bolts and No. 1 transmission control cable bracket from the continuously variable transaxle assembly.
-