FRONT DIFFERENTIAL OIL SEAL REPLACEMENT

PROCEDURE
-
REMOVE FRONT LOWER BUMPER ABSORBER
-
REMOVE NO. 1 ENGINE UNDER COVER
-
REMOVE REAR ENGINE UNDER COVER RH
-
REMOVE REAR ENGINE UNDER COVER LH
-
DRAIN CONTINUOUSLY VARIABLE TRANSAXLE FLUID

-
Using a 6 mm socket hexagon wrench, remove the overflow plug and gasket from the continuously variable transaxle.
-
Using a 6 mm socket hexagon wrench, remove the No. 1 transmission oil filler tube from the oil pan and drain the fluid.
-
Using a 6 mm socket hexagon wrench, install the No. 1 transmission oil filler tube to the oil pan.
- Torque:
- 1.7 N*m { 17 kgf*cm, 15 in.*lbf }
-
Using a 6 mm socket hexagon wrench, install a new gasket and the overflow plug to the oil pan.
- Torque:
- 40 N*m { 408 kgf*cm, 30 ft.*lbf }
-
-
REMOVE FRONT DRIVE SHAFT ASSEMBLY LH AND RH
-
Remove the front drive shaft LH and RH Click here.
-
-
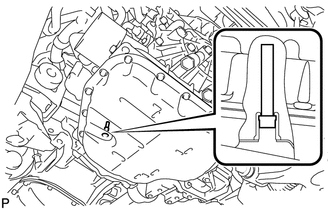
REMOVE CVT TYPE T OIL SEAL LH
-
Using SST, tap out the oil seal from the transaxle case.
- SST
- 09308-00010
Note
Do not damage the transaxle case.
-
-
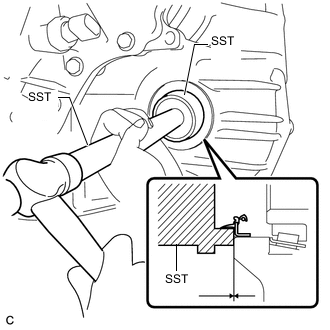
REMOVE CVT TYPE T OIL SEAL RH
-
Using SST, tap out the oil seal from the transaxle housing.
- SST
- 09308-00010
Note
Do not damage the transaxle housing.
-
-
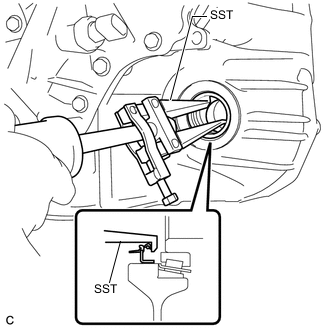
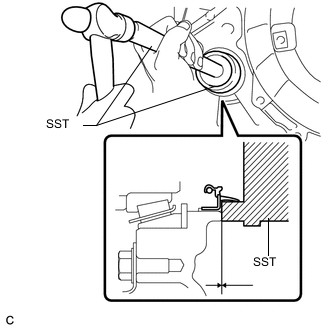
INSTALL CVT TYPE T OIL SEAL LH
-
Using SST and a hammer, tap in a new oil seal to the transaxle case.
- SST
- 09950-70010 ( 09951-07200 )
- 09554-14010
Standard depth -0.5 to 0.5 mm (-0.0197 to 0.0197 in.) Note
Do not damage the oil seal lip.
-
Coat the lip of the oil seal with MP grease.
-
-
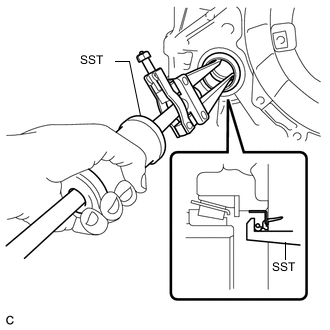
INSTALL CVT TYPE T OIL SEAL RH
-
Using SST and a hammer, tap in a new oil seal to the transaxle housing.
- SST
- 09950-70010 ( 09951-07200 )
- 09554-14010
Standard depth -0.5 to 0.5 mm (-0.0197 to 0.0197 in.) Note
Do not damage the oil seal lip.
-
Coat the lip of the oil seal with MP grease.
-
-
INSTALL FRONT DRIVE SHAFT ASSEMBLY LH AND RH
-
Install the front drive shaft LH and RH Click here.
-
-
ADD CONTINUOUSLY VARIABLE TRANSAXLE FLUID
-
Add continuously variable transaxle fluid Click here.
-
-
INSTALL REAR ENGINE UNDER COVER LH
-
INSTALL REAR ENGINE UNDER COVER RH
-
INSTALL NO. 1 ENGINE UNDER COVER
-
INSTALL FRONT LOWER BUMPER ABSORBER