LUMBAR SUPPORT ADJUSTER ASSEMBLY(for Manual Seat) REMOVAL
CAUTION / NOTICE / HINT
CAUTION:
Wear protective gloves. Sharp areas on the parts may injure your hands.
Tech Tips
-
Use the same procedure for RHD and LHD vehicles.
-
The procedure listed below is for LHD vehicles.
PROCEDURE
-
REMOVE FRONT SEAT ASSEMBLY
-
REMOVE VERTICAL SEAT ADJUSTER KNOB CAP
-
REMOVE VERTICAL ADJUSTING HANDLE LH
-
REMOVE RECLINING ADJUSTER RELEASE HANDLE LH
-
REMOVE FRONT SEAT CUSHION SHIELD LH
-
REMOVE SEAT SLIDE POSITION SENSOR PROTECTOR
-
REMOVE FRONT SEAT INNER BELT ASSEMBLY LH
-
REMOVE FRONT SEAT INNER CUSHION SHIELD LH
-
REMOVE RECLINING CONTROL LEVER LH
-
REMOVE FRONT OUTER SEAT CUSHION BRACKET
-
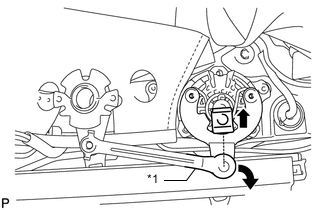
Text in Illustration *1 Connector Link Remove the clip and disconnect the connector link.
-
Text in Illustration *1 Protective Tape Using a screwdriver, detach the 2 claws and remove the front outer seat cushion bracket with connector link.
Tech Tips
Tape the screwdriver tip before use.
-
-
REMOVE SEPARATE TYPE SEAT CUSHION COVER WITH PAD
-
REMOVE SEPARATE TYPE FRONT SEATBACK COVER
-
REMOVE SEPARATE TYPE FRONT SEATBACK PAD
-
REMOVE LUMBAR SUPPORT ADJUSTER ASSEMBLY LH
-
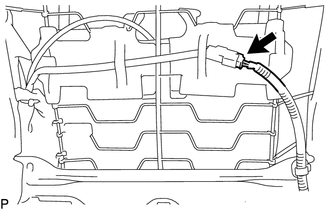
Disconnect the connector.
-
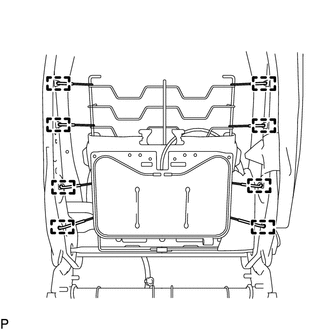
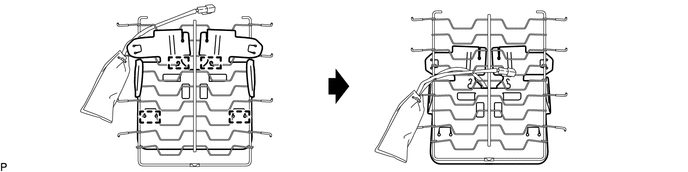
Detach the 8 hooks and remove the seatback spring.
-
Pull the wire harness and disconnect it from the backing sheet as shown in the illustration.
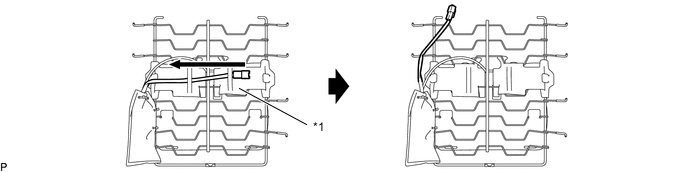
Text in Illustration *1 Backing Sheet - - -
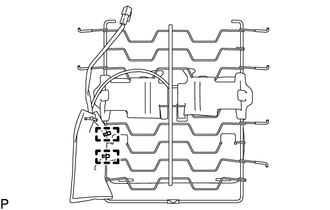
Cut off the 2 cable ties.
-
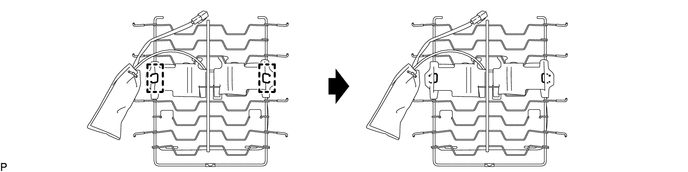
Detach the 2 hooks as shown in the illustration.
-
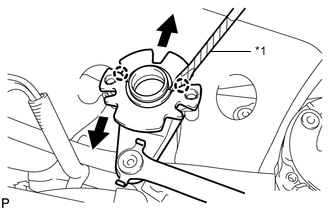
Detach the 2 hooks.
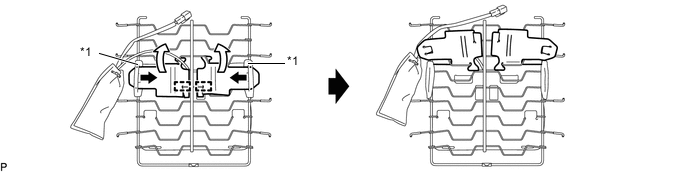
Text in Illustration *1 Opening - - -
Pull out the backing sheet from the openings and fold it up as shown in the illustration.
-
Detach the 4 hooks.
-
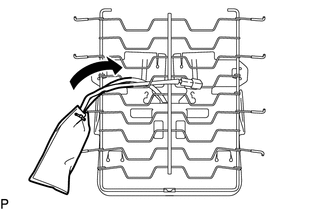
Detach the 4 hooks.
-
Pass the pump of the lumbar support adjuster assembly LH through the hole in the seatback spring as shown in the illustration and remove the lumbar support adjuster assembly LH.
-