ECM REMOVAL
PROCEDURE
-
REMOVE RADIATOR SUPPORT OPENING COVER
-
PRECAUTION
Note
After turning the ignition switch off, waiting time may be required before disconnecting the cable from the battery terminal. Therefore, make sure to read the disconnecting the cable from the battery terminal notice before proceeding with work Click here.
-
DISCONNECT CABLE FROM NEGATIVE BATTERY TERMINAL
Note
When disconnecting the cable, some systems need to be initialized after the cable is reconnected Click here.
-
REMOVE NO. 2 CYLINDER HEAD COVER
-
REMOVE AIR CLEANER CAP SUB-ASSEMBLY
-
REMOVE AIR CLEANER CASE SUB-ASSEMBLY
-
Detach the wire harness clamp from the air cleaner case.
-
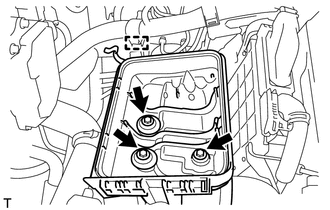
Remove the 3 bolts and air cleaner case.
-
-
REMOVE NO. 1 AIR CLEANER INLET
-
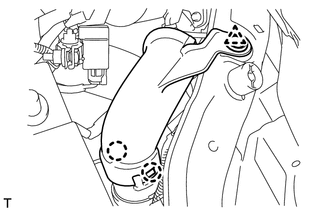
Remove the clip.
-
Detach the 2 claws and remove the No. 1 air cleaner inlet.
-
-
DISCONNECT NO. 2 AIR CLEANER INLET
-
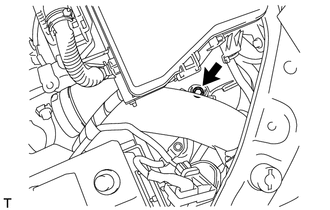
Remove the bolt and disconnect the No. 2 air cleaner inlet from the vehicle body.
-
-
REMOVE ECM
-
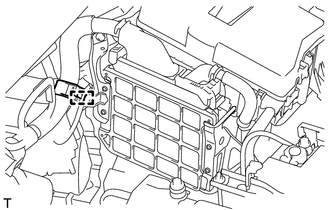
Disconnect the wire harness clamp.
-
Disconnect the 2 ECM connectors.
-

Raise the 2 levers while pushing the locks on the levers and disconnect the 2 ECM connectors.
Note
After disconnecting the connectors, make sure that dirt, water or other foreign matter does not contact the connecting parts of the connectors.
-
-
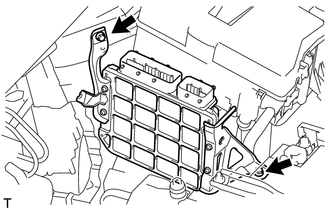
Remove the 2 bolts and ECM.
-
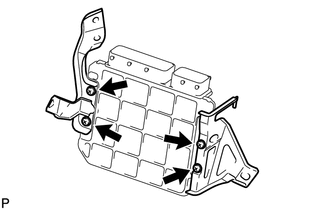
Remove the 4 screws, No. 1 ECM bracket and No. 2 ECM bracket.
-