VALVE BODY ASSEMBLY INSTALLATION
PROCEDURE
-
INSTALL MANUAL VALVE
-
Install the manual valve to the valve body.
-
-
INSTALL TRANSMISSION VALVE BODY ASSEMBLY
-
Install the spring and check ball body.
-
Align the groove of the manual valve with the pin of the lever.
-
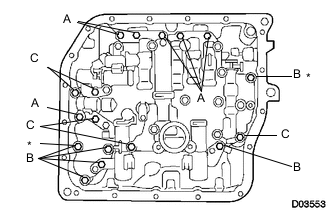
Install the valve body with the 17 bolts.
- Torque:
- 11 N*m { 110 kgf*cm, 8 ft.*lbf }
Note
-
Push the valve body against the accumulator piston spring and check ball body to install it.
-
Temporarily install the bolts marked by * in the illustration first because they are positioning bolts.
Tech Tips
Each bolt length is indicated below.
Bolt length for bolt A 25 mm (0.984 in.) for bolt B 41 mm (1.61 in.) for bolt C 45 mm (1.77 in.)
-
-
INSTALL VALVE BODY OIL STRAINER ASSEMBLY
-
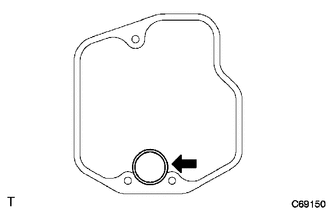
Coat a new O-ring with ATF WS.
-
Install the O-ring to the oil strainer.
-
Install the oil strainer with the 3 bolts.
- Torque:
- 11 N*m { 110 kgf*cm, 8 ft.*lbf }
-
-
CONNECT TRANSMISSION WIRE
-
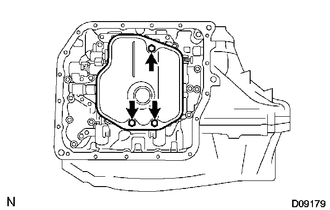
INSTALL AUTOMATIC TRANSAXLE OIL PAN SUB-ASSEMBLY
-
INSTALL NO. 1 ENGINE UNDER COVER
-
INSTALL FRONT LOWER BUMPER ABSORBER
-
ADD AUTOMATIC TRANSAXLE FLUID
Fluid type Toyota Genuine ATF WS -
INSPECT TRANSAXLE FLUID LEVEL
-
INSTALL RADIATOR SUPPORT OPENING COVER