HIGH INTENSITY DISCHARGE HEADLIGHT BULB REMOVAL

Tech Tips
-
Use the same procedure for the RH and LH sides.
-
The procedure described below is for the LH side.
-
PRECAUTION
Note
After turning the power switch off, waiting time may be required before disconnecting the cable from the negative (-) auxiliary battery terminal. Therefore, make sure to read the disconnecting the cable from the negative (-) auxiliary battery terminal notices before proceeding with work Click here.
-
REMOVE LUGGAGE TRIM SERVICE HOLE COVER
-
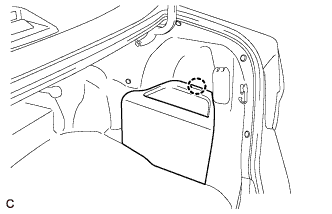
Disengage the claw to remove the luggage trim service hole cover.
-
-
DISCONNECT CABLE FROM AUXILIARY BATTERY NEGATIVE TERMINAL
Note
When disconnecting the cable, some systems need to be initialized after the cable is reconnected Click here.
-
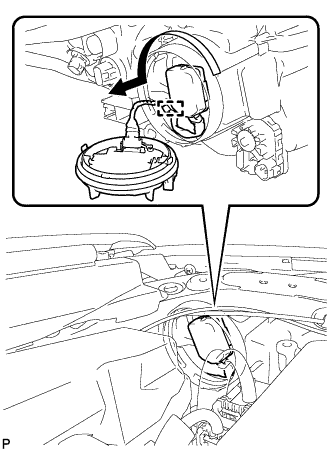
REMOVE HEADLIGHT LIGHT CONTROL ECU SUB-ASSEMBLY
CAUTION:
The headlight light control ECU sub-assembly may be hot when the light control switch is in the HEAD position or right after it is turned off. Check that the headlight light control ECU sub-assembly is not hot before starting work.
-
Disconnect the connector.
-
for LH Side:
-
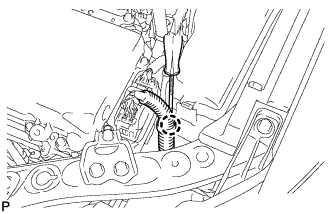
Using a screwdriver, disengage the claw and disconnect the wire harness.
-
Move the wire harness as shown in the illustration.
-

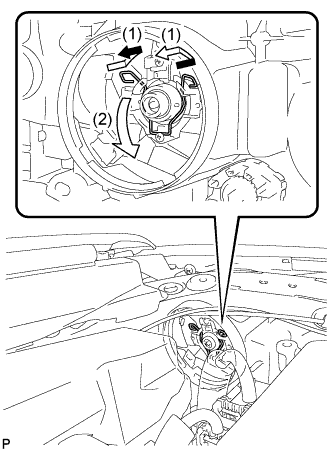
Turn the headlight light control ECU sub-assembly in the direction indicated by the arrow shown in the illustration, and disconnect it.
Note
-
Do not apply excessive force using a tool.
-
Do not damage the O-ring or allow it to become contaminated with foreign matter. If the O-ring is damaged or contaminated, water may get into the headlight assembly, resulting in a malfunction of the headlight light control ECU sub-assembly.
-
-
-
for RH Side:
-
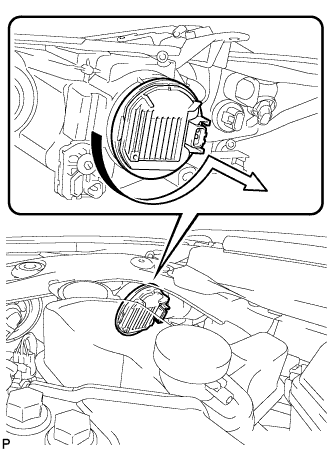
Turn the headlight light control ECU sub-assembly in the direction indicated by the arrow shown in the illustration, and disconnect it.
Note
-
Do not apply excessive force using a tool.
-
Do not damage the O-ring or allow it to become contaminated with foreign matter. If the O-ring is damaged or contaminated, water may get into the headlight assembly, resulting in a malfunction of the headlight light control ECU sub-assembly.
-
-
-
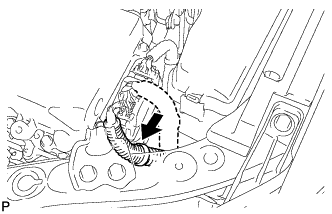
Disengage the clamp.
-
Turn the socket of the headlight light control ECU sub-assembly in the direction indicated by the arrow shown in the illustration, and remove it.
Note
Do not pull the headlight light control ECU sub-assembly with the socket connected.
-
-
REMOVE DISCHARGE HEADLIGHT BULB
-
Release the set spring as shown in the illustration and remove the discharge headlight bulb.
Note
Do not touch the bulb glass.
-