MOTOR CABLE REMOVAL

-
REMOVE SERVICE PLUG GRIP
-
REMOVE COOL AIR INTAKE DUCT SEAL
-
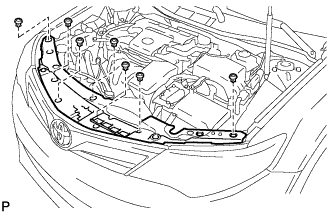
Remove the 7 clips and cool air intake duct seal.
-
-
REMOVE INLET AIR CLEANER ASSEMBLY
-
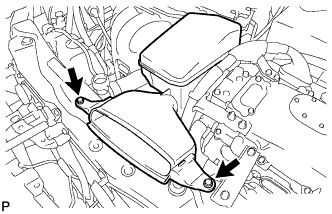
Remove the 2 bolts and inlet air cleaner assembly.
-
-
REMOVE AIR CLEANER CAP SUB-ASSEMBLY
-
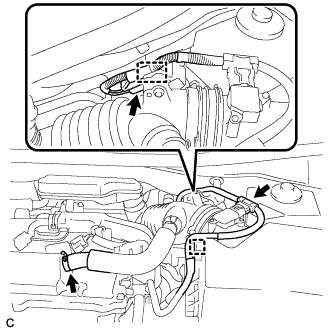
Disconnect the mass air flow meter connector and wire harness clamp from the air cleaner cap sub-assembly.
-
Disconnect the ventilation hose from the cylinder head cover.
-
Disconnect the connector and wire harness clamp.
-
Release the 2 clamps and remove the air cleaner cap sub-assembly.
-

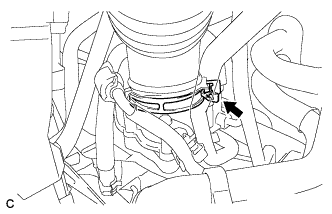
Text in Illustration *1 Retainer *2 Fuel Tube Connector *3 Pipe *4 O-ring *a Pinch *b Pull Disconnect the 2 fuel vapor feed hoses.
Note
-
Remove any dirt or foreign matter on the fuel tube connector before performing this work.
-
Do not allow any scratches or foreign matter to get on the parts when disconnecting them as the fuel tube connector has an O-ring that seals the pipe.
-
Perform this work by hand. Do not use any tools.
-
Protect the disconnected parts by covering them with plastic bags after disconnecting each fuel vapor feed hose.
-
-
Loosen the hose clamp and disconnect the air cleaner hose from the throttle with motor body assembly.
-
-
REMOVE AIR CLEANER FILTER ELEMENT
-
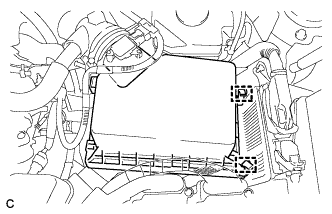
REMOVE AIR CLEANER CASE SUB-ASSEMBLY
-
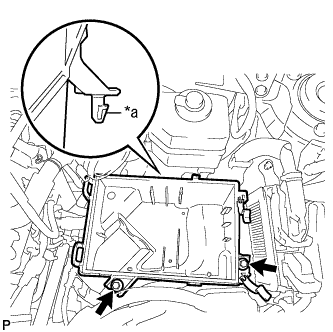
Text in Illustration *a Projection Remove the 2 bolts and air cleaner case sub-assembly.
-
-
REMOVE UPPER INVERTER COVER
CAUTION:
Wear insulated gloves.
-
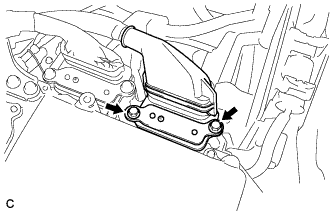
Remove the 2 bolts and upper inverter cover (generator cable side).
Note
-
Make sure to pull the upper inverter cover straight up, as a connector is connected to the bottom of the cover.
-
Do not touch the upper inverter cover waterproofing rubber.
-
-
-
REMOVE MOTOR CABLE
CAUTION:
Wear insulated gloves.
-
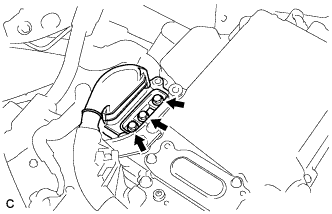
Using an insulated tool, remove the 3 bolts.
-
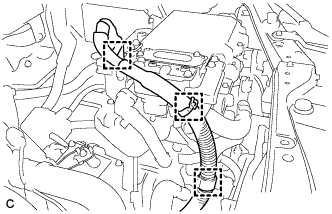
Disconnect the 3 wire harness clamps and separate the motor cable.
Note
-
Do not damage the terminals, connector housings or inverter with converter assembly when disconnecting them.
-
Do not touch the connector waterproofing rubber or terminals.
-
Insulate the removed terminals with insulating tape.
-
Do not allow any foreign objects or water to enter the inverter with converter assembly.
-
-
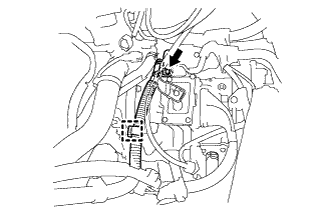
Disconnect the clamp.
-
Remove the bolt and disconnect the motor cable from the hybrid vehicle transaxle assembly.
-

Disconnect the 2 clamps.
-
Remove the 4 bolts and motor cable from the hybrid vehicle transaxle assembly.
-