ROCKER PANEL MOULDING INSTALLATION

-
INSTALL BODY ROCKER PANEL MOULDING ASSEMBLY
-
Install 7 new clips (rocker panel moulding clip) to the body rocker panel moulding assembly.
-
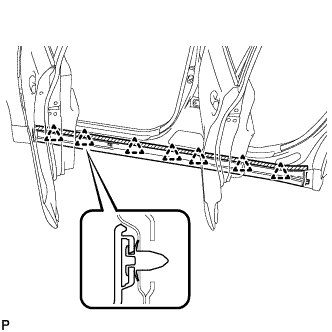
Engage the 7 clips to install the body rocker panel moulding assembly.
-
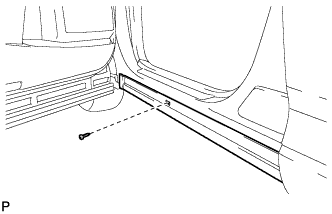
Install the screw.
-
Install the grommet.
-
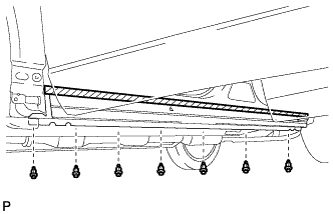
Install the 7 clips.
-
-
INSTALL REAR ROCKER PANEL MOULDING END COVER
-
Clean the vehicle body surface.
-
Using a heat light, heat the vehicle body surface.
-
Remove the double-sided tape from the vehicle body.
-
Wipe off any tape adhesive residue with cleaner.
-
-
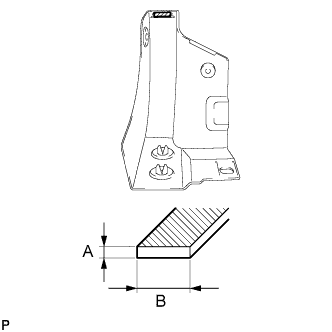
Clean the rear rocker panel moulding end cover.
Dimension Measurement A 1.2 mm (0.0472 in.) B 6.0 mm (0.236 in.)
-
Using a heat light, heat the rear rocker panel moulding end cover.
-
Remove the double-sided tape from the rear rocker panel moulding end cover.
-
Wipe off any tape adhesive residue with cleaner.
-
Apply new double-sided tape to the rear rocker panel moulding end cover.
-
-
Install the 2 grommets to the rear rocker panel moulding end cover.
-
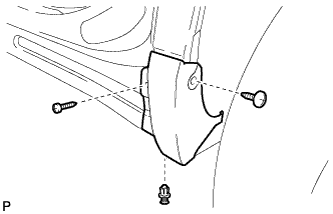
Install the rear rocker panel moulding end cover.
-
Using a heat light, heat the vehicle body and rear rocker panel moulding end cover.
-
Remove the release paper from the rear rocker panel moulding end cover.
Tech Tips
After removing the release paper, keep the exposed adhesive free from foreign matter.
-
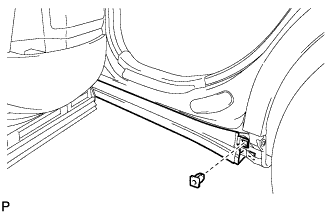
Install the rear rocker panel moulding end cover with the 2 screws and clip.
-
-
-
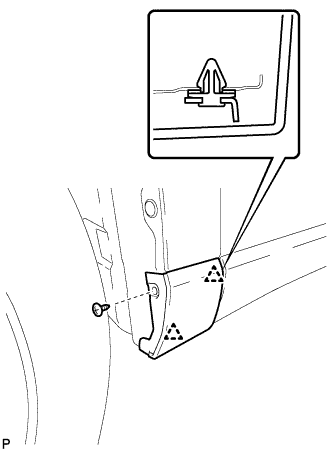
INSTALL NO. 2 ROCKER PANEL MOULDING PROTECTOR
-
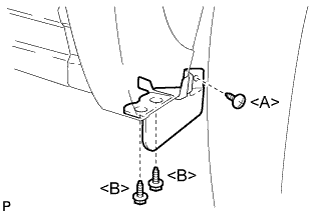
Install the No. 2 rocker panel moulding protector with the 2 screws <B>.
-
Install the screw <A>.
-
-
INSTALL FRONT FENDER OUTSIDE MOULDING
-
Clean the vehicle body surface.
-
Using a heat light, heat the vehicle body surface.
-
Remove the double-sided tape from the vehicle body.
-
Wipe off any tape adhesive residue with cleaner.
-
-
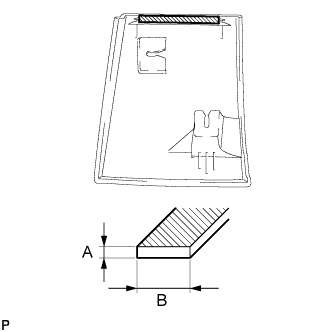
Clean the front fender outside moulding.
Dimension Measurement A 1.2 mm (0.0472 in.) B 6.0 mm (0.236 in.)
-
Using a heat light, heat the front fender outside moulding.
-
Remove the double-sided tape from the front fender outside moulding.
-
Wipe off any tape adhesive residue with cleaner.
-
Apply new double-sided tape to the front fender outside moulding.
-
-
Install 2 new clips (No. 1 outside moulding clip) to the front fender outside moulding.
-
Install the front fender outside moulding.
-
Using a heat light, heat the vehicle body and front fender outside moulding.
-
Remove the release paper from the front fender outside moulding.
Tech Tips
After removing the release paper, keep the exposed adhesive free from foreign matter.
-
Engage the 2 clips and install the front fender outside moulding.
-
-
Install the screw.
-