WIPER SWITCH REMOVAL

-
REMOVE FRONT DOOR SCUFF PLATE LH
-
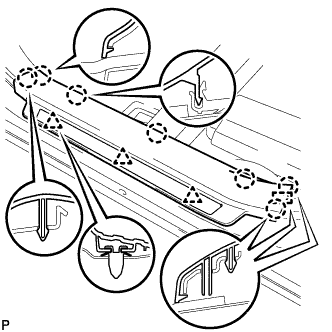
Disengage the 3 clips, 7 claws and guide, and remove the front door scuff plate LH.
-
-
REMOVE COWL SIDE TRIM SUB-ASSEMBLY LH
-
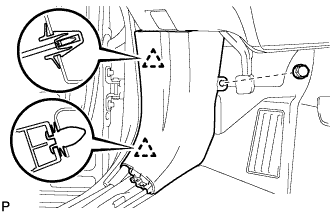
Remove the clip.
-
Disengage the 2 clips and remove the cowl side trim sub-assembly LH.
-
-
REMOVE LOWER NO. 1 INSTRUMENT PANEL FINISH PANEL
-
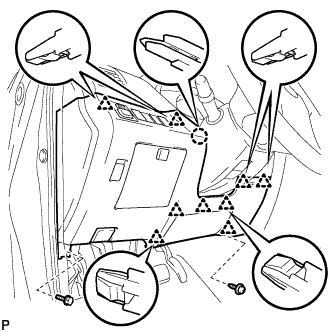
Remove the bolt <C> and screw <E> or <F>.
-
Disengage the claw and 9 clips.
-
Disconnect the connectors.
-
Disconnect the connector and aspirator duct.
-

Disconnect the hood lock control cable and remove the lower No. 1 instrument panel finish panel.
-
-
REMOVE LOWER STEERING COLUMN COVER
-

Turn the steering wheel assembly to the right and remove the screw shown in the illustration.
-

Turn the steering wheel assembly to the left and remove the screw shown in the illustration.
-

Disengage the 3 claws and remove the lower steering column cover.
-
-
REMOVE UPPER STEERING COLUMN COVER
-

Disengage the 4 clips and 3 claws and remove the upper steering column cover.
-
-
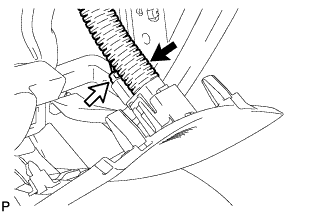
REMOVE WINDSHIELD WIPER SWITCH ASSEMBLY
-
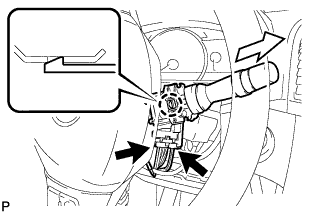
Disconnect the 2 connectors.
-
Disengage the claw and remove the windshield wiper switch assembly as shown in the illustration.
Note
If the claw is pushed with excessive force, it may break.
-