BACK DOOR OPENER SWITCH REMOVAL

-
REMOVE BACK DOOR PANEL TRIM ASSEMBLY
-
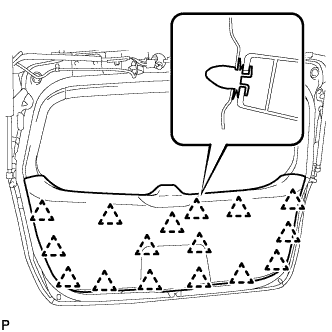
Disengage the 16 clips and remove the back door panel trim assembly.
-
-
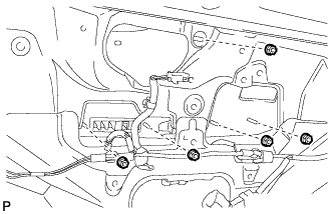
REMOVE REAR LIGHT ASSEMBLY LH
-
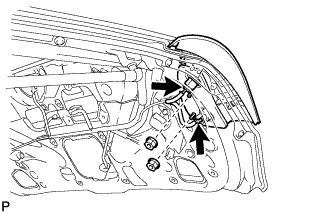
Disconnect the 2 connectors.
-
Remove the 2 nuts.
-
Disengage the 2 pins and remove the rear light assembly.
-
-
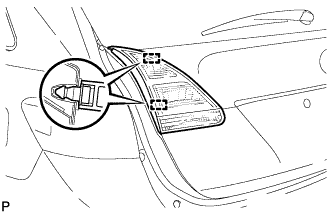
REMOVE REAR LIGHT ASSEMBLY RH
Tech Tips
Use the same procedure for the RH side and LH side.
-
REMOVE BACK DOOR OUTSIDE GARNISH SUB-ASSEMBLY
-
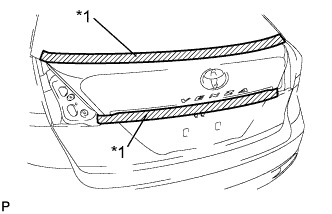
Text in Illustration *1 Protective Tape Put protective tape around the back door outside garnish sub-assembly.
-
Disconnect each connector.
-
Remove the 5 nuts.
-
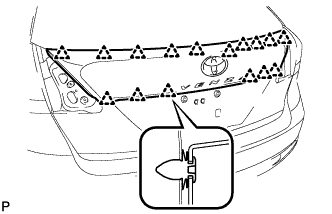
Disengage the 16 clips and remove the back door outside garnish sub-assembly.
-
Remove the 16 clips (back door moulding clip) from the back door outside garnish sub-assembly.
-
Remove the 5 gaskets and 5 stud bolts from the back door outside garnish sub-assembly.
-
-
REMOVE BACK DOOR OPENER SWITCH ASSEMBLY
-
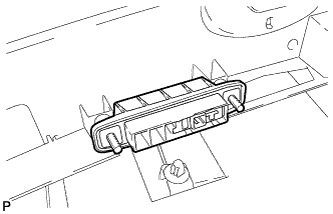
Remove the back door opener switch assembly.
-