SLIDING ROOF HOUSING REMOVAL

-
REMOVE NO. 1 SLIDING ROOF GLASS SUB-ASSEMBLY
-
Fully open the No. 2 sliding roof glass sub-assembly.
-
Using a T20 "TORX" socket wrench, remove the 6 screws and No. 1 sliding roof glass sub-assembly.
-
-
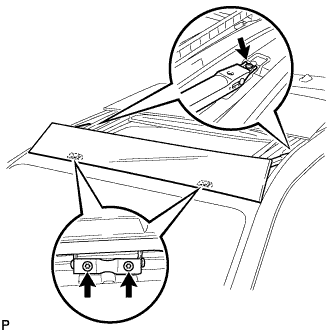
REMOVE SLIDING ROOF SIDE GARNISH LH
-

Using a T25 "TORX" socket wrench, remove the screw and sliding roof side garnish LH as shown in the illustration.
-
-
REMOVE SLIDING ROOF SIDE GARNISH RH
Tech Tips
Use the same procedure for the RH side and the LH side.
-
REMOVE NO. 2 SLIDING ROOF GLASS SUB-ASSEMBLY
-
Fully close the No. 2 sliding roof glass sub-assembly.
-
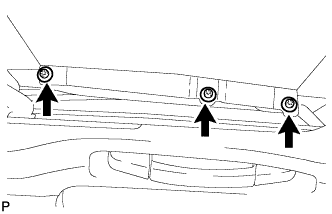
Using a T25 "TORX" socket wrench, remove the 3 screws.
Tech Tips
Use the same procedure for the RH side and the LH side.
-
Remove the No. 2 sliding roof glass sub-assembly.
-
-
REMOVE ROOF HEADLINING ASSEMBLY
Tech Tips
Refer to the procedure up to Remove Roof Headlining Assembly Click here.
-
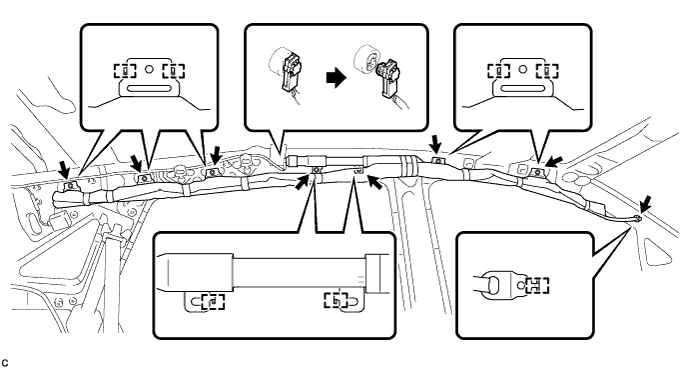
REMOVE CURTAIN SHIELD AIRBAG ASSEMBLY LH
CAUTION:
When storing the curtain shield airbag assembly, keep the airbag deployment side facing upward.
-
Check that the ignition switch is off.
-
Check that the cable is disconnected from the negative (-) battery terminal.
CAUTION:
Wait at least 90 seconds after disconnecting the cable from the negative (-) battery terminal to disable the SRS system.
-
Using a screwdriver with the tip wrapped with protective tape, disconnect the curtain shield airbag connector.
Note
When disconnecting the airbag connector, take care not to damage the airbag wire harness.
-
Remove the 8 bolts.
-
Disengage the 13 hooks to remove the curtain shield airbag assembly.
-
-
REMOVE CURTAIN SHIELD AIRBAG ASSEMBLY RH
Tech Tips
Use the same procedure for the RH side and the LH side.
-
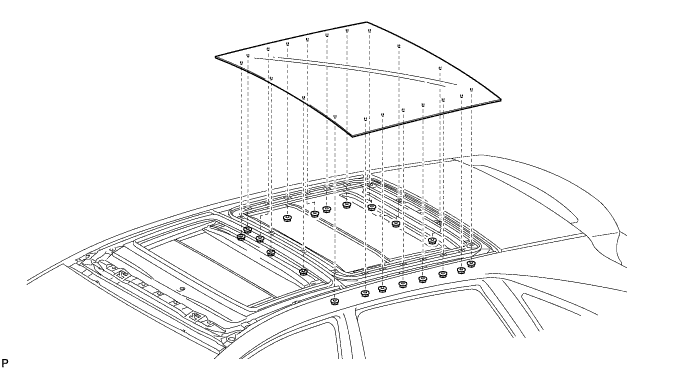
REMOVE NO. 3 SLIDING ROOF GLASS SUB-ASSEMBLY
-
Remove the 20 nuts and No. 3 sliding roof glass sub-assembly.
-
-
REMOVE SLIDING ROOF DRIVE GEAR SUB-ASSEMBLY
-
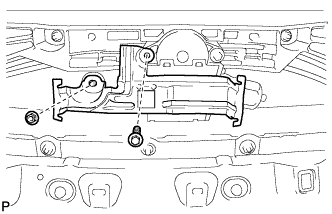
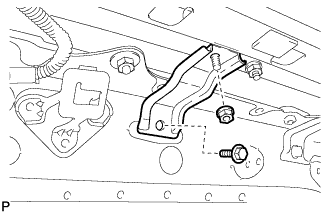
Remove the bolt, nut and room light bracket.
-
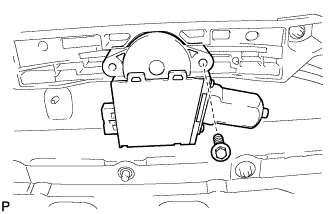
Remove the bolt and sliding roof drive gear sub-assembly.
-
-
REMOVE FRONT SLIDING ROOF HOUSING MOUNTING BRACKET LH
-
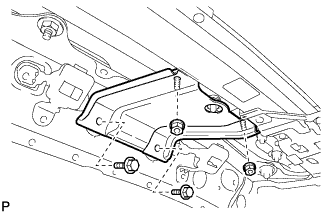
Remove the 2 bolts, 2 nuts and front sliding roof housing mounting bracket LH.
-
-
REMOVE FRONT SLIDING ROOF HOUSING MOUNTING BRACKET RH
Tech Tips
Use the same procedure for the RH side and the LH side.
-
REMOVE CENTER SLIDING ROOF HOUSING MOUNTING BRACKET LH
-
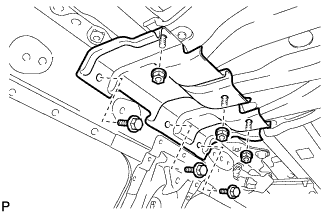
Remove the 3 bolts, 3 nuts and center sliding roof housing mounting bracket LH.
-
-
REMOVE CENTER SLIDING ROOF HOUSING MOUNTING BRACKET RH
Tech Tips
Use the same procedure for the RH side and the LH side.
-
REMOVE REAR SLIDING ROOF HOUSING MOUNTING BRACKET LH
-
Remove the bolt, nut and rear sliding roof housing mounting bracket LH.
-
-
REMOVE REAR SLIDING ROOF HOUSING MOUNTING BRACKET RH
Tech Tips
Use the same procedure for the RH side and the LH side.
-
REMOVE SLIDING ROOF HOUSING ASSEMBLY
-
Remove the 18 nuts and sliding roof housing assembly.
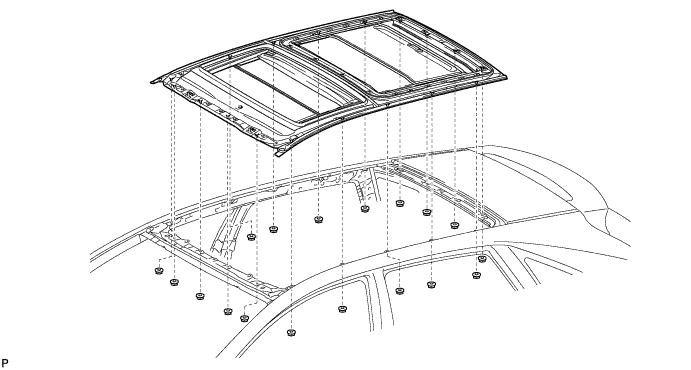
Note
-
When removing the housing, be careful not to damage the vehicle.
-
Perform this step with 2 or more technicians.
-
-