HOOD LOCK CONTROL CABLE ASSEMBLY REMOVAL

-
REMOVE FRONT WHEEL LH
-
REMOVE FRONT FENDER OUTSIDE MOULDING LH
-
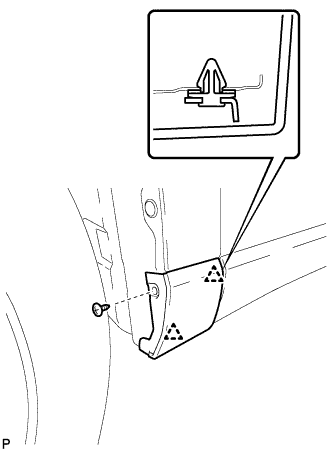
Remove the screw.
-
Disengage the 2 clips and remove the front fender outside moulding.
-
Remove the 2 clips (No. 1 outside moulding clip) from the front fender outside moulding.
-
-
REMOVE FRONT FENDER LINER LH
-

Text in Illustration *a 90° Using a screwdriver, turn the pin 90 degrees and remove the 2 pin hold clips.
-
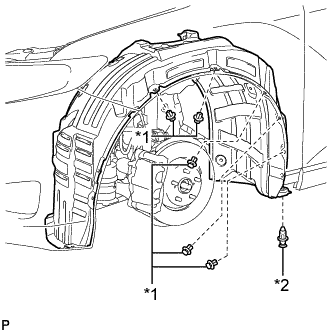
Text in Illustration *1 Clip <A> *2 Clip <B> Remove the 5 clips <A>.
-
Remove the clip <B>.
-
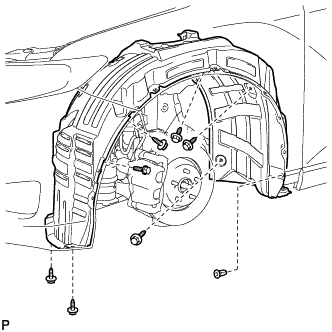
Remove the bolt and 6 screws.
-
Remove the grommet and front fender liner LH.
Tech Tips
The grommets need to be replaced with new ones because they will break when they are removed.
-
-
REMOVE COOL AIR INTAKE DUCT SEAL
-
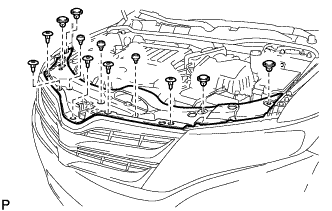
Using a clip remover, remove the 12 clips and cool air intake duct seal.
-
-
REMOVE RADIATOR GRILLE
-
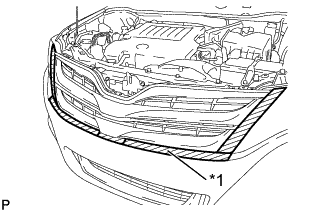
Text in Illustration *1 Protective Tape Put protective tape around the radiator grille.
-
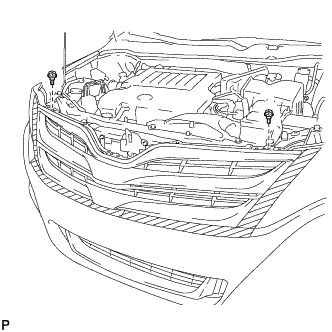
Remove the 2 bolts.
-
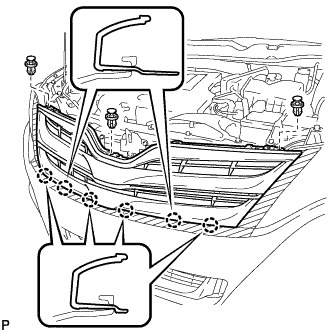
Using a clip remover, remove the 3 clips.
-
Disengage the 6 claws and remove the radiator grille.
-
-
REMOVE LOW PITCHED HORN ASSEMBLY
-
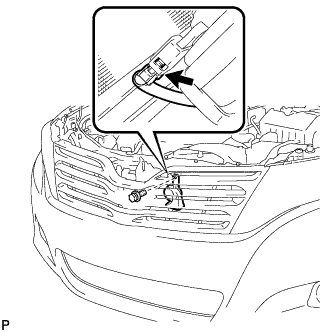
Disconnect the connector.
-
Remove the bolt and low pitched horn assembly.
-
-
REMOVE HOOD LOCK ASSEMBLY (w/o Engine Hood Courtesy Switch)
-
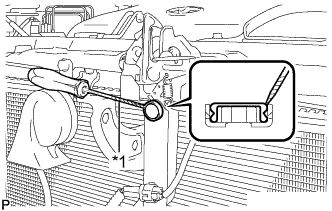
Text in Illustration *1 Protective Tape Using a screwdriver, remove the hood lock nut cap.
Tech Tips
Tape the screwdriver tip before use.
-
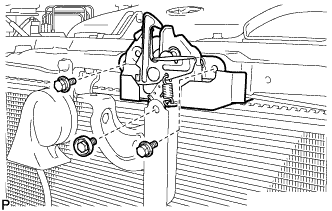
Remove the 3 bolts.
-
Disconnect the hood lock control cable and remove the hood lock assembly.
-
-
REMOVE HOOD LOCK ASSEMBLY (w/ Engine Hood Courtesy Switch)
-
Text in Illustration *1 Protective Tape Using a screwdriver, remove the hood lock nut cap.
Tech Tips
Tape the screwdriver tip before use.
-

Disconnect the connector.
-
Remove the 3 bolts.
-
Disconnect the hood lock control cable and remove the hood lock assembly.
-
-
REMOVE FRONT DOOR SCUFF PLATE LH
-
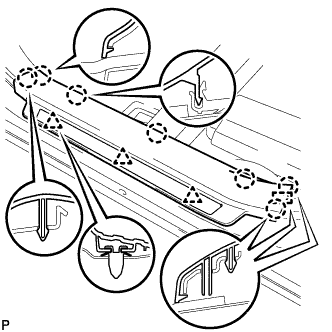
Disengage the 3 clips, 7 claws and guide, and remove the front door scuff plate LH.
-
-
REMOVE COWL SIDE TRIM SUB-ASSEMBLY LH
-
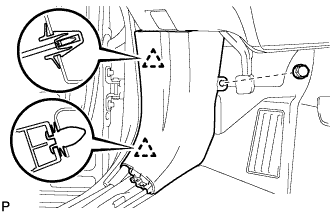
Remove the clip.
-
Disengage the 2 clips and remove the cowl side trim sub-assembly LH.
-
-
REMOVE LOWER NO. 1 INSTRUMENT PANEL FINISH PANEL
-
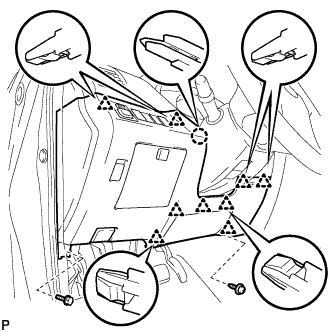
Remove the bolt <C> and screw <E> or <F>.
-
Disengage the claw and 9 clips.
-
Disconnect the connectors.
-
Disconnect the connector and aspirator duct.
-

Disconnect the hood lock control cable and remove the lower No. 1 instrument panel finish panel.
-
-
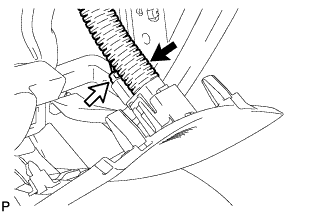
REMOVE HOOD LOCK CONTROL CABLE ASSEMBLY
-
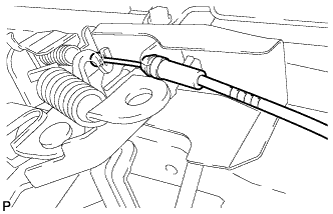
Using a screwdriver, disconnect each clamp shown in the illustration.
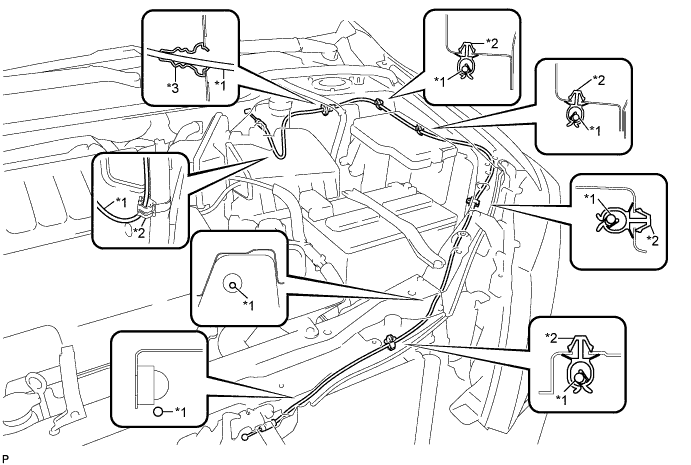
Text in Illustration *1 Hood Lock Control Cable *3 Hood Cable Grommet *2 Clamp - - Tech Tips
Tape the screwdriver tip before use.
-
Pull the hood lock control cable assembly from the engine compartment and remove it.
-