AIR CONDITIONING AMPLIFIER REMOVAL

-
DISCONNECT CABLE FROM NEGATIVE BATTERY TERMINAL
Note
When disconnecting the cable, some systems need to be initialized after the cable is reconnected Click here.
-
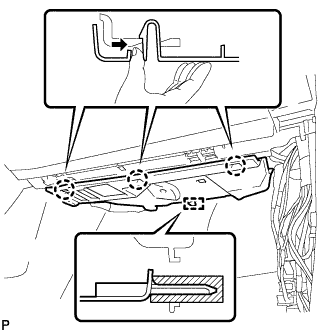
REMOVE FRONT DOOR SCUFF PLATE RH
Tech Tips
Use the same procedure for the RH side and the LH side Click here.
-
REMOVE COWL SIDE TRIM SUB-ASSEMBLY RH
Tech Tips
Use the same procedure for the RH side and the LH side Click here.
-
REMOVE NO. 2 INSTRUMENT PANEL UNDER COVER SUB-ASSEMBLY
-
Push the 3 claws in the direction indicated by the arrow to disengage them.
-
Disengage the guide and remove the No. 2 instrument panel under cover sub-assembly.
-
-
REMOVE LOWER INSTRUMENT PANEL SUB-ASSEMBLY
-
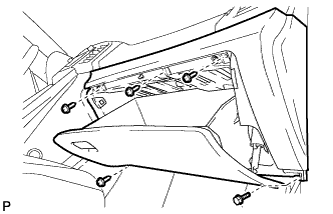
Remove the bolt <C> and 4 screws <E> or <F>.
-
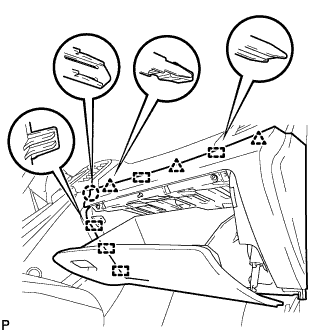
Disengage the claw, 3 clips and 5 guides.
-
Disconnect the connectors and remove the lower instrument panel sub-assembly.
-
-
REMOVE AIR CONDITIONING AMPLIFIER ASSEMBLY
-
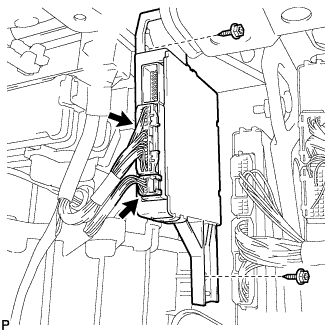
Disconnect each connector.
-
Remove the 2 screws and air conditioning amplifier assembly.
Note
Be careful when removing the air conditioning amplifier assembly. If the air conditioning amplifier assembly is dropped, replace it with a new one.
-