FRONT SEAT ASSEMBLY REASSEMBLY

-
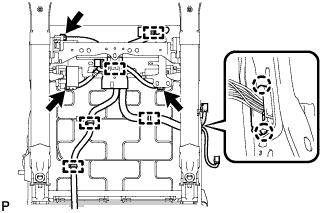
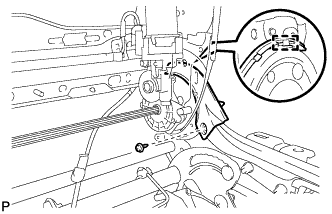
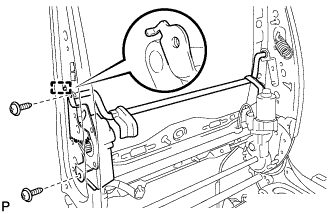
INSTALL FRONT SEAT WIRE RH (for Front Passenger Side)
-
Engage each clamp and install the front seat wire RH.
-
-
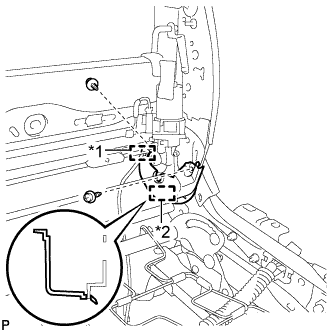
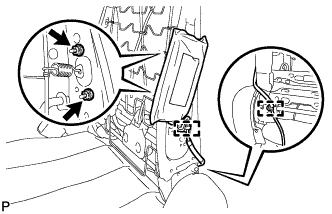
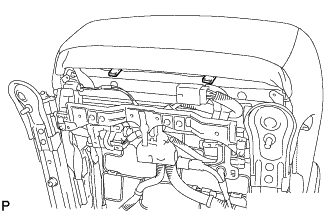
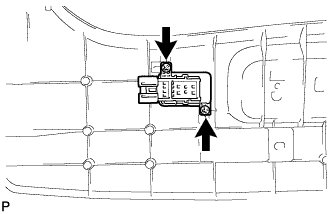
INSTALL OCCUPANT CLASSIFICATION ECU (for Front Passenger Side)
-
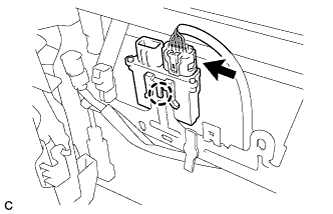
Install the occupant classification ECU with the claw.
Note
-
If the occupant classification ECU has been dropped, or there are any cracks, dents or other defects in the case or connector, replace the occupant classification ECU with a new one.
-
When installing the occupant classification ECU, be careful that the SRS wiring does not interfere with or is pinched between other parts.
-
-
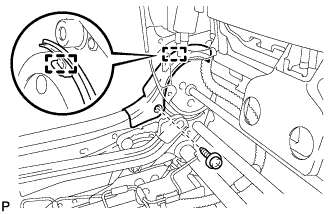
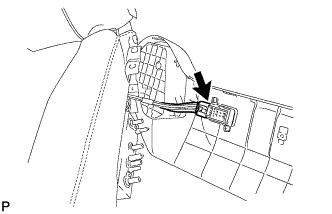
Connect the connector.
-
-
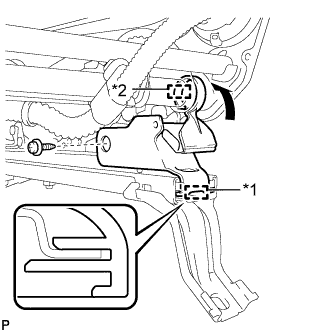
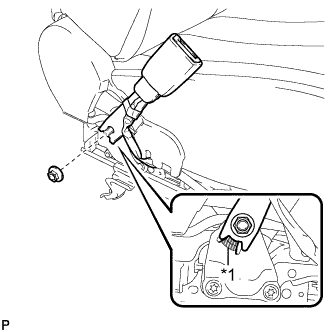
INSTALL SEAT POSITION SENSOR
-
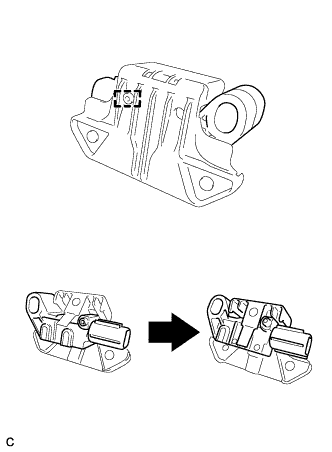
Install the seat position sensor to the seat slide position sensor protector with the pin as shown in the illustration.
-
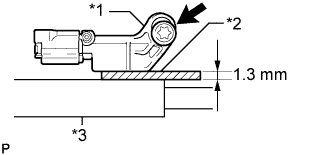
Text in Illustration *1 Seat Position Sensor *2 Feeler Gauge *3 Seat Rail Using a 1.3 mm (0.0512 in.) feeler gauge, temporarily install the seat position sensor.
Note
-
If the seat position sensor has been dropped, or there are any cracks, dents or other defects in the case or connector, replace the seat position sensor with a new one.
-
When installing the seat position sensor, be careful that the SRS wiring does not interfere with or is pinched between other parts.
Tech Tips
Be sure that the clearance between the seat position sensor and the seat rail is within 0.6 mm (0.0236 in.) to 2.0 mm (0.0787 in.).
-
-

Using a T30 "TORX" socket wrench, tighten the "TORX" screw to install the seat position sensor.
- Torque:
- 8.0 N*m { 82 kgf*cm, 71 in.*lbf }
-
Make sure that the clearance between the seat position sensor and the seat rail is within 0.6 mm (0.0236 in.) to 2.0 mm (0.0787 in.).
-
Connect the connector.
-
Check that there is no looseness in the installation parts of the seat position sensor.
-
-
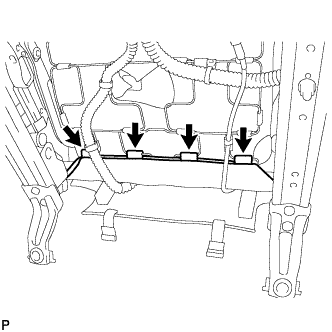
INSTALL SEAT HEATER CONTROL SUB-ASSEMBLY
-
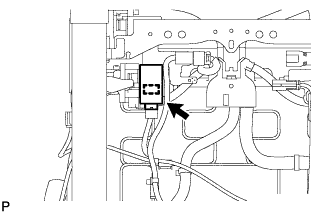
Engage the clamp.
-
Connect the connector to the seat heater control sub-assembly.
-
-
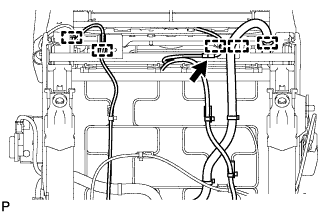
INSTALL FRONT SEAT WIRE
-
Engage the 5 clamps.
-
Engage the 2 claws.
-
Connect the 3 connectors.
-
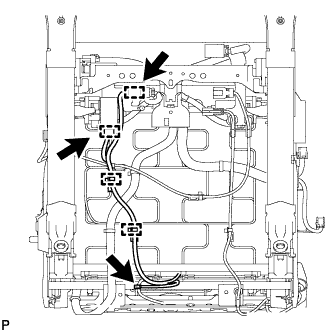
Connect the 3 connectors.
-
Engage the 4 clamps.
-
Connect the connector.
-
Engage the 2 clamps and install the front seat wire.
-
-
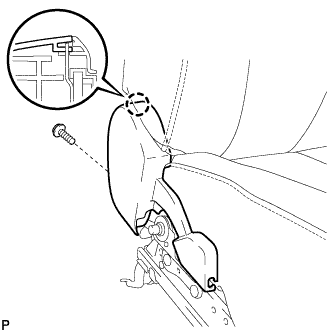
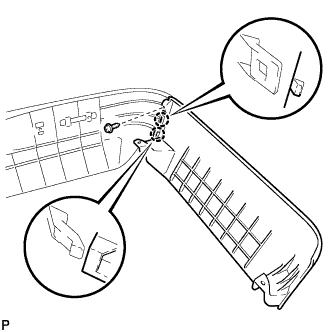
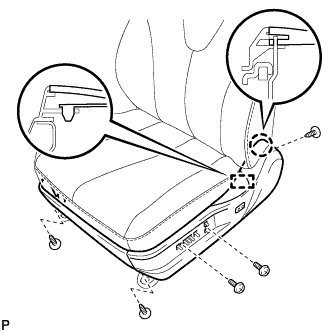
INSTALL FRONT SEAT LOWER CUSHION SHIELD LH
-
Text in Illustration *1 Guide *2 Hook Engage the guide.
-
Engage the hook as shown in the illustration.
-
Install the front seat lower cushion shield LH with the screw.
-
-
INSTALL FRONT SEAT LOWER CUSHION SHIELD RH
-
Text in Illustration *1 Guide *2 Hook Engage the guide.
-
Engage the hook as shown in the illustration.
-
Install the front seat lower cushion shield RH with the screw.
-
-
INSTALL RECLINING ADJUSTER INSIDE COVER LH
-
Engage the guide.
-
Install the reclining adjuster inside cover LH with the screw.
-
-
INSTALL SEAT RECLINING ADJUSTER INSIDE COVER LH
-
Text in Illustration *1 Clamp *2 Guide Engage the guide.
-
Engage the clamp.
-
Install the seat reclining adjuster inside cover LH with the 2 screws.
-
-
INSTALL RECLINING ADJUSTER INSIDE COVER RH
-
Engage the guide.
-
Install the reclining adjuster inside cover RH with the screw.
-
-
INSTALL SEAT RECLINING ADJUSTER INSIDE COVER RH
-
Text in Illustration *1 Clamp *2 Guide Engage the guide.
-
Engage the clamp.
-
Install the seat reclining adjuster inside cover RH with the 2 screws.
-
-
INSTALL LOWER ACTIVE HEADREST UNIT
-
Install the lower active headrest unit with the 2 nuts.
- Torque:
- 5.0 N*m { 51 kgf*cm, 44 in.*lbf }
-
-
INSTALL UPPER ACTIVE HEADREST UNIT
-
Install the upper active headrest unit with the 4 nuts.
- Torque:
- 14 N*m { 143 kgf*cm, 10 ft.*lbf }
-
Connect the cable to the upper active headrest unit with the nut.
- Torque:
- 5.0 N*m { 51 kgf*cm, 44 in.*lbf }
-
-
INSTALL LUMBAR SUPPORT ADJUSTER ASSEMBLY
-
Install the bush.
-
Engage the guide.
-
Install the lumbar support adjuster assembly with the 2 screws.
-
Connect the connector.
-
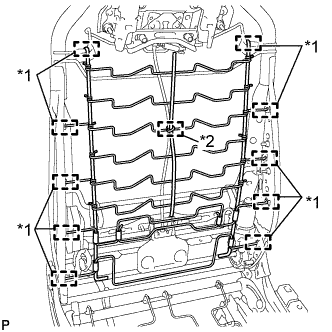
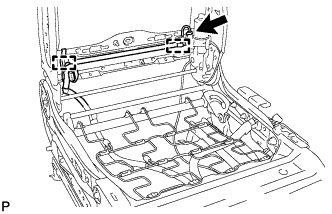
Text in Illustration *1 Guide *2 Clamp Engage the 10 guides and install the front seatback spring sub-assembly.
-
Install a new clamp.
-
-
INSTALL FRONT SEAT SIDE AIRBAG ASSEMBLY
-
Install the front seat side airbag assembly with 2 new nuts.
- Torque:
- 8.0 N*m { 82 kgf*cm, 71 in.*lbf }
-
Engage the 2 clamps to connect the wire harness.
-

Engage the 4 clamps to connect the wire harness.
-
-
INSTALL FRONT SEATBACK HEATER ASSEMBLY
-
Using a tacker, install the front seatback heater assembly to the end of the separate type front seatback cover with 12 new tack pins.
Note
Be careful not to damage the separate type front seatback cover.
-
-
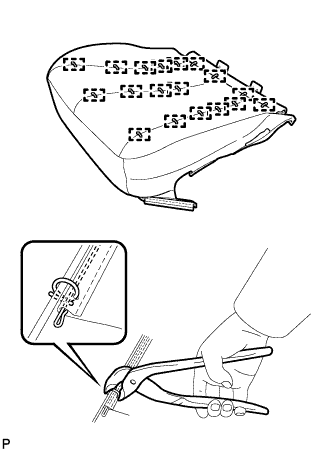
INSTALL SEPARATE TYPE FRONT SEATBACK COVER
-
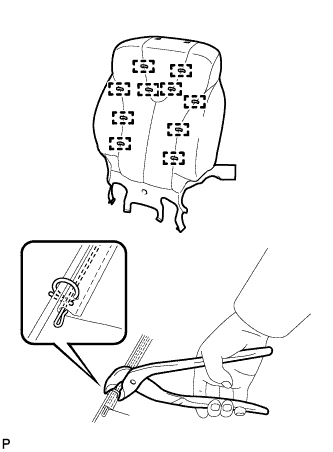
Using hog ring pliers, install the separate type front seatback cover to the separate type front seatback pad with 10 new hog rings.
Note
-
Be careful not to damage the separate type front seatback cover.
-
Be sure to securely install the hog rings as shown in the illustration while preventing wrinkles from forming on the separate type front seatback cover.
-
-
-
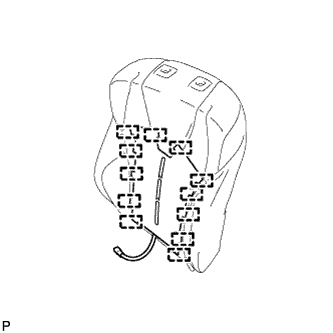
INSTALL SEPARATE TYPE FRONT SEATBACK COVER WITH PAD
-
Temporarily install the separate type front seatback cover with pad to the front seat frame assembly with adjuster.
-
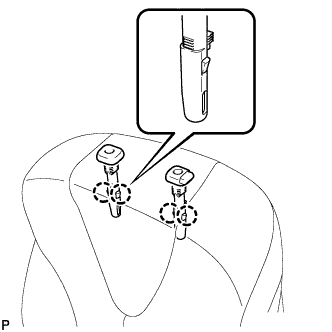
Engage the 4 claws and install the 2 front seat headrest supports.
-

Using hog ring pliers, install 2 new hog rings.
Note
-
Be careful not to damage the separate type front seatback cover.
-
Be sure to securely install the hog rings as shown in the illustration while preventing wrinkles from forming on the separate type front seatback cover.
-
-

Using hog ring pliers, install 2 new hog rings.
Note
-
Be careful not to damage the separate type front seatback cover.
-
Be sure to securely install the hog rings as shown in the illustration while preventing wrinkles from forming on the separate type front seatback cover.
-
-
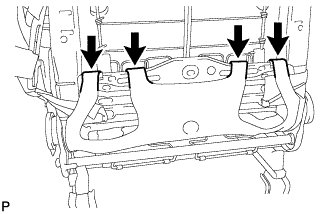
Engage the 4 hooks.
-
Text in Illustration *1 Bracket Engage the guide to install the bracket of the separate type front seatback cover with the nut.
- Torque:
- 8.0 N*m { 82 kgf*cm, 71 in.*lbf }
Note
-
For vehicles with front seat side airbag assembly, the front seat side airbag assembly may not be activated normally unless the separate type front seatback cover is securely installed.
-
Check that the strap is not twisted after installing the bracket.
-
Install the bracket securely.
-
-
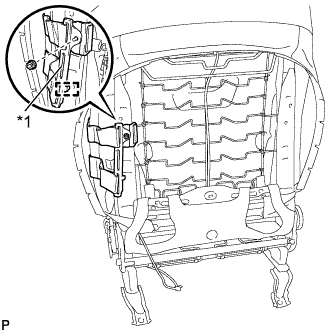
INSTALL FRONT SEATBACK BOARD SUB-ASSEMBLY
-

Engage the 2 guides as shown in the illustration.
-

Engage the 14 claws.
-
Install the front seatback board sub-assembly with the 2 screws.
-
-
INSTALL FRONT SEAT CUSHION HEATER ASSEMBLY
-
Using a tacker, install the front seat cushion heater assembly to the end of the separate type front seat cushion cover with 25 new tack pins.
Note
-
Be careful not to damage the separate type front seat cushion cover.
-
When installing the tack pins, take care to minimize wrinkles as much as possible.
-
-
-
INSTALL FRONT SEAT CUSHION PROTECTOR (for LH Side)
-
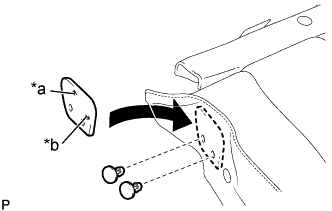
Text in Illustration *a Upper *b Front w/ Cover:
-
Install the front seat cushion protector to the separate type front seat cushion cover with 2 new clips as shown in the illustration.
Note
-
The clips must not be reused.
-
Pay attention to the installation direction.
-
-
-
-
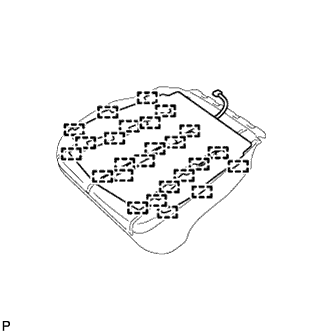
INSTALL SEPARATE TYPE FRONT SEAT CUSHION COVER
-
Using hog ring pliers, install the separate type front seat cushion cover to the separate type front seat cushion pad with 18 new hog rings.
Note
-
Be careful not to damage the separate type front seat cushion cover.
-
Be sure to securely install the hog rings as shown in the illustration while preventing wrinkles from forming on the separate type front seat cushion cover.
-
-
-
INSTALL SEPARATE TYPE FRONT SEAT CUSHION COVER WITH PAD
-
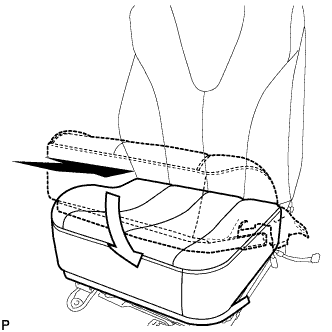
Temporarily install the separate type front seat cushion cover with pad to the front seat frame assembly with adjuster.
-
Engage each hook as shown in the illustration.
-
Install the 2 clips.
-
Connect the connector.
-
Engage each clamp.
-
Engage the 4 hooks and install the separate type front seat cushion cover with pad.
-
-
INSTALL FRONT SEAT CUSHION PROTECTOR
-
Install the 2 front seat cushion protectors.
-
-
INSTALL FRONT INNER SEAT CUSHION SHIELD
-

Engage the guide as shown in the illustration.
-
Engage the claw.
-
Install the front inner seat cushion shield with the screw.
-
-
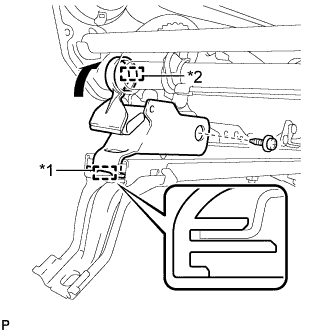
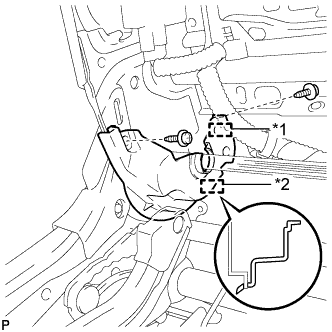
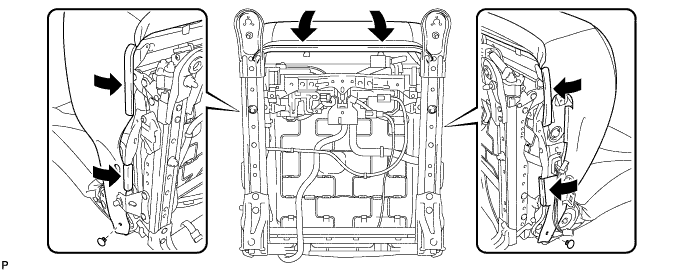
INSTALL FRONT SEAT INNER BELT ASSEMBLY
-
Text in Illustration *1 Protruding Part Install the front seat inner belt assembly with the nut.
- Torque:
- 42 N*m { 428 kgf*cm, 31 ft.*lbf }
Note
Do not allow the anchor part of the front seat inner belt assembly to overlap the protruding part of the front seat adjuster.
-
Connect each connector and engage each clamp.
-
-
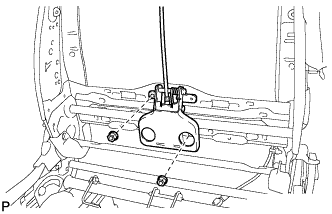
INSTALL POSITION CONTROL ECU AND SWITCH ASSEMBLY (for Driver Side)
-
Connect the 2 connectors.
-
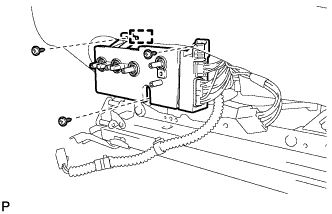
Engage the guide.
-
Install the position control ECU and switch assembly with the 3 screws.
-
-
INSTALL FRONT POWER SEAT SWITCH RH (for Front Passenger Side)
-
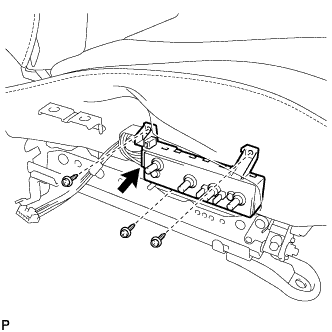
Connect the connector.
-
Install the front power seat switch RH with the 3 screws.
-
-
INSTALL FRONT POWER SEAT LUMBAR SWITCH
-
Install the front power seat lumbar switch with the 2 screws.
-
-
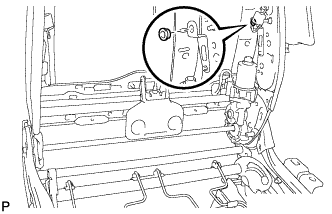
INSTALL FRONT INNER NO. 1 SEAT CUSHION SHIELD
-
Engage the 2 claws to install the front inner No. 1 seat cushion shield to the front seat cushion shield.
-
Install the screw.
-
-
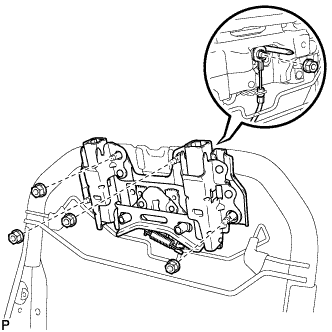
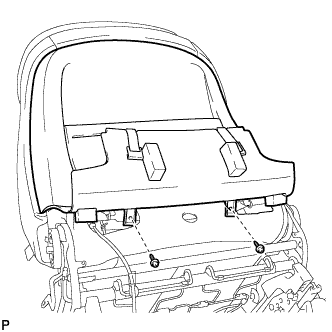
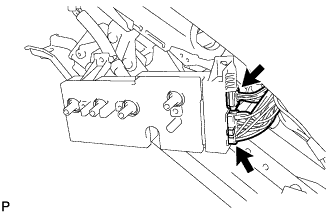
INSTALL FRONT SEAT CUSHION SHIELD ASSEMBLY
-
Connect the connector to the front power seat lumbar switch.
-
Engage the guide and claw.
-
Install the front seat cushion shield assembly with the 5 screws.
-
Engage the 2 hooks.
-
-
INSTALL SLIDE AND VERTICAL POWER SEAT SWITCH KNOB
-
Engage the 4 claws to install the slide and vertical power seat switch knob.
-
-
INSTALL RECLINING POWER SEAT SWITCH KNOB
-
Engage the 4 claws to install the reclining power seat switch knob.
-
-
INSTALL SEAT ADJUSTER COVER CAP
-
Install the seat adjuster cover cap.
Tech Tips
Use the same procedure for the RH side and LH side.
-