REAR SEAT ASSEMBLY (for RH Side) REMOVAL

-
REMOVE REAR SEAT HEADREST ASSEMBLY
-
REMOVE REAR SEAT CENTER HEADREST ASSEMBLY
-
REMOVE REAR SEAT INNER TRACK BRACKET COVER
-
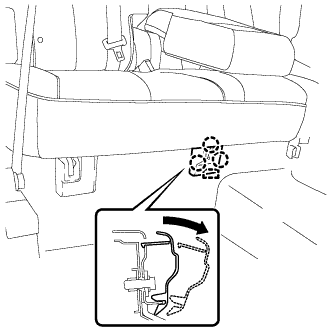
Disengage the 3 claws and guide, and remove the rear seat inner track bracket cover as shown in the illustration.
-
-
REMOVE REAR SEAT OUTER TRACK BRACKET COVER
-
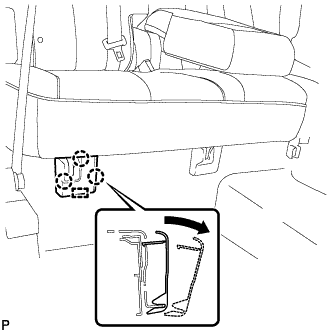
Disengage the 3 claws and guide, and remove the rear seat outer track bracket cover as shown in the illustration.
-
-
DISCONNECT REAR SEAT RECLINING CONTROL CABLE SUB-ASSEMBLY
-
Pull down the adjuster's lock piece to release the lock as shown in the illustration.
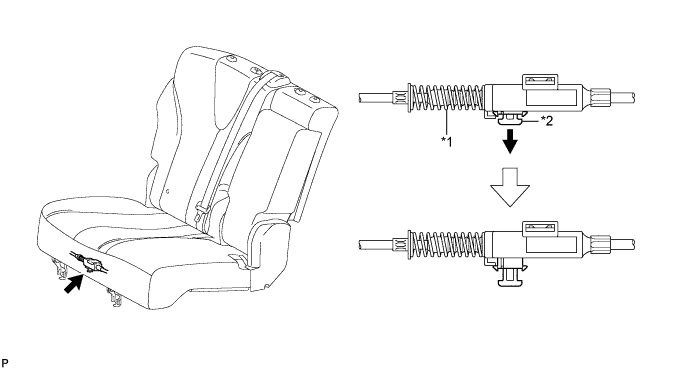
Text in Illustration *1 Adjuster Spring *2 Lock Piece -
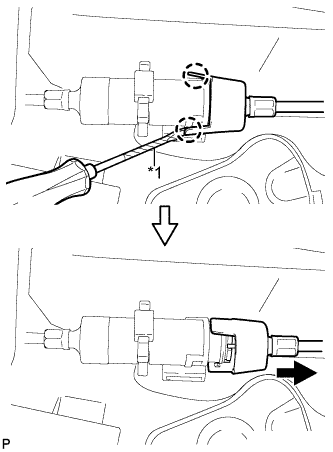
Text in Illustration *1 Protective Tape Using a screwdriver wrapped with protective tape, disengage the 2 claws as shown in the illustration.
-
Lift up the seat track adjusting handle to the uppermost position and hold the handle in this position as shown in the illustration.
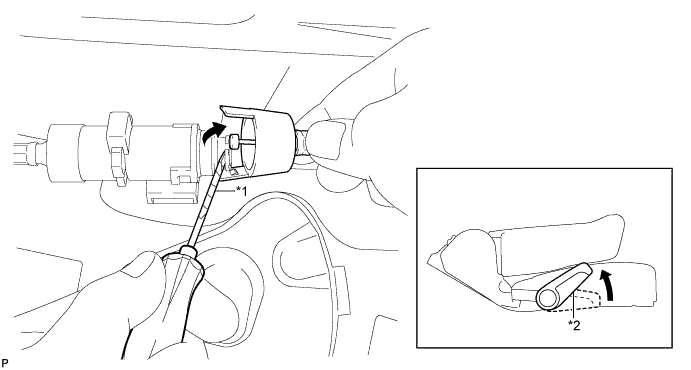
Text in Illustration *1 Protective Tape *2 Seat Track Adjusting Handle -
Using a screwdriver wrapped with protective tape, disconnect the rear seat reclining control cable sub-assembly as shown in the illustration.
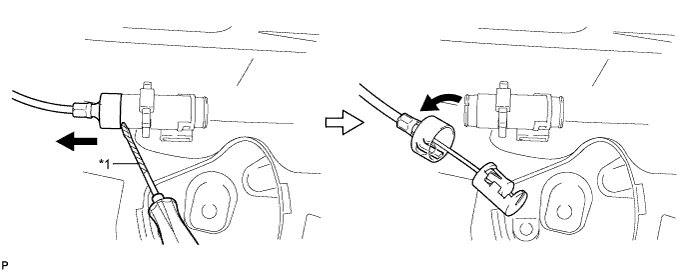
Text in Illustration *1 Protective Tape - -
-
-
REMOVE REAR SEAT ASSEMBLY RH
-
Remove the 3 bolts on the rear side of the seat.
-
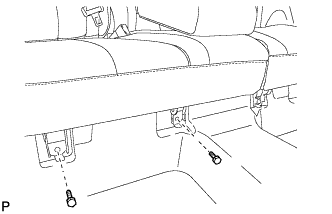
Remove the 2 bolts on the front side of the rear seat assembly RH.
-
Remove the rear seat assembly RH.
Note
Be careful not to damage the vehicle body.
-