TELEVISION CAMERA INSTALLATION

-
INSTALL TELEVISION CAMERA ASSEMBLY
-
Engage the 2 claws to install the television camera assembly.
-
-
INSTALL BACK DOOR OUTSIDE GARNISH SUB-ASSEMBLY
-
Install the 5 stud bolts and 5 new gaskets to the back door outside garnish sub-assembly.
-
Install 16 new clips (back door moulding clip) to the back door outside garnish sub-assembly.
-
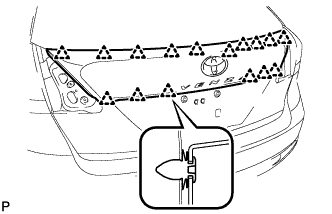
Engage the 16 clips to install the back door outside garnish sub-assembly.
-
Install the 5 nuts.
-
Connect each connector.
-
-
INSTALL REAR LIGHT ASSEMBLY RH
Tech Tips
Use the same procedure for the RH side and the LH side Click here.
-
INSTALL REAR LIGHT ASSEMBLY LH
-
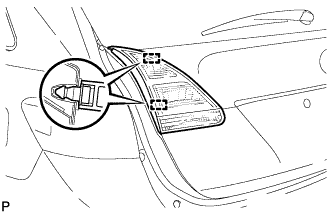
Engage the 2 pins to install the rear light assembly.
-
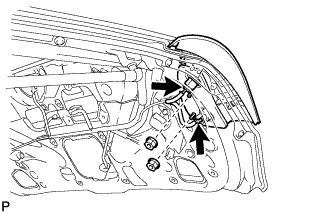
Install the 2 nuts.
- Torque:
- 6.8 N*m { 69 kgf*cm, 60 in.*lbf }
-
Connect the 2 connectors.
-
-
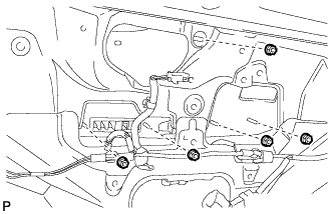
INSTALL REAR WIPER MOTOR AND BRACKET ASSEMBLY
-
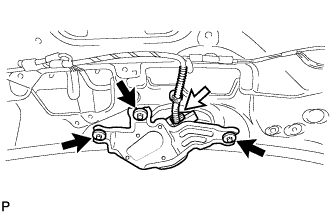
Install the rear wiper motor and bracket assembly with the 3 bolts.
- Torque:
- 5.5 N*m { 56 kgf*cm, 49 in.*lbf }
-
Connect the connector.
-
-
INSTALL REAR WIPER MOTOR GROMMET
-
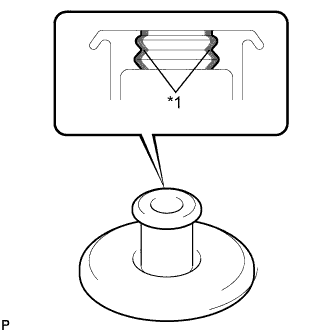
Text in Illustration *1 MP grease Apply MP grease to the entire surface of the wiper motor grommet lip.
Tech Tips
Make sure that the hole does not get clogged with grease and the grooves on the lip are filled with grease.
-
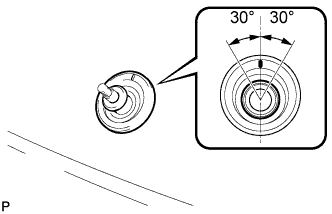
Install the rear wiper motor grommet with the position mark facing upward as shown in the illustration.
-
-
INSTALL REAR WIPER ARM AND BLADE ASSEMBLY
-
Stop the wiper motor at the automatic stop position.
-
When reusing the rear wiper arm and blade assembly:
-
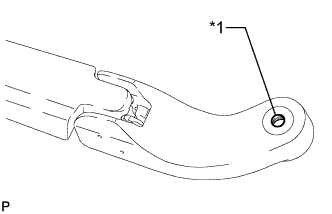
Text in Illustration *1 Wiper Arm Serration Clean the wiper arm serrations.
-
-
When reusing the rear wiper motor and bracket assembly:
-
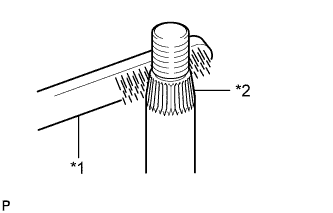
Text in Illustration *1 Wire Brush *2 Wiper Pivot Serration Clean the wiper pivot serrations with a wire brush.
-
-
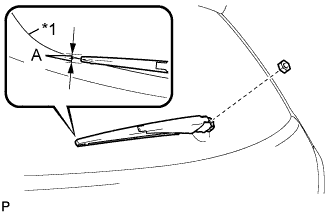
Text in Illustration *1 Ceramic Hard Line Install the rear wiper arm and blade assembly with the nut to the position shown in the illustration.
Standard Measurement Area Dimension A 7.5 mm (0.295 in.) - Torque:
- 5.5 N*m { 56 kgf*cm, 49 in.*lbf }
-
Operate the rear wiper while spraying washer fluid onto the back door glass. Make sure that the rear wiper functions properly and the wiper does not come into contact with the vehicle body.
-
-
INSTALL REAR WIPER ARM HEAD CAP
-
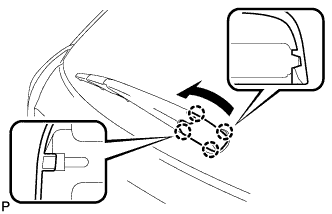
Engage the 4 claws to install the cap as shown in the illustration.
-
-
INSTALL BACK DOOR PANEL TRIM ASSEMBLY
-
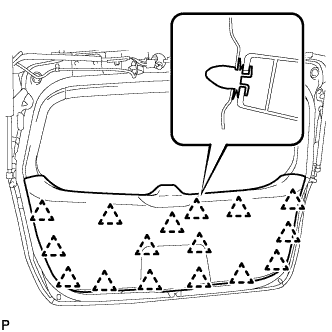
Engage the 16 clips and install the back door panel trim assembly.
-