INSTRUMENT PANEL SPEAKER INSTALLATION

-
INSTALL FRONT NO. 3 SPEAKER ASSEMBLY (for 13 Speakers)
-
Engage the 3 claws to install the front No. 3 speaker assembly.
-
-
INSTALL FRONT PILLAR GARNISH CORNER PIECE (for 13 Speakers)
-
Connect the connector.
-
Engage the clamp.
-
Engage the 3 claws to install the front pillar garnish corner piece LH.
-
-
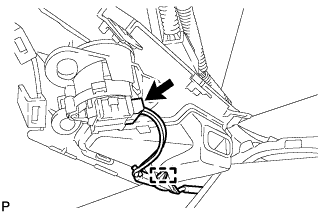
INSTALL FRONT NO. 2 SPEAKER ASSEMBLY
-
Connect the connector.
-
Install the front No. 2 speaker assembly with the 2 bolts.
- Torque:
- 11 N*m { 112 kgf*cm, 8 ft.*lbf }
-
-
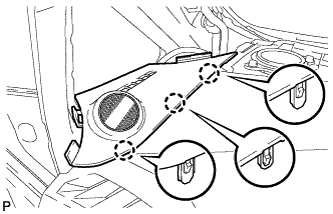
INSTALL NO. 1 INSTRUMENT PANEL SPEAKER PANEL SUB-ASSEMBLY
-

Engage the 2 guides, 6 claws and 2 clips to install the No. 1 instrument panel speaker panel sub-assembly.
-
-
INSTALL FRONT NO. 4 SPEAKER ASSEMBLY (for 13 Speakers)
-
Connect the connector.
-
Install the center speaker assembly with the 2 bolts.
- Torque:
- 11 N*m { 112 kgf*cm, 8 ft.*lbf }
-
-
INSTALL NO. 2 INSTRUMENT PANEL SPEAKER PANEL SUB-ASSEMBLY
-
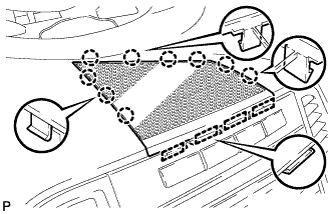
Engage the 4 guides and 9 claws to install the No. 2 instrument panel speaker panel sub-assembly.
-
-
INSTALL FRONT PILLAR GARNISH
-
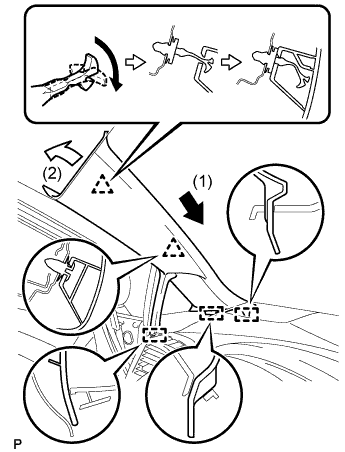
Engage the 3 guides.
-
Turn the end of the front pillar garnish clip 90° with needle-nosed pliers and install it to the front pillar garnish RH.
Tech Tips
Tape the needle-nosed pliers tip before use.
-
Engage the 2 clips to install the front pillar garnish LH.
-
-
CONNECT FRONT DOOR OPENING TRIM WEATHERSTRIP
-
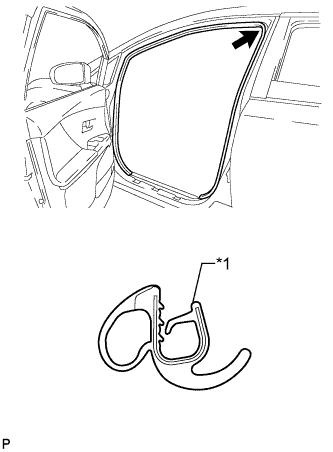
Text in Illustration *1 Alignment mark (Yellow) Align the alignment mark (Yellow) on the weatherstrip with the protruding portion on the body indicated by the arrow in the illustration, and install the front door opening trim weatherstrip LH.
Note
After installation, check that the corners fit correctly.
-