INSTRUMENT PANEL SPEAKER REMOVAL

-
DISCONNECT FRONT DOOR OPENING TRIM WEATHERSTRIP
-
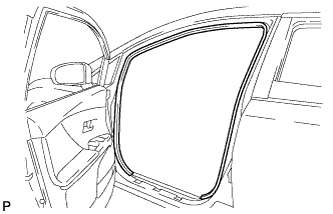
Remove the front door opening trim weatherstrip LH.
-
-
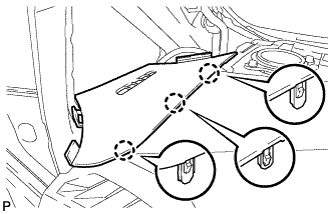
REMOVE FRONT PILLAR GARNISH
-
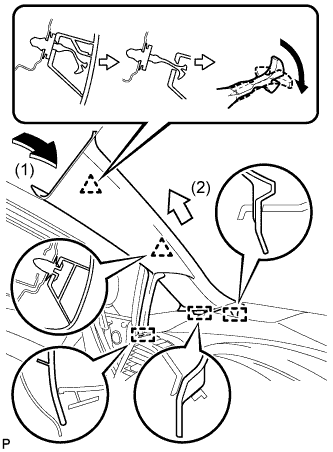
Pull the upper part of the garnish toward the inside of the cabin and disengage the 2 clips.
Tech Tips
Make the front pillar garnish LH hang down from the front pillar garnish clip.
-
Turn the end of the front pillar garnish clip 90° with needle-nosed pliers and remove it from the front pillar garnish LH.
Note
-
Front pillar garnish clips are reusable if they are not removed from the vehicle and have no damage.
-
Replace the front pillar garnish clips with new ones if they are removed from the vehicle.
Tech Tips
Tape the needle-nosed pliers tip before use.
-
-
Disengage the 3 guides and remove the front pillar garnish LH.
-
-
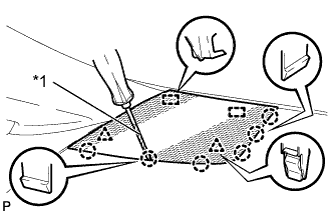
REMOVE NO. 2 INSTRUMENT PANEL SPEAKER PANEL SUB-ASSEMBLY
-
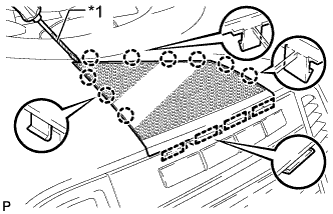
Text in Illustration *1 Protective Tape Using a screwdriver, disengage the 9 claws and 4 guides, and remove the No. 2 instrument panel speaker panel sub-assembly.
Tech Tips
Tape the screwdriver tip before use.
-
-
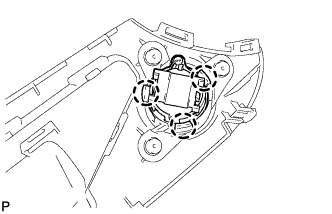
REMOVE FRONT NO. 4 SPEAKER ASSEMBLY (for 13 Speakers)
-
Remove the 2 bolts.
-
Disconnect the connector and remove the center speaker assembly.
-
-
REMOVE NO. 1 INSTRUMENT PANEL SPEAKER PANEL SUB-ASSEMBLY
-
Text in Illustration *1 Protective Tape Using a screwdriver, disengage the 2 clips, 6 claws and 2 guides, and remove the No. 1 instrument panel speaker panel sub-assembly.
Tech Tips
Tape the screwdriver tip before use.
-
-
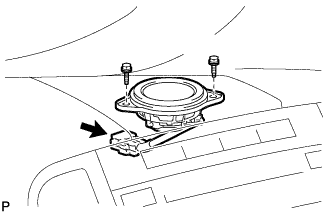
REMOVE FRONT NO. 2 SPEAKER ASSEMBLY
-

Remove the 2 bolts.
-
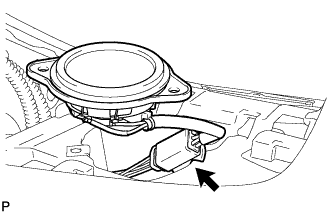
Disconnect the connector and remove the front No. 2 speaker assembly.
-
-
REMOVE FRONT PILLAR GARNISH CORNER PIECE (for 13 Speakers)
-
Disengage the 3 claws and remove the front pillar garnish corner piece LH.
-
-
REMOVE FRONT NO. 3 SPEAKER ASSEMBLY (for 13 Speakers)
-
Disengage the 3 claws and remove the front No. 3 speaker assembly.
-