RADIO ANTENNA CORD INSTALLATION

-
INSTALL NO. 3 ANTENNA CORD SUB-ASSEMBLY
-
Pass the washer hose through the No. 3 antenna cord sub-assembly.
-

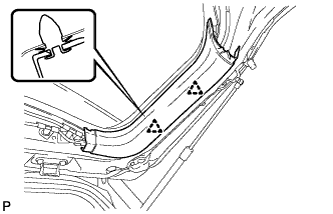
Pass the No. 3 antenna cord sub-assembly with washer hose through the vehicle body as shown in the illustration.
-
Engage the 2 claws.
-
Connect the grommet to the back door.
-
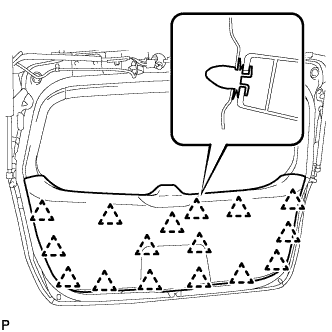
Engage the 4 clamps.
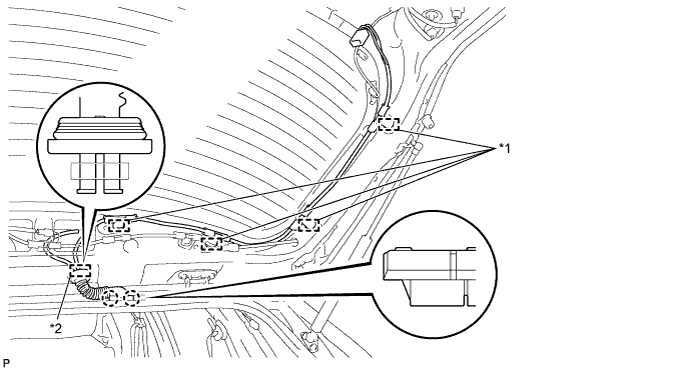
Text in Illustration *1 Clamp *2 Grommet -
Connect the connector and engage the clamp.
-
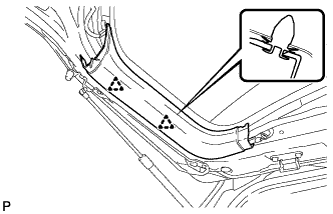
Engage the 7 clamps.
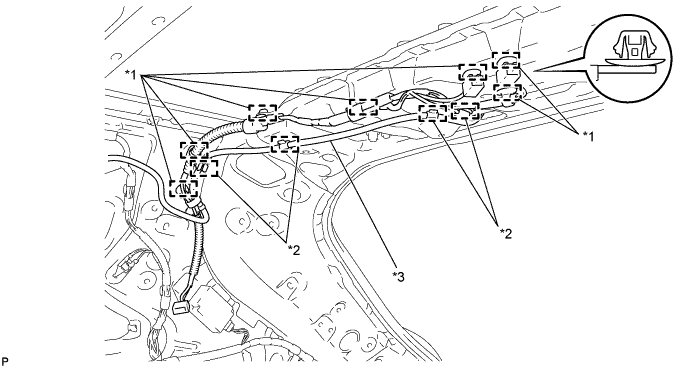
Text in Illustration *1 Clamp *2 Hook *3 Washer Hose - - -
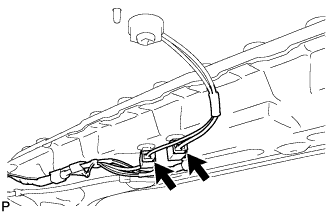
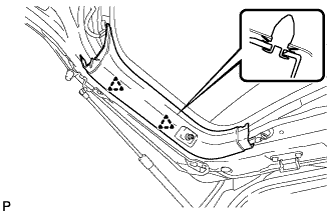
Engage the 4 hooks to connect the washer hose.
-
Connect the 2 connectors.
-
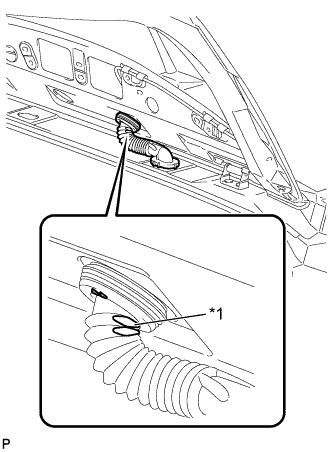
Text in Illustration *1 Flat Area Set the position of the grommet as shown in the illustration.
Tech Tips
Flat area to be oriented outside the vehicle.
-
-
INSTALL BACK DOOR TRIM COVER RH
-
Engage the 2 clips to install the back door trim cover RH.
-
-
INSTALL BACK DOOR TRIM COVER LH (w/o Power Back Door)
-
Engage the 2 clips to install the back door trim cover LH.
-
-
INSTALL BACK DOOR TRIM COVER LH (w/ Power Back Door)
-
Engage the 2 clips to install the back door trim cover LH.
-
-
INSTALL BACK DOOR TRIM PANEL ASSEMBLY
-
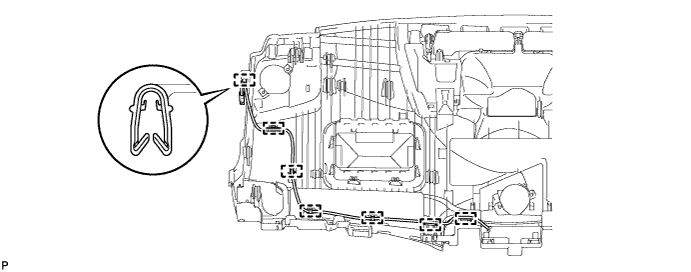
Engage the 16 clips and install the back door panel trim assembly.
-
-
INSTALL UPPER BACK WINDOW PANEL TRIM
-
Engage the 4 clips and 4 claws to install the upper back window panel trim.
-
-
INSTALL NO. 2 ANTENNA CORD SUB-ASSEMBLY
-
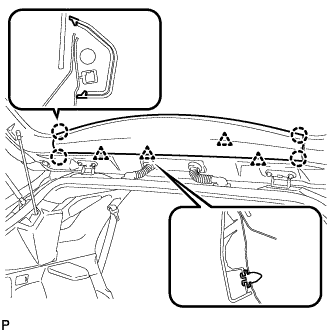
Aligning the No. 2 antenna cord sub-assembly and washer hose with the markings on the roof headlining assembly, temporarily install the cord and washer hose.
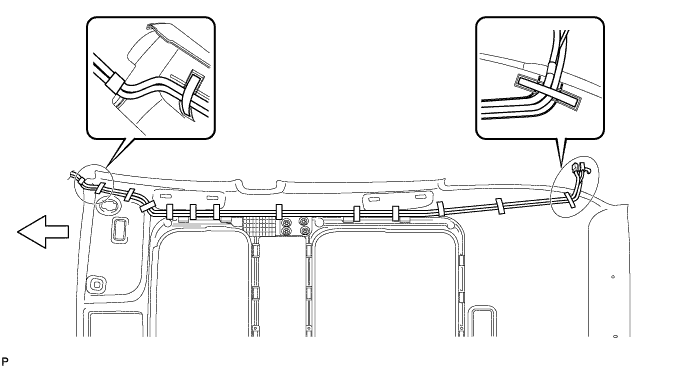
Text in Illustration 
Tape 
Front -
Put the strips of the tape back to the positions shown in the illustration in order to secure the antenna cord and washer hose to the roof headlining assembly.
Tech Tips
-
If the tape has lost adhesion, use other tape, such as packing tape, with enough adhesion to secure the antenna cord and washer hose to the roof headlining assembly.
-
Secure the antenna cord and washer hose to the roof headlining assembly with tape as shown in the illustration.
-
-
-
INSTALL ROOF HEADLINING ASSEMBLY
-
INSTALL ANTENNA CORD SUB-ASSEMBLY
-
Engage the 7 clamps to install the antenna cord sub-assembly.
-
-
INSTALL INSTRUMENT PANEL SAFETY PAD ASSEMBLY