REAR LOWER ARM (for 2WD) REMOVAL

-
REMOVE REAR WHEELS
-
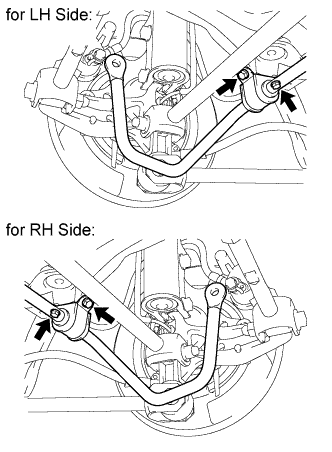
SEPARATE REAR STABILIZER LINK ASSEMBLY LH
-
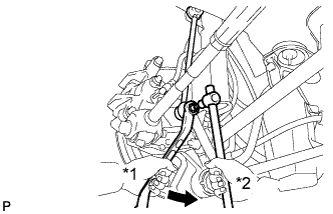
Text in Illustration *1 Turn *2 Hold Remove the nut and separate the rear stabilizer link assembly LH from the rear stabilizer bar.
Tech Tips
If the ball joint turns together with the nut, use a hexagon wrench (5 mm) to hold the stud bolt.
-
-
SEPARATE REAR STABILIZER LINK ASSEMBLY RH
Tech Tips
Perform the same procedure as the LH side.
-
REMOVE REAR STABILIZER BAR
-
Remove the 4 bolts and rear stabilizer bar.
-
-
SEPARATE REAR HEIGHT CONTROL SENSOR SUB-ASSEMBLY
-
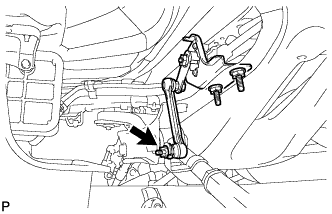
Remove the nut and separate the rear height control sensor sub-assembly from the rear No. 2 suspension arm assembly RH.
Note
Use wire or an equivalent tool to keep the rear height control sensor link from hanging down.
-
-
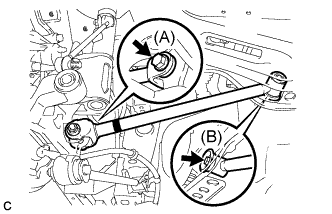
REMOVE REAR NO. 2 SUSPENSION ARM ASSEMBLY LH
-
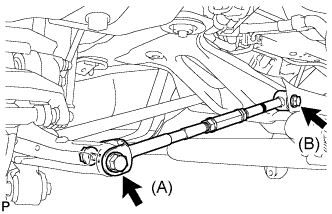
Remove the bolt (A) and the nut, and separate the rear No. 2 suspension arm assembly LH from the rear axle carrier sub-assembly LH.
Note
Since a stopper nut is used, loosen the bolt.
-
Remove the bolt (B) and the rear No. 2 suspension arm assembly LH.
-
-
REMOVE REAR NO. 2 SUSPENSION ARM ASSEMBLY RH
Tech Tips
Perform the same procedure as the LH side.
-
REMOVE REAR NO. 1 SUSPENSION ARM ASSEMBLY LH
-
Remove the bolt and the nut, and separate the rear No. 1 suspension arm assembly LH from the rear axle carrier sub-assembly.
Note
Since a stopper nut is used, loosen the bolt.
-
Remove the bolt and the rear No. 1 suspension arm assembly LH.
-
-
REMOVE REAR NO. 1 SUSPENSION ARM ASSEMBLY RH
Tech Tips
Perform the same procedure as the LH side.