AUTOMATIC TRANSAXLE ASSEMBLY REMOVAL

Note
If automatic transmission parts have been replaced, refer to Parts Replacement Compensation Table to determine if any additional operations are necessary Click here.
-
REMOVE ENGINE ASSEMBLY WITH TRANSAXLE
Tech Tips
See the steps from "Recover Refrigerant from Refrigeration System" through "Remove Engine Assembly with Transaxle" Click here.
-
REMOVE FRONT NO. 1 STABILIZER BRACKET LH
-
Remove the 2 bolts and front No. 1 stabilizer bracket LH from the front frame assembly.
-
-
REMOVE FRONT NO. 1 STABILIZER BRACKET RH
Tech Tips
Perform the same procedure as for the LH side.
-
REMOVE FRONT STABILIZER BAR WITH FRONT STABILIZER LINK ASSEMBLY
-
REMOVE STEERING LINK ASSEMBLY
-
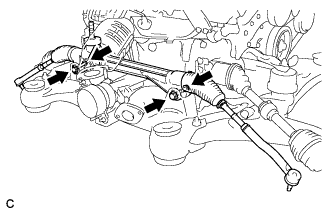
Remove the 2 bolts, 2 nuts and steering link assembly.
Note
Because the nut has its own stopper, do not turn the nut. Loosen the bolt with the nut secured.
-
-
REMOVE STARTER ASSEMBLY
-
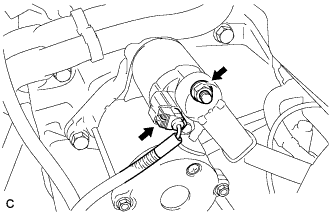
Disconnect the starter connector.
-
Open the terminal cap, remove the nut and disconnect the starter wire.
-
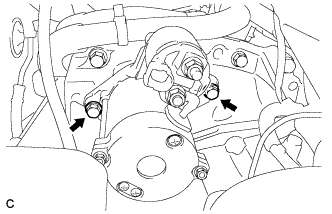
Remove the 2 bolts and starter.
-
-
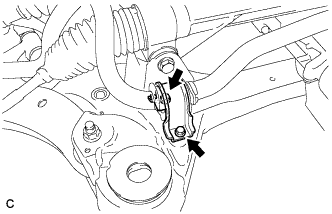
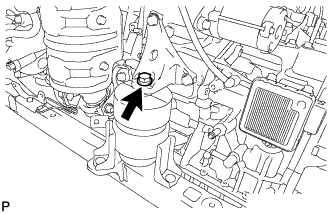
SEPARATE REAR ENGINE MOUNTING INSULATOR ASSEMBLY
-
Remove the 2 bolts and separate the rear engine mounting insulator assembly from the rear engine mounting bracket.
-
-
REMOVE FRONT FRAME ASSEMBLY
-
Disconnect the 2 clamps with the engine wire.
-
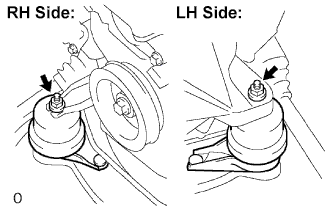
Remove the 2 nuts and separate the engine mounting insulators RH and LH.
-
Remove the bolt and separate the front engine mounting insulator.
-
Remove the front frame assembly from the engine assembly with transaxle.
-
-
REMOVE TRANSFER STIFFENER PLATE RH
-
Remove the 4 bolts and transfer stiffener plate RH.
-
-
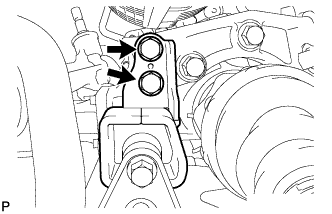
REMOVE TCM
-
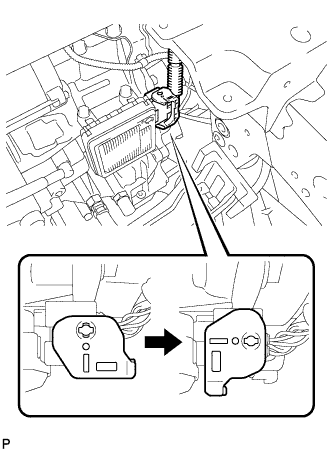
Turn the lock lever and disconnect the connector from the TCM.
-
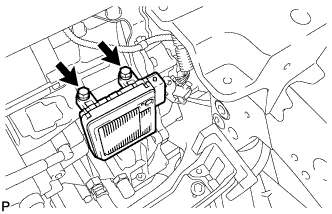
Remove the 2 bolts and TCM from the transaxle.
-
-
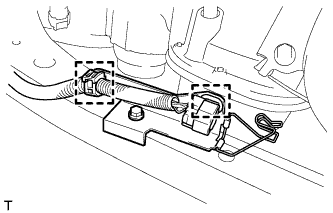
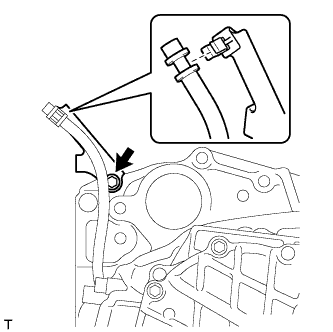
SEPARATE WIRE HARNESS
-

Remove the bolt and ground cable.
-
Separate the park/neutral position switch connector and 6 wire harness clamps.
-
-
REMOVE AUTOMATIC TRANSAXLE ASSEMBLY
-
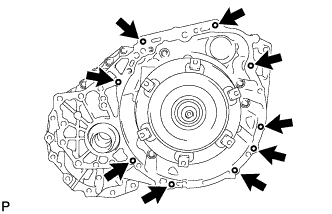
Remove the 9 bolts and transaxle.
Note
To prevent damage to the knock pins, do not pry between the transaxle and engine.
-
-
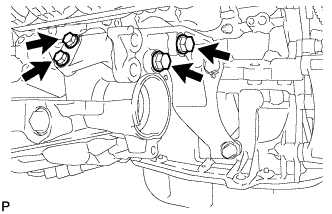
REMOVE TRANSFER ASSEMBLY
-
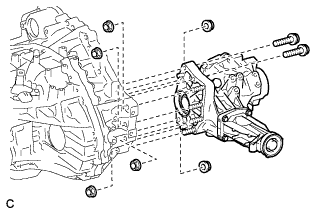
Remove the 2 bolts and 6 nuts.
-
Using a plastic hammer, remove the transfer assembly from the automatic transaxle assembly.
Note
-
Remove the transfer assembly from the automatic transaxle assembly without tilting it.
-
During removal, do not hold the transfer assembly by the oil seals on either side of the assembly.
-
-
-
REMOVE TORQUE CONVERTER ASSEMBLY
-
REMOVE FLEXIBLE HOSE BRACKET SUB-ASSEMBLY
-
Slide the clip and disconnect the breather plug hose from the flexible hose bracket sub-assembly.
-
Remove the bolt and flexible hose bracket sub-assembly from the transaxle.
-
Remove the breather hose from the flexible hose bracket sub-assembly.
-
-
REMOVE FRONT ENGINE MOUNTING BRACKET
-
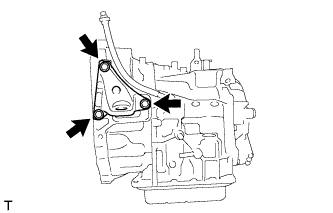
Remove the 3 bolts and front engine mounting bracket.
-
-
REMOVE WIRE HARNESS CLAMP BRACKET
-
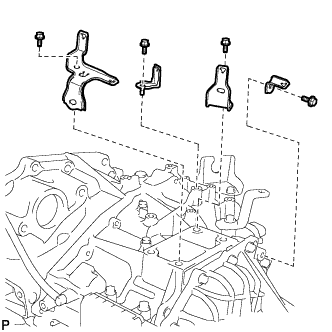
Remove the 4 bolts and 4 clamp brackets.
-
-
REMOVE NO. 1 TRANSMISSION CONTROL CABLE BRACKET
-
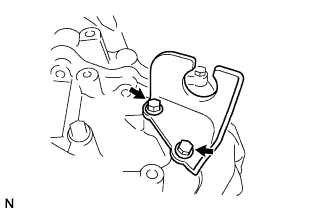
Remove the 2 bolts and No. 1 transmission control cable bracket from the automatic transaxle assembly.
-
-
REMOVE TRANSMISSION CASE PLUG ASSEMBLY
-
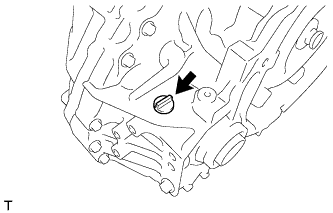
Remove the transmission case plug assembly from the automatic transaxle assembly.
-
Remove the O-ring from the transmission case plug assembly.
-
-
REMOVE OUTLET NO. 1 OIL COOLER HOSE
-
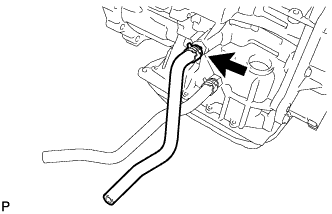
Remove the outlet No. 1 oil cooler hose.
-
-
REMOVE INLET NO. 1 OIL COOLER HOSE
-
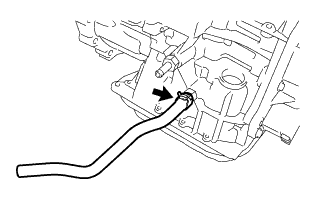
Remove the inlet No. 1 oil cooler hose.
-