VACUUM SWITCHING VALVE (for ACIS) INSTALLATION

-
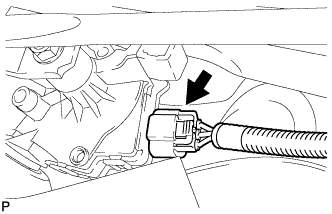
INSTALL VACUUM SWITCHING VALVE ASSEMBLY (for ACIS)
-
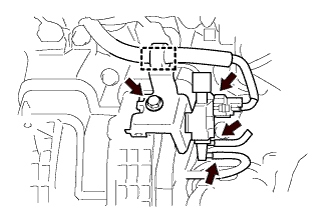
Install the vacuum switching valve assembly (for ACIS) with the bolt.
- Torque:
- 9.0 N*m { 92 kgf*cm, 80 in.*lbf }
-
Connect the 2 vacuum hoses, clamp and connector.
-
-
INSTALL OUTER COWL TOP PANEL
-

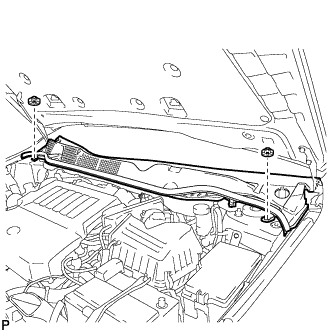
Text in Illustration *1 Bolt *2 Nut Install the outer cowl top panel with the 4 bolts and 4 nuts.
- Torque:
- Nut
- 85 N*m { 866 kgf*cm, 63 ft.*lbf }
- Bolt
- 8.8 N*m { 90 kgf*cm, 78 in.*lbf }
-
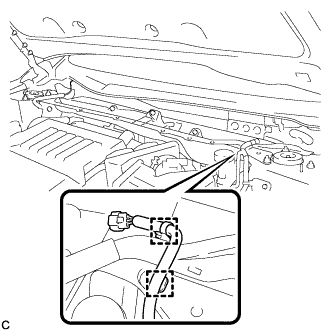
Engage the 2 wire harness clamps to the outer cowl top panel.
-
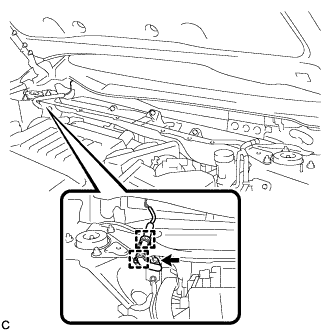
Engage the 2 wire harness clamps to the outer cowl top panel and connect the connector (w/ Windshield Deicer).
-
-
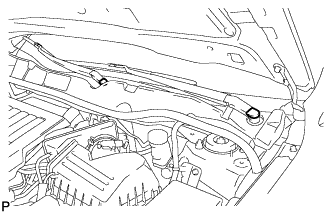
INSTALL WINDSHIELD WIPER MOTOR AND LINK ASSEMBLY
-
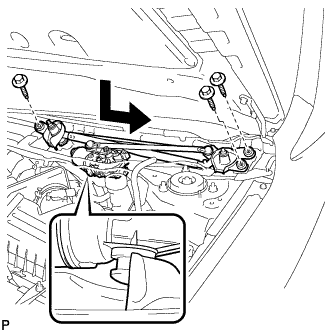
Install the windshield wiper motor and link assembly with the 3 bolts as shown in the illustration.
- Torque:
- 7.0 N*m { 71 kgf*cm, 62 in.*lbf }
-
Connect the connector.
-
-
INSTALL COWL TOP VENTILATOR LOUVER SUB-ASSEMBLY
-
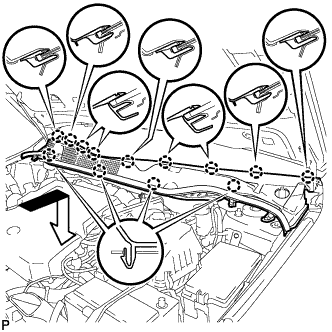
Engage the 13 claws and install the cowl top ventilator louver sub-assembly as shown in the illustration.
-
Install the 2 clips.
-
-
INSTALL FRONT FENDER TO COWL SIDE SEAL LH
-
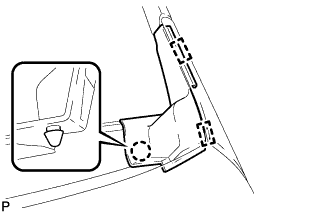
Engage the claw and 2 guides to install the front fender to cowl side seal LH.
-
-
INSTALL FRONT FENDER TO COWL SIDE SEAL RH
Tech Tips
Use the same procedure for the RH side and LH side.
-
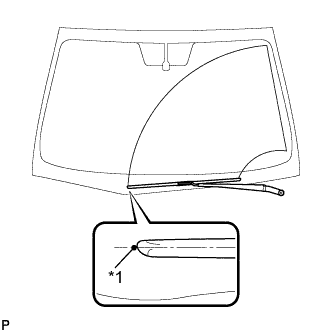
INSTALL FRONT WIPER ARM AND BLADE ASSEMBLY RH
-
Operate the wiper and stop the windshield wiper motor at the automatic stop position.
-
When reusing the front wiper arm and blade assembly RH:
-

Text in Illustration *1 Wiper Arm Serration Clean the wiper arm serrations.
-
-
When reusing the windshield wiper link assembly:
-
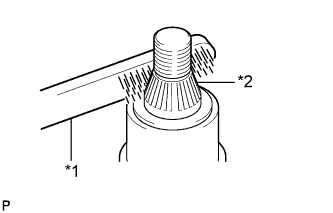
Text in Illustration *1 Wire Brush *2 Wiper Pivot Serration Clean the wiper pivot serrations with a wire brush.
-
-
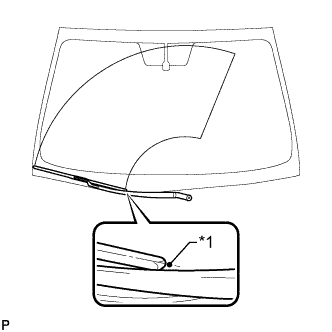
Text in Illustration *1 Ceramic Notch Install the front wiper arm and blade assembly RH with the nut to the position shown in the illustration.
- Torque:
- 20 N*m { 204 kgf*cm, 15 ft.*lbf }
-
-
INSTALL FRONT WIPER ARM AND BLADE ASSEMBLY LH
-
When reusing the front wiper arm and blade assembly LH:
-
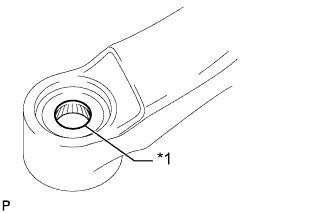
Text in Illustration *1 Wiper Arm Serration Clean the wiper arm serrations.
-
-
When reusing the windshield wiper link assembly:
-
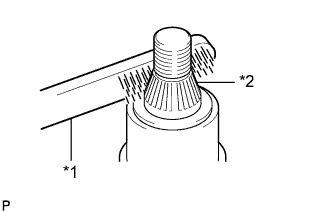
Text in Illustration *1 Wire Brush *2 Wiper Pivot Serration Clean the wiper pivot serrations with a wire brush.
-
-
Text in Illustration *1 Ceramic Notch Install the front wiper arm and blade assembly LH with the nut to the position shown in the illustration.
- Torque:
- 20 N*m { 204 kgf*cm, 15 ft.*lbf }
-
Operate the front wipers while spraying washer fluid onto the windshield. Make sure that the front wipers function properly and the wipers do not come into contact with the vehicle body.
-
-
INSTALL FRONT WIPER ARM HEAD CAP
-
Install the 2 front wiper arm head caps.
-
-
INSTALL NO. 1 ENGINE COVER SUB-ASSEMBLY
-
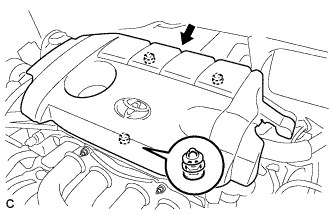
Fit the 3 retainers and install the No. 1 engine cover sub-assembly.
-