ЗАДНИЙ САЛЬНИК КОЛЕНЧАТОГО ВАЛА ЗАМЕНА

-
REMOVE AUTOMATIC TRANSMISSION ASSEMBLY
-
REMOVE DRIVE PLATE AND RING GEAR SUB-ASSEMBLY
-
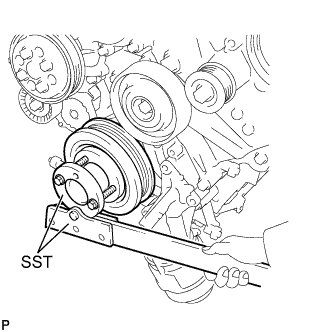
Зафиксируйте коленчатый вал с помощью SST.
- SST
- 09213-54015 ( 90119-08216 )
- 09330-00021
-
Вывернув 10 болтов, снимите распорную втулку, ведущий диск, коронную шестерню в сборе и ротор датчика угла поворота коленчатого вала.
-
-
REMOVE ENGINE REAR OIL SEAL
-
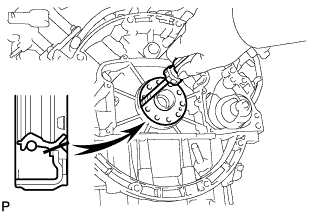
Remove the engine rear oil seal with a screwdriver.
Tech Tips
Tape the screwdriver tip before use.
Note
Do not damage the surface of the engine rear oil seal press fit hole and crankshaft.
-
-
INSTALL ENGINE REAR OIL SEAL
-
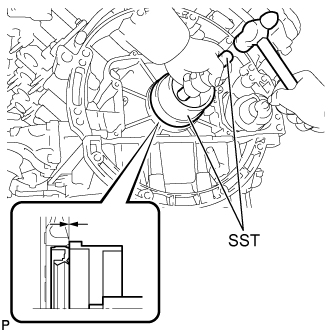
Using SST, tap in a new engine rear oil seal until its surface is flush with the oil seal retainer edge.
- SST
- 09223-15030
- 09950-70010 ( 09951-07150 )
Note
-
Keep the lip free from foreign matter.
-
Do not tap on the engine rear oil seal at an angle.
-
-
INSTALL DRIVE PLATE AND RING GEAR SUB-ASSEMBLY
-
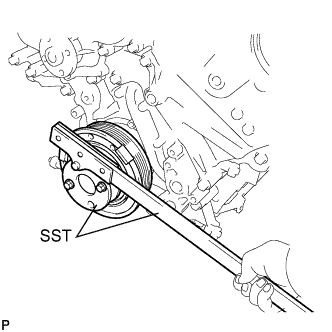
Using SST, hold the crankshaft.
- SST
- 09213-54015 ( 90119-08216 )
- 09330-00021
-
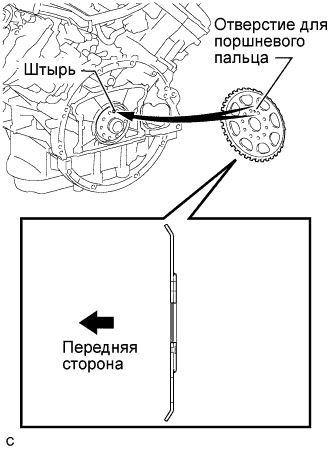
Install the crankshaft angle sensor rotor.
Tech Tips
-
Align the pin of the crankshaft with the pin hole of the crankshaft angle sensor rotor.
-
As the crankshaft angle sensor rotor are not reversible, be sure to install it in the direction shown in the illustration.
-
-

Install the drive plate and ring gear sub-assembly and spacer plate on to the crankshaft.
Tech Tips
As the drive plate and ring gear sub-assembly and spacer plate are not reversible, be sure to install it in the direction shown in the illustration.
-

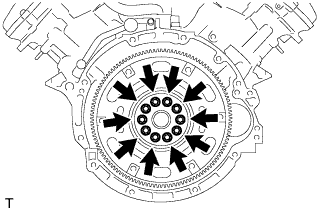
Uniformly install and tighten 10 new bolts in the sequence shown in the illustration.
- Torque:
- 30 N*m { 306 kgf*cm, 22 ft.*lbf }
Note
-
Do not reuse the drive plate installation bolts.
-
Do not impact or damage the drive plate installation bolts. Be sure to handle them carefully.
-
Mark the upside of each drive plate installation bolt with paint.
-
Retighten the drive plate installation bolts by 90°.
-
Check that the painted marks are now at a 90° angle to the upside.
-
-
INSTALL AUTOMATIC TRANSMISSION ASSEMBLY