REAR SUNSHADE ASSEMBLY INSPECTION

-
INSPECT REAR SUNSHADE ASSEMBLY
Text in Illustration *1 Component without Harness connected
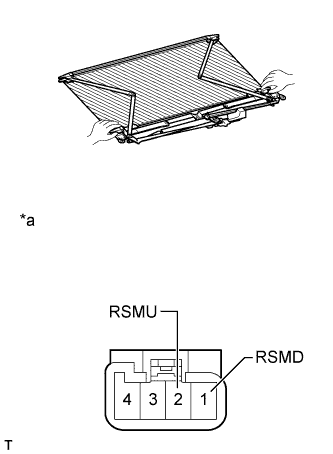
(Rear Sunshade Assembly)
-
Hold the edges of the rear sunshade with your hands as shown in the illustration.
-
Apply battery voltage to the rear sunshade motor and check the operation of the rear sunshade.
OK Measurement Condition Specified Condition Battery positive (+) → 2 (RSMU)
Battery negative (-) → 1 (RSMD)
Rear sunshade raises Battery positive (+) → 1 (RSMD)
Battery negative (-) → 2 (RSMU)
Rear sunshade lowers Tech Tips
To prevent the motor from burning out, stop operation as soon as the rear sunshade is fully raised or lowered.
CAUTION:
Be careful when the rear sunshade rises and lowers. Something could get caught in the rear sunshade and cause an injury.
If the result is not as specified, replace the rear sunshade assembly.
-
-
INSPECT INTEGRATION CONTROL AND PANEL ASSEMBLY
-
Remove the integration control and panel assembly Click here.
-
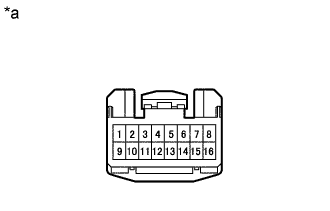
Text in Illustration *a Component without Harness connected
(Integration Control and Panel)
Measure the resistance according to the value(s) in the table below.
Standard resistance Tester Connection Switch Condition Specified Condition 3 - 9 Rear sunshade switch is pushed Below 200 Ω Rear sunshade switch is not pushed 10 kΩ or higher If the result is not as specified, replace the integration control and panel assembly.
-