- Click here
REMOVE NO. 4 ENGINE ROOM WIRE
-
except Sport Package:
-
Disconnect the 6 connectors.
-
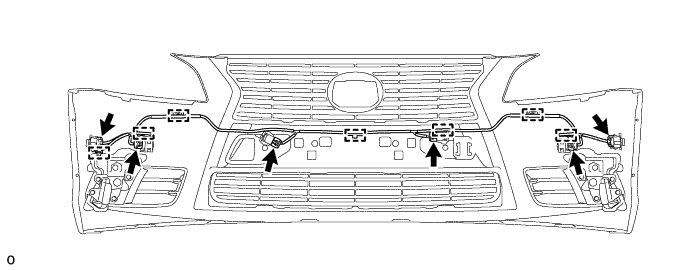
Detach the 7 clamps and remove the No. 4 engine room wire.
-
-
for Sport Package:
-
Disconnect the 6 connectors.
-
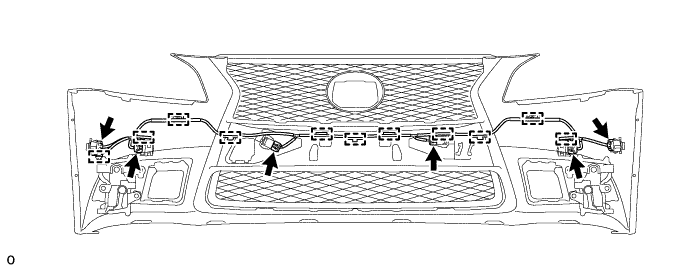
Detach the 11 clamps and remove the No. 4 engine room wire.
-
-
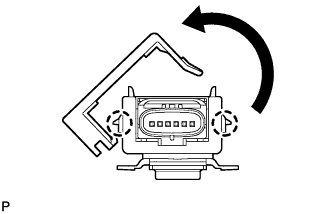
Detach the 2 claws and remove the clip.
Tip:Use the same procedure to remove the clip on the other side.
-
- Click here
REMOVE NO. 1 ULTRASONIC SENSOR
-
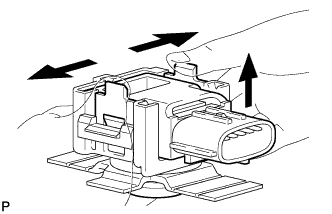
Remove the 6 No. 1 ultrasonic sensors as shown in the illustration.
Note:
-
Be careful not to damage the retainer.
-
Do not forcibly remove the retainer from the bumper cover.
-
-
- Click here
REMOVE NO. 1 ULTRASONIC SENSOR RETAINER
-
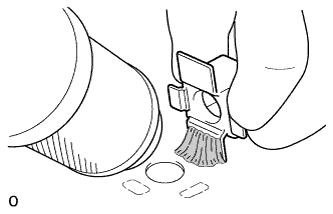
While heating the retainer using a dryer, pull the retainer lightly and remove the double-sided tape. Then remove the 4 No. 1 ultrasonic sensor retainers.
Heating temperature 40 to 60°C (104 to 140°F) CAUTION:Be careful of burns.
-
Using a cloth or non-residue solvent, wipe off any tape residue on the bumper cover.
-
- Click here
REMOVE NO. 2 ULTRASONIC SENSOR RETAINER
-
While heating the retainer using a dryer, pull the retainer lightly and remove the double-sided tape. Then remove the 2 No. 2 ultrasonic sensor retainers.
Heating temperature 40 to 60°C (104 to 140°F) CAUTION:Be careful of burns.
-
Using a cloth or non-residue solvent, wipe off any tape residue on the bumper cover.
-
- Click here
REMOVE HEADLIGHT CLEANER WASHER NOZZLE COVER
-
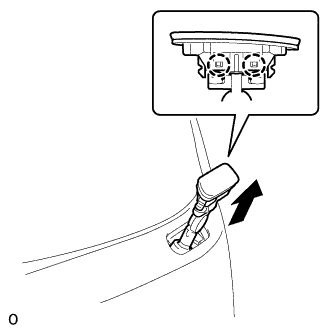
Extend the headlight washer nozzle.
-
- Click here
REMOVE HEADLIGHT CLEANER HOSE
-
except Sport Package:
-
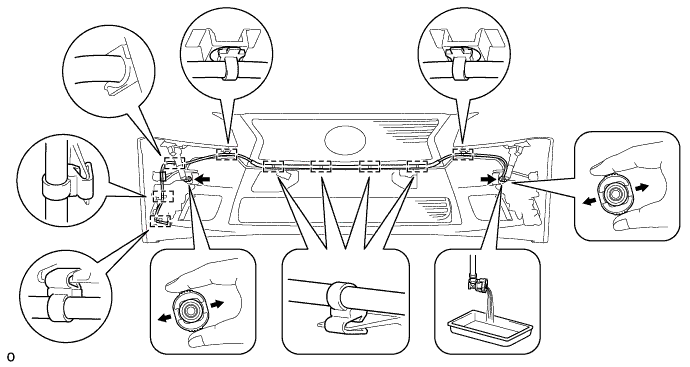
Disconnect the headlight cleaner hose from the headlight washer actuator sub-assembly LH.
-
Disconnect the headlight cleaner hose from the headlight washer actuator sub-assembly RH and drain the washer fluid.
-
Detach the 9 clamps and remove the headlight cleaner hose.
-
-
for Sport Package:
-
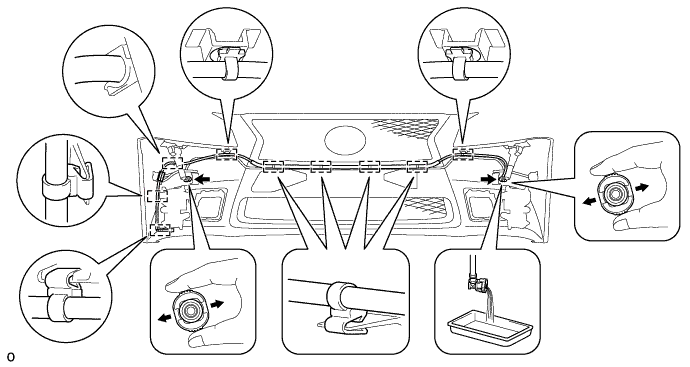
Disconnect the headlight cleaner hose from the headlight washer actuator sub-assembly LH and drain the washer fluid.
-
Disconnect the headlight cleaner hose from the headlight washer actuator sub-assembly RH and drain the washer fluid.
-
Detach the 9 clamps and remove the headlight cleaner hose.
-
-
- Click here
REMOVE HEADLIGHT WASHER ACTUATOR SUB-ASSEMBLY LH
-
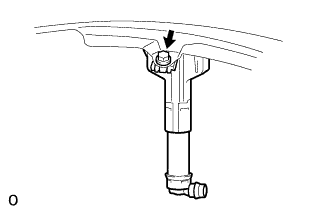
Remove the screw and headlight washer actuator sub-assembly LH.
-
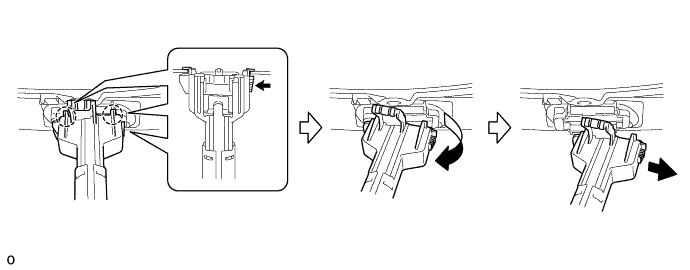
Detach the 2 claws and remove the headlight washer actuator sub-assembly as shown in the illustration.
-
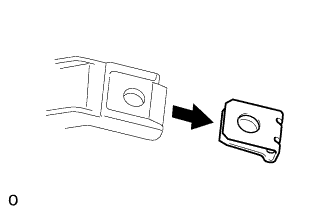
Remove the spring nut from the headlight washer actuator sub-assembly LH.
-
- Click here
REMOVE HEADLIGHT WASHER ACTUATOR SUB-ASSEMBLY RH
Tip:Use the same procedure described for the LH side.
-
Click here
REMOVE ULTRASONIC SENSOR RETAINER
Tip:Use the same procedure for both ultrasonic sensor retainers.
-
Remove the ultrasonic sensor retainer.
-
-
Click here
REMOVE ULTRASONIC SENSOR CLIP
Tip:Use the same procedure for both ultrasonic sensor clips.
-
Remove the ultrasonic sensor clip.
-
- Click here
REMOVE WASHER BRACKET
Tip:
-
Use the same procedure for the RH and LH sides.
-
The procedure listed below is for the LH side.
-
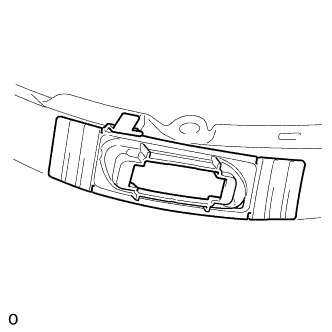
except Sport Package:
-
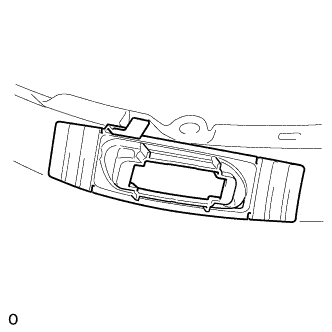
Remove the washer bracket from the front bumper together with the double-sided tape.
Note:
-
If the double-sided tape remains on the bumper, remove it completely.
-
The headlight cleaner bracket is a nonreusable part.
-
-
-
for Sport Package:
-
Remove the washer bracket from the front bumper together with the double-sided tape.
Note:
-
If the double-sided tape remains on the bumper, remove it completely.
-
The washer bracket is a non-reusable part.
-
-
-
- Click here
REMOVE FOG LIGHT ASSEMBLY LH
-
except Sport Package:
-
for Sport Package:
-
- Click here
REMOVE FOG LIGHT ASSEMBLY RH
Tip:Use the same procedure described for the LH side.
- Click here
REMOVE FOG LIGHT COVER LH
-
except Sport Package:
-
Detach the 5 claws and remove the fog light cover LH.
-
-
for Sport Package:
-
Remove the screw.
-
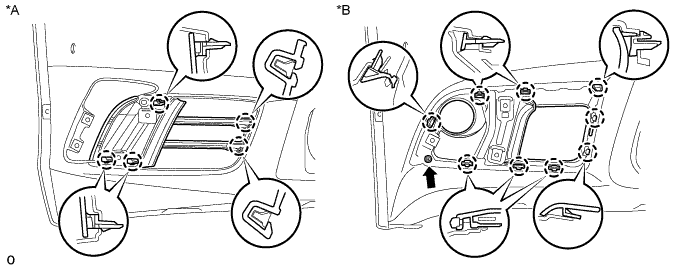
Detach the 9 claws and remove the fog light cover LH.
Table 1. Text in Illustration *A except Sport Package *B for Sport Package
-
-
- Click here
REMOVE FOG LIGHT COVER RH
Tip:Use the same procedure described for the LH side.
- Click here
REMOVE FRONT BUMPER EXTENSION MOUNTING BRACKET
-
for Type A:
-
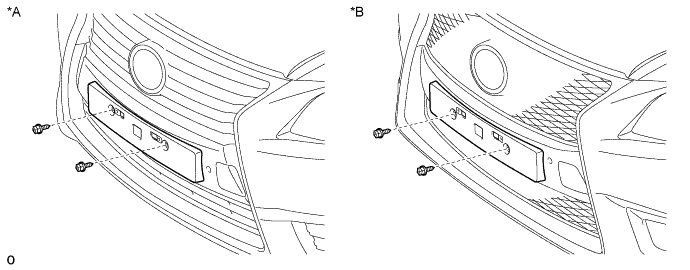
Remove the 2 screws and front bumper extension mounting bracket.
Table 2. Text in Illustration *A except Sport Package *B for Sport Package
-
-
for Type B:
-
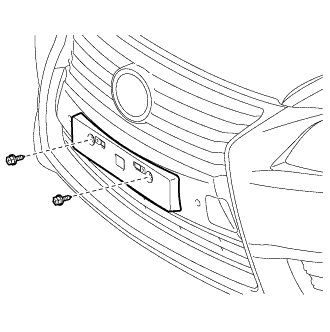
Remove the 2 screws and front bumper extension mounting bracket.
-
-
- Click here
REMOVE FRONT BUMPER LOWER COVER
-
Detach the 2 claws and front bumper lower cover.
-
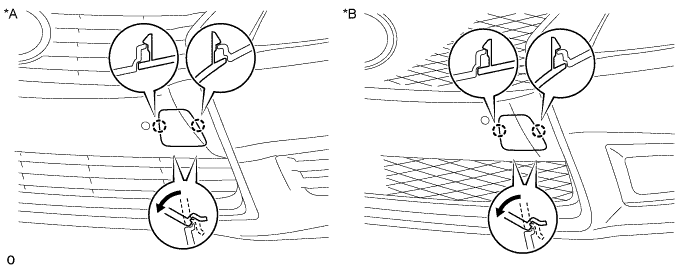
Rotate the cover forward as shown in the illustration.
Table 3. Text in Illustration *A except Sport Package *B for Sport Package
-
- Click here
REMOVE RADIATOR GRILLE
- Click here
REMOVE LOWER NO. 1 RADIATOR GRILLE
-
except Sport Package:
-
Detach the 17 claws and remove the lower No. 1 radiator grille.
-
-
for Sport Package:
-
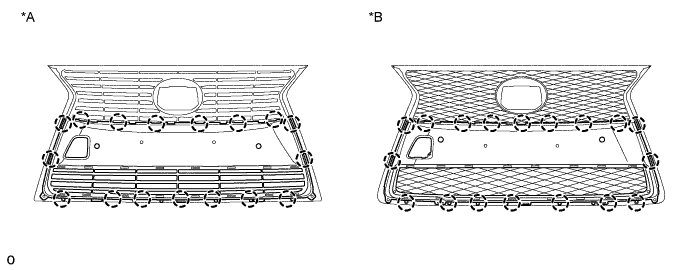
Detach the 18 claws and remove the lower No. 1 radiator grille.
Table 4. Text in Illustration *A except Sport Package *B for Sport Package
-
-