STEREO JACK ADAPTER ASSEMBLY REMOVAL

Tech Tips
-
Use the same procedure for RHD and LHD vehicles.
-
The procedure listed below is for LHD vehicles.
-
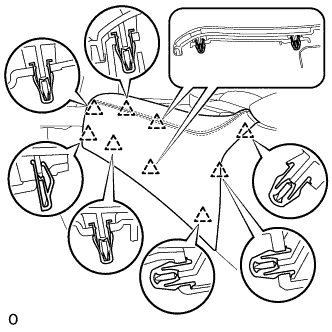
REMOVE INSTRUMENT PANEL FINISH PANEL END LH
-
Pull the front part of the instrument panel finish panel end LH to detach the 6 clips.
-
Pull the instrument panel finish panel end LH to detach 3 clips and remove the instrument panel finish panel end LH.
-
-
REMOVE INSTRUMENT PANEL FINISH PANEL END RH
Tech Tips
Use the same procedure described for the LH side.
-
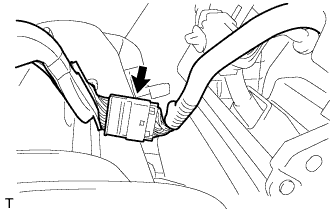
REMOVE SHIFT LEVER KNOB SUB-ASSEMBLY

-
Twist the shift lever knob sub-assembly in the direction indicated by the arrow and remove it.
-
-
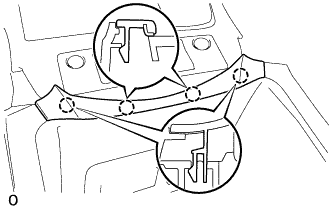
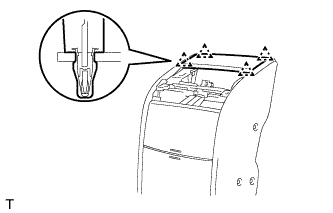
REMOVE NO. 3 BOX PANEL
-
Detach the 4 claws and remove the No. 3 box panel.
-
-
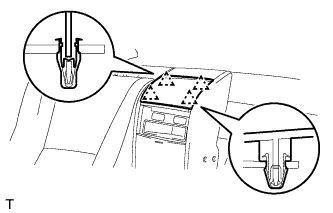
REMOVE UPPER REAR CONSOLE PANEL SUB-ASSEMBLY
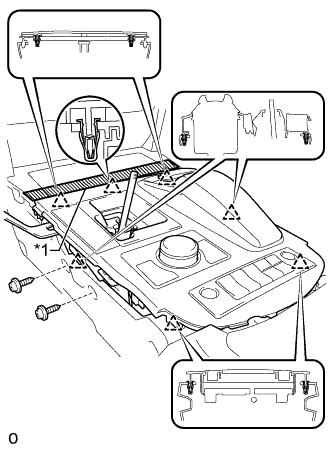
Text in Illustration *1 Protective Tape
-
Apply protective tape as shown in the illustration.
-
Move the shift lever to N.
-
Remove the 2 screws.
-
Detach the 6 clips and remove the upper rear console panel sub-assembly.
-
Disconnect each connector and detach each wire harness clamp.
-
-
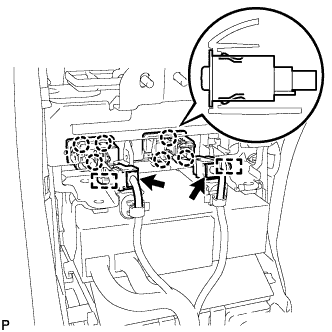
REMOVE NO. 1 STEREO JACK ADAPTER ASSEMBLY
-
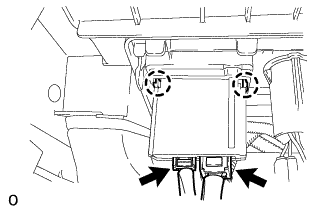
Disconnect the 2 connectors.
-
Detach the 2 claws and remove the No. 1 stereo jack adapter assembly.
-
-
REMOVE REAR CENTER SEAT CUSHION ASSEMBLY (for Power Seat, for 5-Passenger with Ottoman)
-
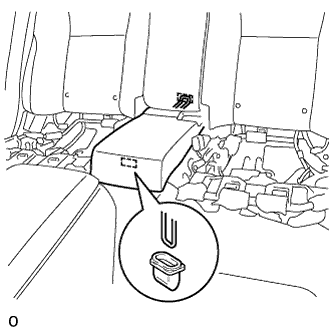
Detach the front hook of the rear center seat cushion assembly from the vehicle body.
Note
The rear center seat cushion assembly deforms easily. To avoid deforming the rear center seat cushion assembly, place your hands near the hook and then pull up on the rear center seat cushion assembly.
-
Detach the rear hook of the rear center seat cushion assembly to remove the rear center seat cushion assembly from the center seatback frame sub-assembly.
Note
Be careful not to damage the vehicle body.
-
-
REMOVE REAR SEAT CENTER ARMREST ASSEMBLY (for Power Seat, for 5-Passenger with Ottoman)
-
Lower the rear seat center armrest assembly.
-
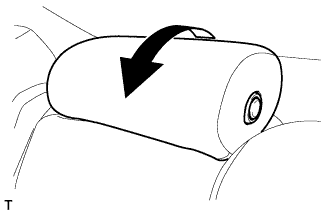
Raise the rear center seat headrest assembly.
-
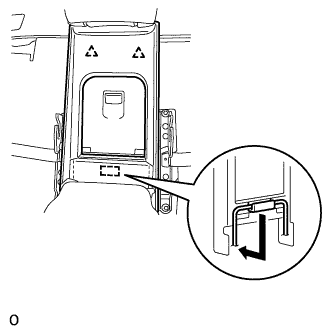
Detach the 2 clips.
-
Detach the hook by lowering the rear seat armrest hole board, and remove it.
-

Remove the 2 bolts and nut.
-
Disconnect the 2 connectors to remove the rear seat center armrest assembly.
Note
Be careful not to damage the vehicle body.
-
-
REMOVE HEADPHONE TERMINAL (for Power Seat, for 5-Passenger with Ottoman)
-
Disconnect each connector.
-

Using a moulding remover B, detach the 8 claws and remove the bezel.
-
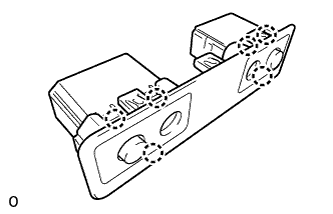
Detach the 6 claws and remove the 2 headphone terminals.
-
-
REMOVE REAR SEAT LOWER CONSOLE BOX COVER (for 4-Passenger with Ottoman)
-

Using a screwdriver, detach the 4 claws, then detach the 2 hooks and remove the rear seat lower console box cover.
Tech Tips
Tape the screwdriver tip before use.
-
-
REMOVE REAR SEAT CONSOLE BOX ASSEMBLY (for 4-Passenger with Ottoman)
-
Using a screwdriver, detach the 4 clips and remove the rear seat console box front panel.
Tech Tips
Tape the screwdriver tip before use.
-

Remove the 4 bolt and service plug cover.
-
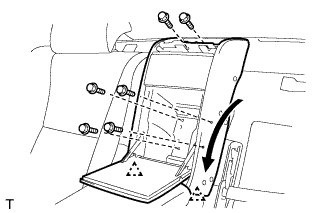
Remove the 6 bolts, and move the rear seat console box assembly in the direction of the arrow shown in the illustration. Then detach the 2 clips, and remove it.
-
Disconnect the connector.
-
-
REMOVE REAR SEAT CONSOLE BOX PANEL (for 4-Passenger with Ottoman)
-
Detach the 4 clips and remove the rear seat console box panel.
-
-
REMOVE HEADPHONE TERMINAL (for 4-Passenger with Ottoman)
-
Disconnect the 2 connectors.
-
Detach the 2 clamps.
-
Detach the 6 claws and remove the 2 headphone terminals.
-