PILLAR SPEAKER (for Quarter) REMOVAL

Tech Tips
-
Use the same procedure for the RH and LH sides.
-
The procedure listed below is for the LH side.
-
PRECAUTION
CAUTION:
After turning the power switch off, waiting time may be required before disconnecting the cable from the auxiliary battery negative (-) terminal. Therefore, make sure to read the disconnecting the cable from the auxiliary battery negative (-) terminal notices before proceeding with work Click here.
-
REMOVE LUGGAGE COMPARTMENT MAT SUB-ASSEMBLY (w/ Spare Tire)

-
REMOVE DECK BOARD ASSEMBLY (w/o Spare Tire)

-
REMOVE DECK TRIM SIDE BOARD LH (w/o Spare Tire)
-

Detach the 2 clips and remove the deck trim side board LH.
-
-
REMOVE BATTERY SERVICE HOLE COVER LH
-

Text in Illustration *A for Standard *B for Ottoman *1 Fastening Tape Detach the clip, fastening tape and remove the battery service hole cover LH.
-
-
DISCONNECT CABLE FROM AUXILIARY BATTERY NEGATIVE TERMINAL
CAUTION:
Wait at least 90 seconds after disconnecting the cable from the auxiliary battery negative (-) terminal to disable the SRS system.
Note
When disconnecting the cable, some systems need to be initialized after the cable is reconnected Click here.
-
REMOVE REAR DOOR SCUFF PLATE LH
-
for Standard Body:
-
for Long Body:
-
-
REMOVE REAR SEAT ASSEMBLY
-
for Power Seat:
-
for Ottoman Seat:
-
for fixed Seat:
-
-
REMOVE REAR SEAT SIDE GARNISH LH
-
Detach the 6 claws and remove the rear seat side garnish LH.
-
-
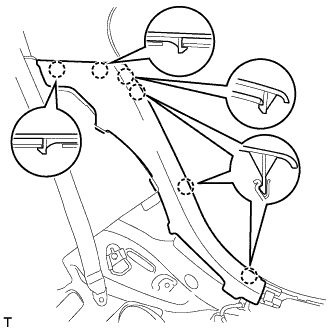
REMOVE INNER ROOF SIDE GARNISH LH
Text in Illustration *1 Clip A
-
Pull the inner roof side garnish LH away from the body to detach the 4 clips (do not detach clip A).
-
Detach the 2 claws of the guide, and pull the inner roof side garnish LH in the direction of the arrow to remove it.
Tech Tips
Clip A remains attached to the body.
-
Remove clip A from the vehicle body.
-
-
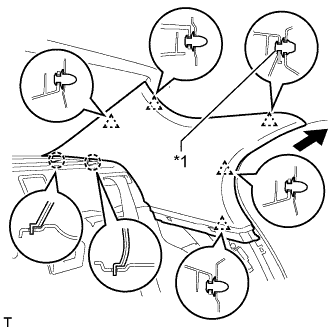
REMOVE REAR HEADER SPEAKER ASSEMBLY (for 19 Speakers)
Note
Do not touch the cone of the speaker.
-

Remove the 2 bolts.
-
Detach the clip, disconnect the speaker connector and remove the rear header speaker assembly.
-