REAR BRAKE DISASSEMBLY

Tech Tips
-
Use the same procedures for the LH side and RH side.
-
The procedures listed below are for the LH side.
-
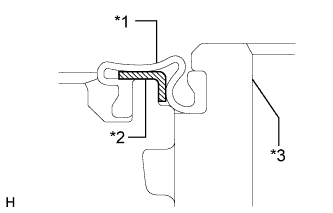
REMOVE CYLINDER BOOT
-
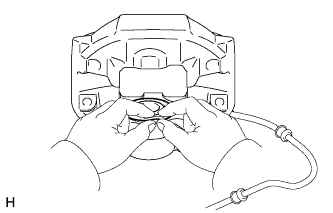
Text in Illustration *1 Cylinder Boot *2 Dust Seal Retainer *3 Rear Disc Brake Piston Remove the 2 cylinder boots from the disc brake caliper.
Tech Tips
If a dust seal retainer comes off the disc brake cylinder or is damaged, replace the rear disc brake cylinder assembly.
Note
Always use your hands to remove the boots. Never use a screwdriver, etc., as the dust seal retainers are easily damaged and may come off.
-
-
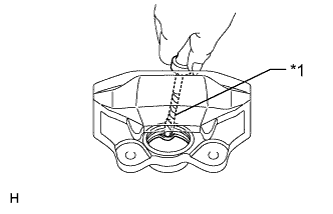
REMOVE REAR DISC BRAKE PISTON
-
Text in Illustration *1 Wooden Plate Install one side of the disc brake pad.
-
Install a wooden plate between the pistons of the disc brake caliper to prevent the pistons from jumping out.
-
Using an air gun, gradually apply air and remove the disc brake piston from the cylinder.
CAUTION:
Do not place your fingers in front of the pistons when using compressed air.
-
Remove the brake pad and wooden plate.
-
Temporarily install the disc brake piston that was removed. Then install the disc brake pad to the side in which the disc brake piston is temporarily installed.
-
Install a wooden plate between the pistons of the disc brake caliper to prevent the pistons from jumping out.
-
Using an air gun, gradually apply air and remove the disc brake piston from the other side of the cylinder.
-
-
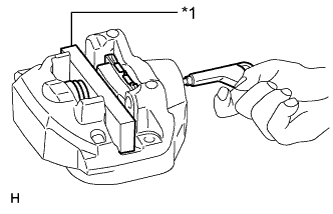
REMOVE PISTON SEAL
-
Text in Illustration *1 Protective Tape Using a screwdriver, remove the 2 piston seals from the disc brake caliper.
Tech Tips
Tape the screwdriver tip before use.
Note
Do not damage the inner cylinder and cylinder groove.
-
-
REMOVE REAR DISC BRAKE BLEEDER PLUG CAP
-
REMOVE REAR DISC BRAKE BLEEDER PLUG