ELECTRICAL KEY OSCILLATOR (for Luggage Compartment) REMOVAL

-
REMOVE LUGGAGE COMPARTMENT MAT SUB-ASSEMBLY

-
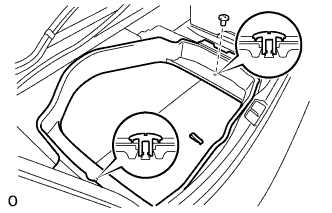
REMOVE DECK TRIM SIDE BOARD LH (w/o Spare Tire)
-

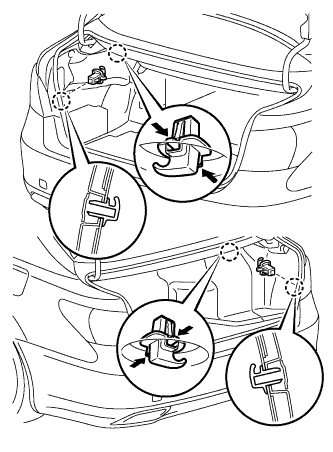
Detach the 2 clips and remove the deck trim side board LH.
-
-
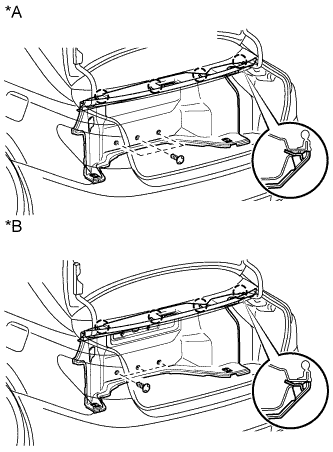
REMOVE DECK TRIM SIDE BOARD RH (w/o Spare Tire)
-
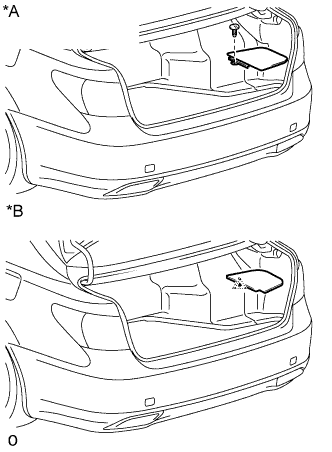
Text in Illustration *A w/ Spare Tire *B w/o Spare Tire w/ Spare Tire:
-
Remove the clip.
-
Remove the deck trim side board RH.
-
-
w/o Spare Tire:
-
Detach the clip and remove the deck trim side board RH.
-
-
-
REMOVE DECK BOARD ASSEMBLY (w/o Spare Tire)

-
REMOVE BATTERY SERVICE HOLE COVER LH
-

Text in Illustration *A for Standard *B for Ottoman *1 Fastening Tape Detach the clip, fastening tape and remove the battery service hole cover LH.
-
-
REMOVE ROPE HOOK
-
Remove the 4 rope hooks by pushing the claws in the direction of the arrows in the illustration.
-
-
REMOVE ROPE HOOK ASSEMBLY
-
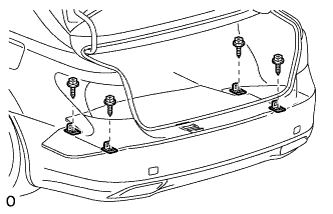
Remove the 4 bolts and 4 rope hook assemblies.
-
-
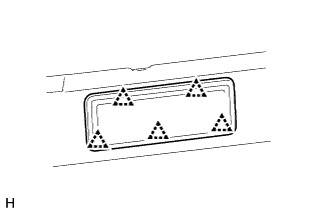
REMOVE NO. 1 LUGGAGE COMPARTMENT LIGHT ASSEMBLY
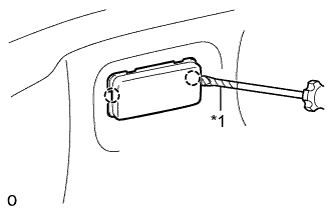
Text in Illustration *1 Protective Tape
-
Using a screwdriver, detach the 2 claws and remove the No. 1 luggage compartment light assembly.
Tech Tips
Tape the screwdriver tip before use.
-
Disconnect the connector.
-
-
REMOVE NO. 1 COOLER COVER (w/ Rear Cooler)
-
Detach the 5 clips and remove the No. 1 cooler cover.
-
-
REMOVE FRONT LUGGAGE COMPARTMENT TRIM COVER
-
Text in Illustration *A w/o Rear Cooler *B w/ Rear Cooler Remove the 3 clips.
-
Detach the 4 claws and remove the front luggage compartment trim cover.
-
-
REMOVE TOOL BOX (w/o Spare Tire)
-
Remove the 2 clips and tool box.
-
-
REMOVE NO. 2 SPARE WHEEL GUARD SUB-ASSEMBLY
-
Remove the clip and wheel guard.
-
-
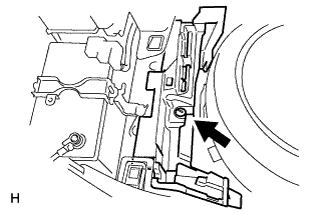
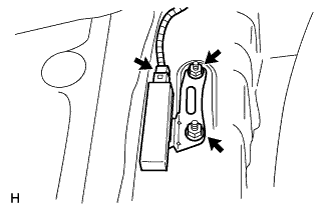
REMOVE INDOOR ELECTRICAL KEY OSCILLATOR
-
Disconnect the connector.
-
Remove the 2 nuts and indoor electrical key oscillator.
-