WATER PUMP WITH MOTOR REMOVAL

-
REMOVE ENGINE ROOM SIDE COVER RH
-
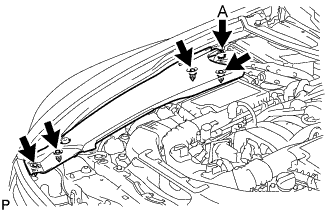
for LHD:
Remove the 5 clips and engine room side cover RH.
Note
Remove the clip labeled A by turning it to prevent the engine room side cover RH and bracket from being damaged.
Tech Tips
The clip labeled A cannot be removed from the engine room side cover RH.
-
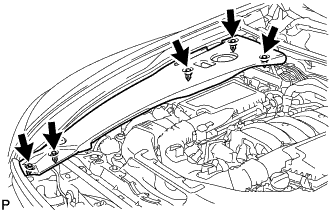
for RHD:
Remove the 5 clips and engine room side cover RH.
-
-
REMOVE ENGINE ROOM SIDE COVER LH
-

for LHD:
Remove the 5 clips and engine room side cover LH.
-
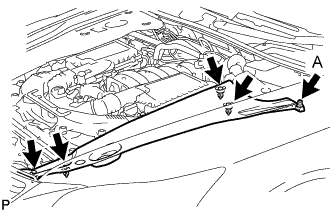
for RHD:
Remove the 5 clips and engine room side cover LH.
Note
Remove the clip labeled A by turning it to prevent the engine room side cover LH and bracket from being damaged.
Tech Tips
The clip labeled A cannot be removed from the engine room side cover LH.
-
-
REMOVE FRONT CENTER FLOOR COVER
-
Remove the 3 screws, 2 bolts, clip and front center floor cover.
-
-
REMOVE NO. 1 ENGINE UNDER COVER
-
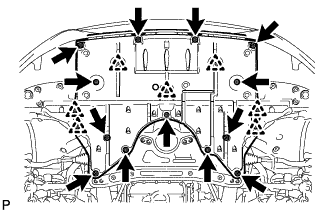
Remove the 13 screws, 7 clips and No. 1 engine under cover.
-
-
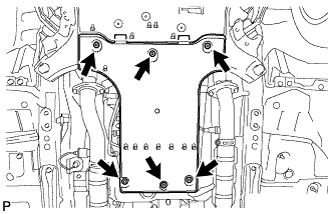
REMOVE FRONT LOWER SUSPENSION MEMBER PROTECTOR
-
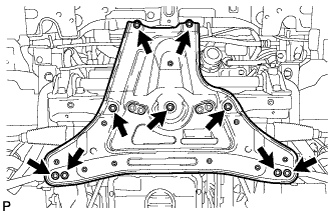
Remove the 9 bolts and front lower suspension member protector.
-
-
DRAIN COOLANT (for Inverter)
Note
-
Do not reuse the drained coolant because it may contain foreign objects.
-
Collect the drained coolant and measure its volume to establish a benchmark. When adding coolant, make sure to add more coolant than the measured amount.
-
Remove the inverter reserve tank cap.
CAUTION:
To avoid the danger of being burned, do not remove the inverter reserve tank cap while the coolant for the inverter is still hot.
Note
Do not remove the plug from the tube.
-
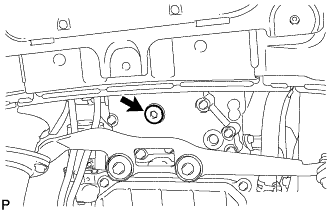
Using a hexagon wrench 10 mm, remove the drain plug indicated in the illustration and drain the coolant.
CAUTION:
Use caution when handling coolant immediately after driving or in summer because it may be hot.
-
Using a hexagon wrench 10 mm, install the drain plug with a new gasket.
- Torque:
- 39 N*m { 400 kgf*cm, 29 ft.*lbf }
-
Measure the volume of the drained coolant.
-
-
REMOVE WATER PUMP WITH MOTOR AND BRACKET ASSEMBLY
-
Disconnect the water pump connector.
Note
Wrap the connectors of the vehicle wire harness and the water pump with motor and bracket assembly to prevent coolant from contaminating the connectors.
-
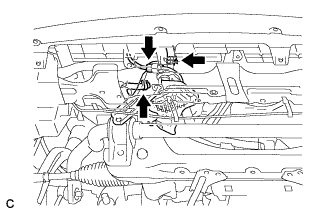
Remove the 2 clips and disconnect the 2 water pump hoses.
Note
Apply insulating tape to the pipe and in the disconnected hose or cover the pipe and hose with plastic bags to prevent entry of foreign matter.
-
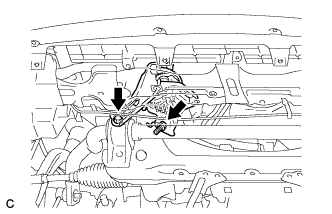
Remove the 2 bolts and water pump with motor and bracket assembly.
-