COOLING FAN MOTOR INSTALLATION

-
CONFIRM INDICATION MARK
-
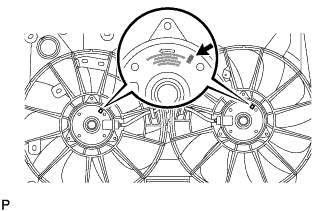
Confirm the indication mark of the cooling fan module.
-
-
INSTALL NO. 2 COOLING FAN MOTOR
-
Install the No. 2 cooling fan motor with the 3 screws.
- Torque:
- 3.9 N*m { 40 kgf*cm, 35 in.*lbf }
-
Connect the connector.
-
-
INSTALL COOLING FAN MOTOR
-
Install the cooling fan motor with the 3 screws.
- Torque:
- 3.9 N*m { 40 kgf*cm, 35 in.*lbf }
-
Connect the connector.
-
-
INSTALL NO. 2 FAN
-
Install the No. 2 fan with the nut.
- Torque:
- 6.3 N*m { 64 kgf*cm, 56 in.*lbf }
-
-
INSTALL FAN
-
Install the fan with the nut.
- Torque:
- 6.3 N*m { 64 kgf*cm, 56 in.*lbf }
-
-
CHECK COOLING FAN MOTOR OPERATION
-
Check that each fan rotates smoothly by hand.
-
Connect the battery to the fan motor connector.
-
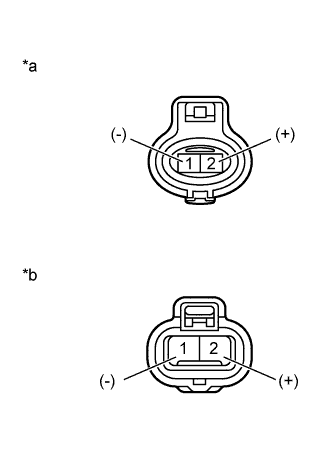
Text in Illustration *a Component without harness connected
(Cooling Fan Motor)
*b Component without harness connected
(No. 2 Cooling Fan Motor)
for Indication Mark M:
-
Text in Illustration *a Component without harness connected
(No. 2 Cooling Fan Motor)
*b Component without harness connected
(Cooling Fan Motor)
for Indication Mark L:
-
-
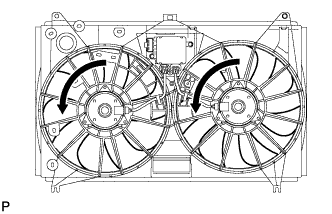
Check that each fan rotates smoothly, and check the motor rotation direction.
Note
Make sure there are no malfunction noises or vibrations while the motor is rotating.
Tech Tips
Be careful if the positive and negative terminals of the battery are mistakenly connected to the connector in reverse, as the motor will operate in the opposite direction.
-
-
INSTALL FAN SHROUD WITH FAN AND MOTOR
-
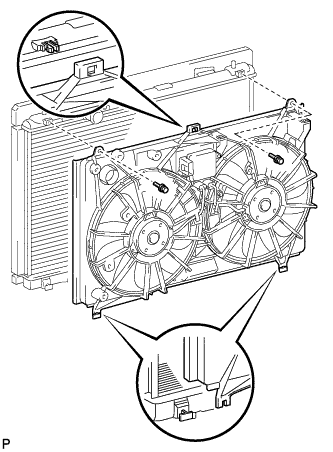
Set the fan shroud with fan and motor to the radiator assembly, and attach the claw.
-
Install the fan shroud with fan and motor with the 2 bolts.
- Torque:
- 7.1 N*m { 72 kgf*cm, 63 in.*lbf }
-
-
INSTALL RADIATOR ASSEMBLY