CANISTER REMOVAL

-
REMOVE FLOOR NO. 1 UNDER COVER
-
Detach the 2 hole plugs.
-
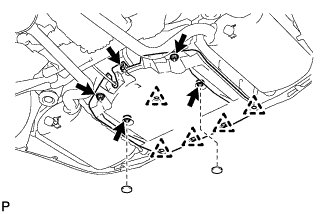
Remove the 5 nuts, 5 clips and under cover.
-
-
REMOVE CANISTER
-
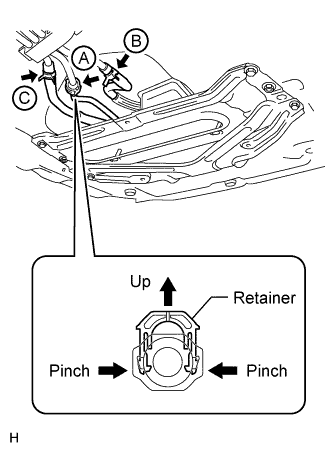
Disconnect the fuel tank vent hose labeled A shown in the illustration.
-
Pinch the retainer and then raise it.
Tech Tips
Do not remove the retainer.
Note
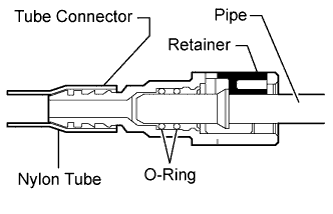
-
Do not use any tools in this procedure.
-
Check for any dirt and foreign matter contamination in the valve and around the connector. Clean if necessary. Foreign matter may damage the O-rings or cause leaks in the seal between the valve and connector.
-
Do not allow any scratches or foreign objects on the parts when disconnecting the tube.
-
Do not forcibly bend, twist or turn the nylon tube.
-
Protect the disconnected part by covering it with a plastic bag after disconnecting the tube.
-
If the tube connector and pipe are stuck, push and pull to release them.
-
-
-
Disconnect the air inlet line hose labeled B and purge line hose labeled C shown in the illustration.
-
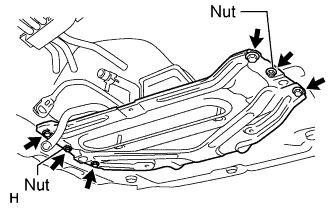
Remove the 4 bolts, 2 plastic nuts and canister.
-
-
REMOVE CANISTER SUPPORT BRACKET
-
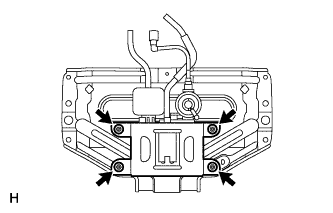
Remove the 4 nuts and canister support bracket.
-