FUEL PUMP (for High Pressure) REMOVAL

Tech Tips
When viewed from the rear of the engine assembly, Bank 1 is on the left side and Bank 2 is on the right side.
-
REMOVE FUEL PRESSURE PULSATION DAMPER ASSEMBLY
-
REMOVE NO. 3 FUEL PIPE SUB-ASSEMBLY
-
Disconnect the fuel pump connector.
-
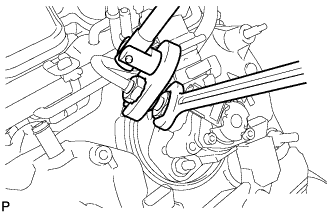
Fix the union bolt on the fuel pump side in place with a 21 mm wrench. Using a 19 mm union nut wrench, loosen the union nut and disconnect the No. 3 fuel pipe sub-assembly from the fuel pump.
Note
Do not loosen the union bolt on the fuel pump side. If the union bolt is accidentally loosened, replace the fuel pump.
-
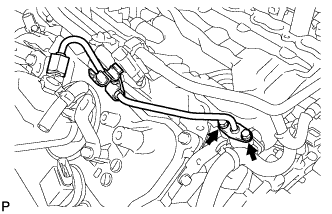
Remove the 2 bolts on the delivery pipe side and remove the No. 3 fuel pipe sub-assembly.
-
Remove the O-ring, backup rings and E-ring from the No. 3 fuel pipe sub-assembly.
-
-
REMOVE NO. 2 FUEL PIPE SUB-ASSEMBLY
Tech Tips
The removal procedures are the same as for the No. 3 fuel pipe sub-assembly.
-
REMOVE FUEL PUMP ASSEMBLY (for Bank 1)
-
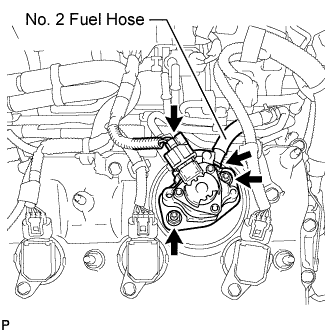
Disconnect the fuel pump connector.
-
Remove the 2 nuts, fuel pump and fuel pump insulator.
-
Disconnect the No. 2 fuel hose from the fuel pump.
-
-
REMOVE FUEL PUMP ASSEMBLY (for Bank 2)
-
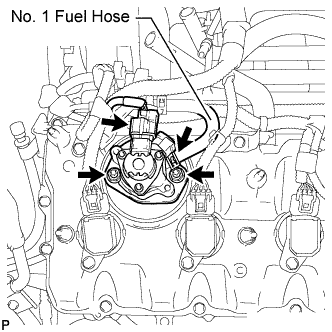
Disconnect the fuel pump connector.
-
Remove the 2 nuts, fuel pump and fuel pump insulator.
-
Disconnect the No. 1 fuel hose from the fuel pump.
-