- Click here
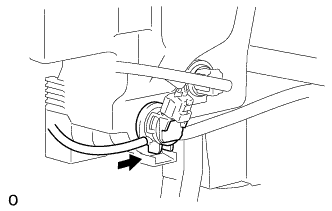
INSTALL HEADLIGHT CLEANER CONTROL RELAY
-
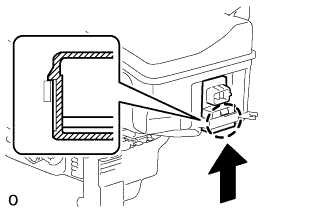
Attach the claw to install the headlight cleaner control relay.
-
- Click here
INSTALL HEADLIGHT CLEANER MOTOR AND PUMP ASSEMBLY
-
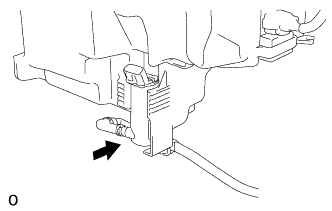
Install the headlight cleaner motor and pump together with the hose.
-
- Click here
INSTALL WINDSHIELD WASHER JAR ASSEMBLY
-

Attach the guide to install the windshield washer jar and pump with the 3 bolts.
5.5 N*m 56 kgf*cm 49 in.*lbf -
Connect the 3 connectors and attach the 4 clamps.
-
- Click here
INSTALL HEADLIGHT ASSEMBLY LH
- Click here
INSTALL WASHER INLET SUB-ASSEMBLY
-
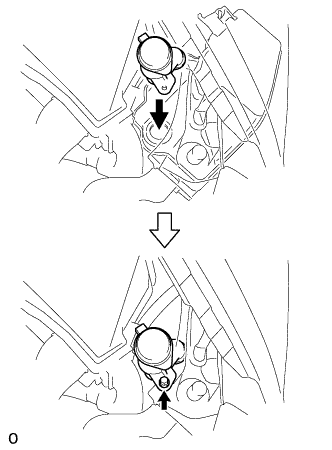
Install the washer inlet with the bolt.
5.5 N*m 56 kgf*cm 49 in.*lbf
-
- Click here
INSTALL WINDSHIELD WASHER MOTOR AND PUMP ASSEMBLY
-
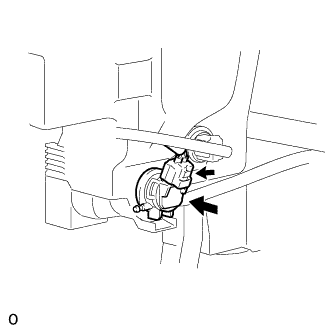
Install the windshield washer motor and pump assembly.
-
Connect the connector.
-
- Click here
FILL WINDSHIELD WASHER JAR AND PUMP ASSEMBLY WITH WASHER FLUID
-
Connect the washer hose to the windshield washer motor and pump, and fill the washer jar with washer fluid.
-
- Click here
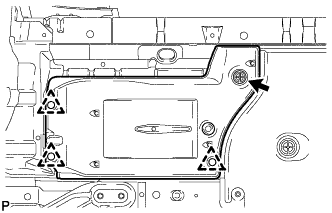
INSTALL FRONT FENDER LINER LH
-
Install the front fender liner LH with the 15 screws and 6 clips.
-
- Click here
INSTALL FRONT FENDER WHEEL OPENING MOULDING LH
-
Attach the clip to install the moulding.
-
Install the 5 screws.
-
- Click here
INSTALL FRONT FENDER MAIN SEAL LH
-
Push in the clip labeled A in the illustration in the upward direction of the vehicle and install the front fender main seal LH with the 3 clips.
-
- Click here
REMOVE FRONT WHEEL LH
119 to 161 N*m 1213 to 1642 kgf*cm 88 to 119 ft.*lbf - Click here
CONNECT CABLE TO AUXILIARY BATTERY NEGATIVE TERMINAL
Note:When disconnecting the cable, some systems need to be initialized after the cable is reconnected (Click here).
- Click here
INSTALL BATTERY SERVICE HOLE COVER LH
-

Attach the battery service hole cover LH with the clip and fastening tape.
Table 1. Text in Illustration *A for Standard *B for Ottoman
-
- Click here
INSTALL DECK TRIM SIDE BOARD LH (w/o Spare Tire)
-

Attach the 2 clips to install the deck trim side board LH.
-
-
Click here
INSTALL DECK BOARD ASSEMBLY (w/o Spare Tire)
-
Click here
INSTALL LUGGAGE COMPARTMENT MAT SUB-ASSEMBLY (w/ Spare Tire)