LIGHTING SYSTEM Clearance Light does not Illuminate
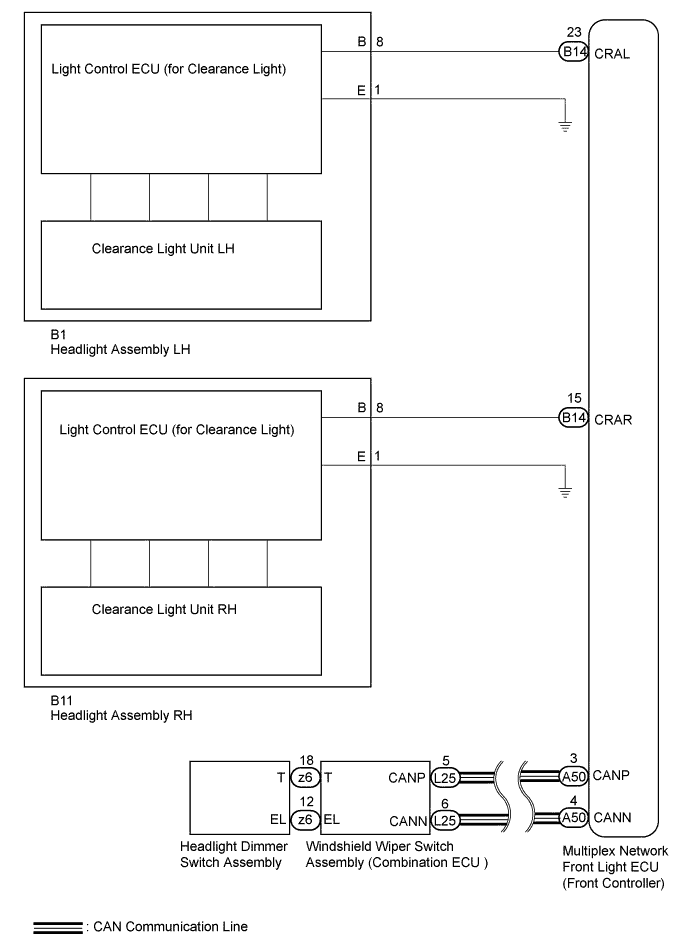
WIRING DIAGRAM

INSPECTION PROCEDURE
Note
-
First perform the communication function inspections in HOW TO PROCEED WITH TROUBLESHOOTING to confirm that there are no CAN communication malfunctions before troubleshooting this symptom.
-
Inspect the fuses for circuits related to this system before performing the following inspection procedure.
PROCEDURE
-
CHECK FOR DTC
-
Check for DTC Click here.
OK DTC B2402 or B2482 output does not occur
NG 
GO TO DIAGNOSTIC TROUBLE CODE CHART Click here
OK 
-
-
READ VALUE USING GTS (HEADLIGHT DIMMER SWITCH)
-
Using the GTS, read the Data List Click here.
Combination Switch Tester Display Measurement Item/Display Normal Condition Diagnostic Note Tail Light Switch Headlight dimmer switch signal (TAIL position)/ON or OFF ON: Headlight dimmer switch TAIL position
OFF: Headlight dimmer switch OFF
- OK Condition sign can be displayed
NG 
INSPECT HEADLIGHT DIMMER SWITCH ASSEMBLY Click here
OK
-
-
CHECK WINDSHIELD WIPER SWITCH (OPERATION)
-
Temporarily replace the windshield wiper switch with a new or normally functioning one Click here.
-
Check the clearance light operation.
OK Clearance light operation is normal
NG
REPLACE MAIN BODY ECU (DRIVER SIDE JUNCTION BLOCK ASSEMBLY)
OK 
END (WINDSHIELD WIPER SWITCH WAS DEFECTIVE)
-
-
INSPECT HEADLIGHT DIMMER SWITCH ASSEMBLY
-
Remove the headlight dimmer switch Click here.
-
Inspect the headlight dimmer switch Click here.
NG
REPLACE HEADLIGHT DIMMER SWITCH ASSEMBLY Click here
OK
REPLACE WINDSHIELD WIPER SWITCH Click here
-