FRONT CRANKSHAFT OIL SEAL REPLACEMENT

-
REMOVE V-RIBBED BELT
-
REMOVE FRONT WHEEL OPENING EXTENSION PAD LH
-

Remove the 5 screws and front wheel opening extension pad LH.
-
-
REMOVE FRONT WHEEL OPENING EXTENSION PAD RH
Tech Tips
Use the same procedure described for the LH side.
-
REMOVE NO. 1 ENGINE UNDER COVER
-
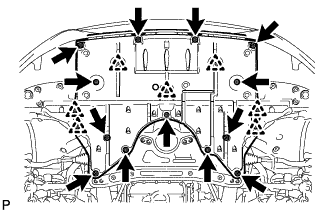
Remove the 13 screws, 7 clips and No. 1 engine under cover.
-
-
REMOVE RESONATOR BRACKET SUB-ASSEMBLY
-

Remove the bolt and resonator bracket sub-assembly.
-
-
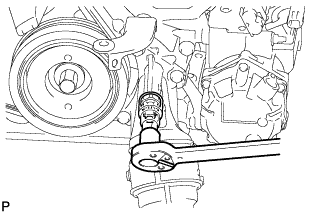
REMOVE ENGINE OIL PRESSURE SWITCH ASSEMBLY
-
Disconnect the switch connector.
-
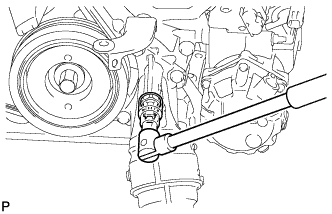
Using a 24 mm deep socket wrench, remove the switch.
-
-
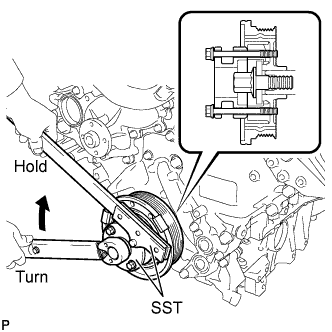
REMOVE CRANKSHAFT PULLEY
-
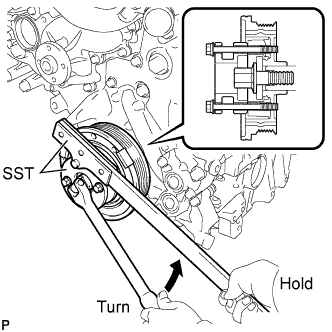
Using SST, loosen the crankshaft pulley set bolt until 2 or 3 threads are engaged.
- SST
- 09213-54015 ( 90119-08216 )
- 09330-00021
-
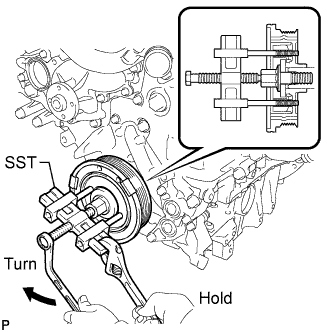
Using the pulley set bolt and SST, remove the crankshaft pulley.
- SST
- 09950-50013 ( 09951-05010, 09952-05010, 09953-05010, 09954-05031 )
-
-
REMOVE CRANKSHAFT TIMING GEAR KEY
-
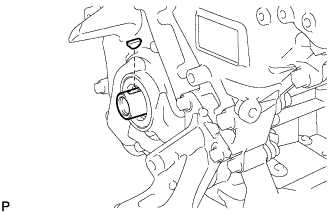
Remove the crankshaft timing gear key from the crankshaft.
-
-
REMOVE FRONT CRANKSHAFT OIL SEAL
-
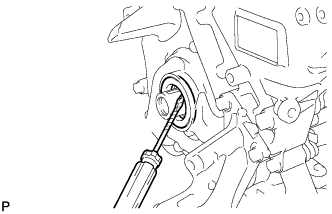
Remove the front crankshaft oil seal with a screwdriver.
Tech Tips
Tape the screwdriver tip before use.
Note
Do not damage the surface of the front crankshaft oil seal press fit hole and crankshaft.
-
-
INSTALL FRONT CRANKSHAFT OIL SEAL
-
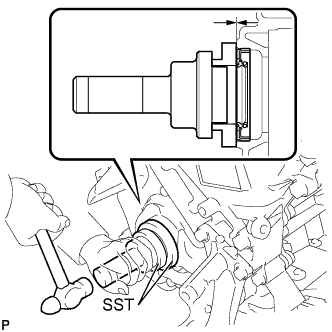
Using SST, tap in a new front crankshaft oil seal until its surface is flush with the timing chain cover edge.
- SST
- 09223-22010
- 09506-35010
Note
-
Keep the lip free from foreign matter.
-
Do not tap the front crankshaft oil seal at an angle.
-
-
INSTALL CRANKSHAFT TIMING GEAR KEY
-
Install the crankshaft timing gear key.
-
-
INSTALL CRANKSHAFT PULLEY
-
Align the pulley set key with the key groove of the pulley, and slide on the pulley.
-
Using SST, install the pulley bolt.
- SST
- 09213-54015 ( 90119-08216 )
- 09330-00021
- Torque:
- 300 N*m { 3059 kgf*cm, 221 ft.*lbf }
-
-
INSTALL ENGINE OIL PRESSURE SWITCH ASSEMBLY
-
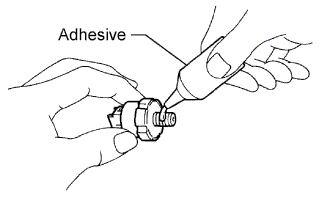
Apply adhesive to 2 or 3 threads of the switch.
Adhesive Toyota Genuine Adhesive 1344, Three Bond 1344 or equivalent -
Using a 24 mm deep socket wrench, install the switch.
- Torque:
- 15 N*m { 153 kgf*cm, 11 ft.*lbf }
Note
Do not start the engine within 1 hour after installation.
-
Connect the switch connector.
-
-
INSTALL RESONATOR BRACKET SUB-ASSEMBLY
-
Install the resonator bracket sub-assembly with the bolt.
- Torque:
- 20 N*m { 204 kgf*cm, 15 ft.*lbf }
-
-
INSTALL NO. 1 ENGINE UNDER COVER
-
Install the No. 1 engine under cover with the 13 screws and 7 clips.
-
-
INSTALL FRONT WHEEL OPENING EXTENSION PAD LH
-
Install the front wheel opening extension pad LH with the 5 screws.
-
-
INSTALL FRONT WHEEL OPENING EXTENSION PAD RH
Tech Tips
Use the same procedure described for the LH side.
-
INSTALL V-RIBBED BELT