SFI SYSTEM, Diagnostic DTC:P0088

| DTC Code | DTC Name |
|---|---|
| P0088 | Fuel Rail / System Pressure - Too High |
DESCRIPTION
Refer to DTC P0087 Click here.
| DTC No. | DTC Detection Condition | Trouble Area |
|---|---|---|
| P0088 | ECM did not command fuel pump for high pressure to open spill valve, but fuel pressure increases 3 MPa (30.6 kgf/cm2, 435 psi) from target pressure for more than 10 seconds (1 trip detection logic) |
|
| There is minimal difference between fuel pressure before and after fuel relief valve operates (2 trip detection logic) |
MONITOR DESCRIPTION
To monitor a high fuel pressure in the direct fuel injection, the ECM measures the fuel pressure using the fuel pressure sensor. If the sensor value is higher than the target fuel pressure value, the ECM interprets this as a malfunction. The ECM illuminates the malfunction indicator lamp (MIL) and sets the diagnosis trouble code (DTC) immediately.
If the sensor value does not vary immediately after the power switch is turned off, the ECM interprets this as a malfunction. When this malfunction is detected in consecutive driving cycles, the ECM illuminates the MIL and sets the DTC.
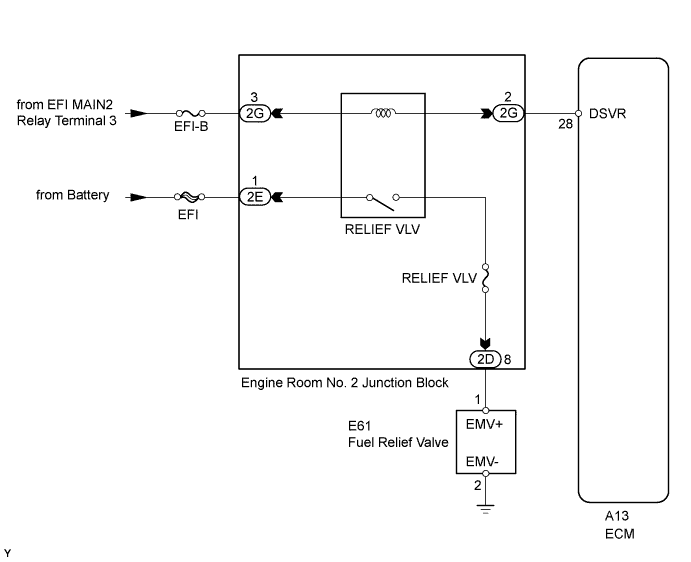
WIRING DIAGRAM
INSPECTION PROCEDURE
Tech Tips
-
Read freeze frame data using the intelligent tester. Freeze frame data records the engine condition when malfunctions are detected. When troubleshooting, freeze frame data can help determine if the vehicle was moving or stationary, if the engine was warmed up or not, if the air-fuel ratio was lean or rich, and other data from the time the malfunction occurred.
-
When viewed from the rear of the engine assembly, Bank 1 is on the left side and Bank 2 is on the right side.
PROCEDURE
-
CHECK OTHER DTCS OUTPUT (IN ADDITION TO DTC P0088)
-
Connect the intelligent tester to the DLC3.
-
Turn the power switch on (IG) and turn the tester ON.
-
Enter the following menus: Powertrain / Engine and ECT / DTC.
-
Read the DTCs using the intelligent tester.
Result Display (DTC output) Proceed to P0088 A P0088 and other DTCs B Tech Tips
If any codes other than P0088 are output, perform troubleshooting for those DTCs first.
B 
GO TO DTC CHART Click here
A 
-
-
PERFORM ACTIVE TEST USING INTELLIGENT TESTER (FUEL PRESSURE RELIEF VALVE OPEN)
-
Put the engine in inspection mode Click here.
-
Warm up the engine.
-
Connect the intelligent tester to the DLC3.
-
Turn the tester ON.
-
Enter the following menus: Powertrain / Engine and ECT / Data List / Primary / Fuel Press and Coolant Temp and Battery Voltage.
Note
Check that the following conditions are met.
-
Coolant Temp value is 50°C (122°F) or more
-
Battery Voltage value is 10 V or more
-
Fuel Press value is 2000 kPa or more
-
-
Turn the power switch off.
Tech Tips
Before turning the power switch off, write down the Fuel Press value.
-
Wait for 10 seconds.
-
Put the engine in inspection mode Click here.
-
After starting the engine, turn the power switch off within 45 seconds.
-
Wait for 10 seconds. Then turn the power switch on (IG).
-
Enter the following menus: Powertrain / Engine and ECT / Active Test / Fuel Pressure Relief Valve Open / Primary / Fuel Press and Coolant Temp and Battery Voltage.
-
Check if the Fuel Press value is stable.
Tech Tips
Before performing the Active Test, check that the following conditions are met.
-
Coolant Temp value is 50°C (122°F) or more
-
Battery Voltage value is 10 V or more
-
Fuel Press value is 2000 kPa or more
-
-
Set Fuel Pressure Relief Valve Open to ON to open the fuel relief valve.
Note
-
Wait 30 seconds after turning the power switch on (IG). If ON is selected before 30 seconds have passed, the Active Test will not operate.
-
After selecting ON, the Active Test will turn OFF automatically after 2 seconds have passed.
-
After ON is selected, ON will not be operable for 60 seconds.
-
-
After performing the Active Test, check the fuel pressure.

Result Inspection Result Proceed to Fuel pressure drops A Fuel pressure does not change B
B 
INSPECT ECM (DSVR VOLTAGE) Click here
A
-
-
REPLACE FUEL PUMP (for High Pressure of Bank 1 and Bank 2)
-
Replace fuel pump (for High Pressure of Bank 1 and Bank 2) Click here.
NEXT
-
-
CHECK IF DTC OUTPUT REOCCURS (SEE IF DTC P0088 IS OUTPUT AGAIN)
-
Clear DTCs Click here.
-
Put the engine in inspection mode Click here.
-
Connect the intelligent tester to the DLC3.
-
Turn the tester ON.
-
Enter the following menus: Powertrain / Engine and ECT / DTC.
-
Read the DTCs using the intelligent tester.
Result Display (DTC output) Proceed to P0088 A No output B
B
END
A 
REPLACE ECM Click here
-
-
INSPECT ECM (DSVR VOLTAGE)
-
Put the engine in inspection mode Click here.
-
Warm up the engine.
-
Connect the intelligent tester to the DLC3.
-
Turn the tester ON.
-
Enter the following menus: Powertrain / Engine and ECT / Data List / Primary / Fuel Press and Coolant Temp and Battery Voltage.
Note
Check that the following conditions are met.
-
Coolant Temp value is 50°C (122°F) or more
-
Battery Voltage value is 10 V or more
-
Fuel Press value is 2000 kPa or more
-
-
Turn the power switch off.
Tech Tips
Before turning the power switch off, write down the Fuel Press value.
-
Wait for 10 seconds.
-
Put the engine in inspection mode Click here.
-
After starting the engine, turn the power switch off within 45 seconds.
-
Wait for 10 seconds. Then turn the power switch on (IG).
-
Enter the following menus: Powertrain / Engine and ECT / Active Test / Fuel Pressure Relief Valve Open / Primary / Fuel Press and Coolant Temp and Battery Voltage.
-
Check if the Fuel Press value is stable.
Tech Tips
Check that the following conditions are met.
-
Coolant Temp value is 50°C (122°F) or more
-
Battery Voltage value is 10 V or more
-
Fuel Press value is 2000 kPa or more
-
-
Set Fuel Pressure Relief Valve Open to ON to open the fuel relief valve.
Note
-
Wait 30 seconds after turning the power switch on (IG). If ON is selected before 30 seconds have passed, the Active Test will not operate.
-
After selecting ON, the Active Test will turn OFF automatically after 2 seconds have passed.
-
After ON is selected, ON will not be operable for 60 seconds.
-
-
After performing the Active Test, check the ECM voltage.
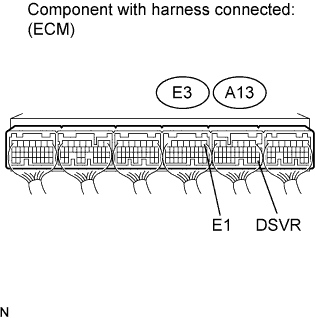
Result Tester Connection Result Proceed to A13-28 (DSVR) - E3-1 (E1) 0 V A Remains between 11 to 14 V B 11 to 14 V → 0 to 3.0 V C
B
REPLACE ECM Click here
C
INSPECT FUSE (RELIEF VLV) Click here
A
-
-
CHECK HARNESS AND CONNECTOR (ENGINE ROOM NO. 2 JUNCTION BLOCK - ECM)
-
Remove the engine room No. 2 junction block.
-
Disconnect the A13 ECM connector.
-
Measure the resistance according to the value(s) in the table below.
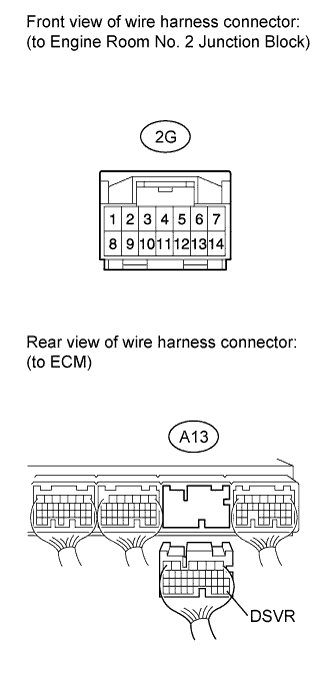
Standard resistance (Check for open) Tester Connection Condition Specified Condition 2G-2 - A13-28 (DSVR) Always Below 1 Ω
NG
REPAIR OR REPLACE HARNESS OR CONNECTOR
OK
-
-
REPLACE ENGINE ROOM NO. 2 JUNCTION BLOCK
NEXT
CONFIRM WHETHER MALFUNCTION HAS BEEN SUCCESSFULLY REPAIRED Click here
-
REPLACE ECM
-
Replace the ECM Click here.
NEXT
CONFIRM WHETHER MALFUNCTION HAS BEEN SUCCESSFULLY REPAIRED Click here
-
-
INSPECT FUSE (RELIEF VLV)
-
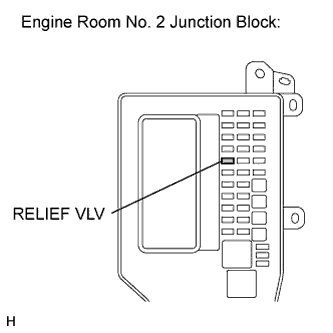
Remove the RELIEF VLV fuse from the engine room No. 2 junction block.
-
Measure the resistance according to the value(s) in the table below.
Standard resistance Tester Connection Condition Specified Condition RELIEF VLV fuse Always Below 1 Ω
NG
CHECK FOR SHORT IN ALL HARNESSES AND CONNECTORS CONNECTED TO FUSE AND REPLACE FUSE
OK
-
-
INSPECT ENGINE ROOM NO. 2 JUNCTION BLOCK (RELIEF VLV RELAY)
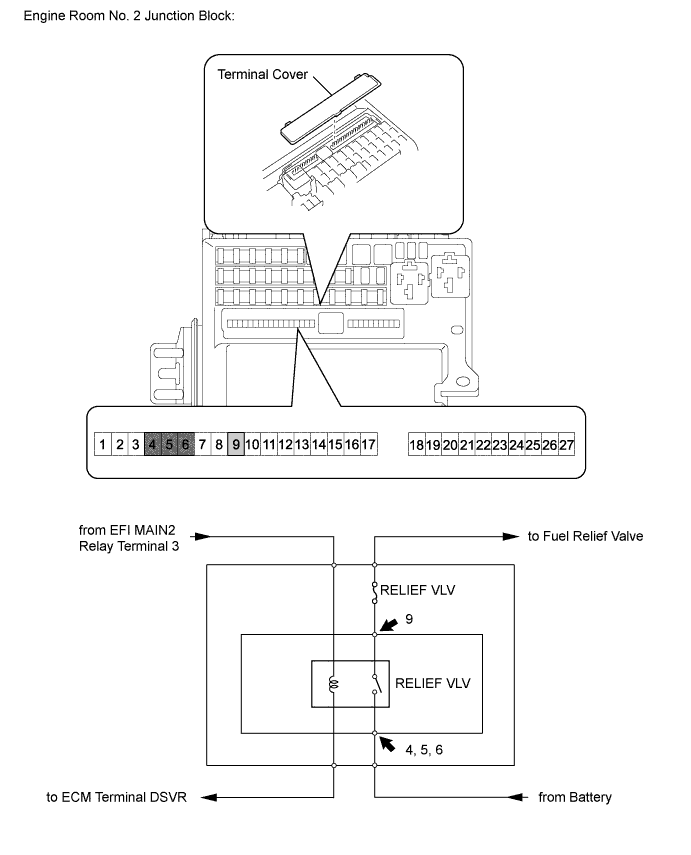
Tech Tips
RELIEF VLV relay cannot be removed and inspected, as it is part of the engine room No. 2 junction block internal circuit.
-
Put the engine in inspection mode Click here.
-
Remove the terminal cover.
-
Measure the voltage according to the value(s) in the table below.
Standard voltage Tester Connection Switch Condition Specified Condition 4 - Body ground Always 11 to 14 V 5 - Body ground Always 11 to 14 V 6 - Body ground Always 11 to 14 V 9 - Body ground Power switch on (READY) → off 0 to 3.0 V → 11 to 14 V (for 3 seconds after power switch turned off)
NG
REPLACE ENGINE ROOM NO. 2 JUNCTION BLOCK
OK
-
-
CHECK HARNESS AND CONNECTOR (ENGINE ROOM NO. 2 JUNCTION BLOCK - FUEL RELIEF VALVE, FUEL RELIEF VALVE - BODY GROUND)
-
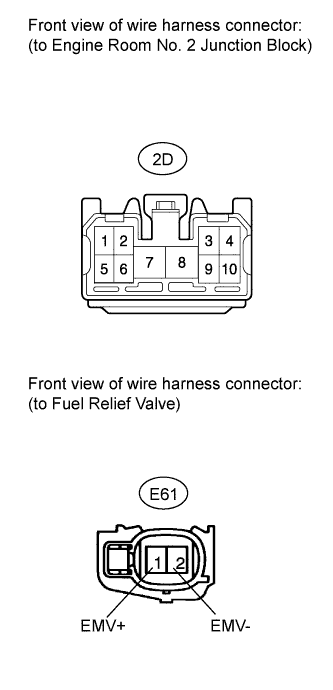
Remove the engine room No. 2 junction block.
-
Disconnect the E61 fuel relief valve connector.
-
Measure the resistance according to the value(s) in the table below.
Standard resistance (Check for open) Tester Connection Condition Specified Condition 2D-8 - E61-1 (EMV+) Always Below 1 Ω E61-2 (EMV-) - Body ground Always Below 1 Ω Standard resistance (Check for short) Tester Connection Condition Specified Condition 2D-8 or E61-1 (EMV+) - Body ground Always 10 kΩ or higher
NG
REPAIR OR REPLACE HARNESS OR CONNECTOR
OK
-
-
REPLACE FUEL RELIEF VALVE
-
Replace fuel relief valve Click here.
NEXT
-
-
CONFIRM WHETHER MALFUNCTION HAS BEEN SUCCESSFULLY REPAIRED
-
Put the engine in inspection mode Click here.
-
Warm up the engine.
-
Connect the intelligent tester to the DLC3.
-
Turn the tester ON.
-
Enter the following menus: Powertrain / Engine and ECT / Data List / Primary / Fuel Press and Coolant Temp and Battery Voltage.
Note
Check that the following conditions are met.
-
Coolant Temp value is 50°C (122°F) or more
-
Battery Voltage value is 10 V or more
-
Fuel Press value is 2 MPa or more
-
-
Turn the power switch off.
Tech Tips
Before turning the power switch off, write down the Fuel Press value.
-
Wait for 10 seconds.
-
Put the engine in inspection mode Click here.
-
After starting the engine, turn the power switch off within 45 seconds.
-
Wait for 10 seconds. Then turn the power switch on (IG).
-
Enter the following menus: Powertrain / Engine and ECT / Active Test / Fuel Pressure Relief Valve Open / Primary / Fuel Press and Coolant Temp and Battery Voltage.
-
Check if the Fuel Press value is stable.
Tech Tips
Before performing the Active Test, check that the following conditions are met.
-
Coolant Temp value is 50°C (122°F) or more
-
Battery Voltage value is 10 V or more
-
Fuel Press value is 2 MPa or more
-
-
Set Fuel Pressure Relief Valve Open to ON to open the fuel relief valve.
Note
-
Wait 30 seconds after turning the power switch on (IG). If ON is selected before 30 seconds have passed, the Active Test will not operate.
-
After selecting ON, the Active Test will turn OFF automatically after 2 seconds have passed.
-
After ON is selected, ON will not be operable for 60 seconds.
-
-
After performing the Active Test, check the fuel pressure.
OK Fuel pressure decreases
NEXT
END
-