HEADLIGHT CLEANER ACTUATOR REMOVAL

-
REMOVE UPPER RADIATOR SUPPORT SEAL
-
Remove the 13 clips and upper radiator support seal.
-
-
REMOVE RADIATOR GRILLE

Text in Illustration *1 Protective Tape
-
Put protective tape around the radiator grille.
-
Remove the 4 screws.
-
Detach the 8 claws and remove the radiator grille.
-
-
REMOVE FRONT BUMPER COVER
-
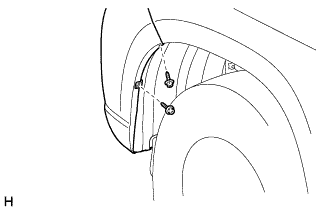
Remove the 2 screws.
Tech Tips
Use the same procedure for the screws on the other side.
-
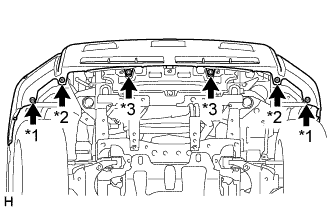
Text in Illustration *1 Screw *2 Bolt A *3 Bolt B Remove the 2 screws.
-
Remove the 2 bolts labeled A and 2 bolts labeled B.
-
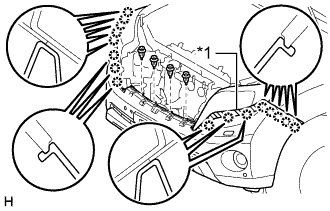
Text in Illustration *1 Protective Tape Put protective tape around the front bumper cover.
-
Remove the 4 clips.
-
Detach the 16 claws and remove the front bumper cover.
Note
Do not hold the middle of the front bumper cover, as it may become reformed.
-
w/ TOYOTA Parking Assist-sensor System, w/ Fog Light:
Disconnect the 3 connectors.
-
w/ TOYOTA Parking Assist-sensor System, w/o Fog Light:
Disconnect the connector.
-
w/o TOYOTA Parking Assist-sensor System, w/ Fog Light:
Disconnect the 2 connectors.
-
w/ Headlight Cleaner System:
Disconnect the No. 1 headlight cleaner hose.
-
-
REMOVE TYPE 1 HEADLIGHT WASHER NOZZLE SUB-ASSEMBLY LH
-
Extend the type 1 headlight washer nozzle sub-assembly LH by hand.
Note
Be careful not to damage the headlight washer actuator sub-assembly or type 1 headlight washer nozzle sub-assembly LH.
-
Detach the claw and remove the type 1 headlight washer nozzle sub-assembly LH.
-
-
REMOVE TYPE 1 HEADLIGHT WASHER NOZZLE SUB-ASSEMBLY RH
Tech Tips
Use the same procedure described for the LH side.
-
REMOVE NO. 1 HEADLIGHT CLEANER HOSE
-
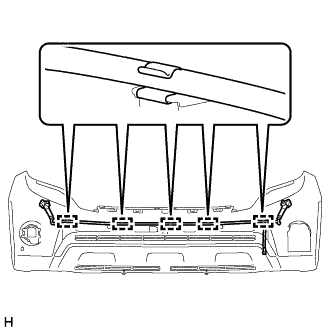
Disconnect the No. 1 headlight cleaner hose from the headlight washer actuator sub-assembly.
-
Detach the 5 clamps and remove the No. 1 headlight cleaner hose from the front bumper cover.
-
-
REMOVE HEADLIGHT WASHER ACTUATOR SUB-ASSEMBLY LH
-
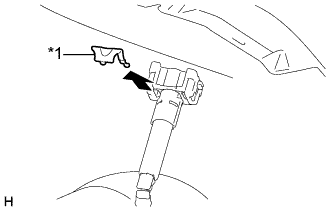
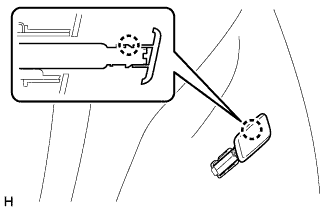
Text in Illustration *1 Headlight Cleaner Clamp Remove the headlight cleaner clamp as shown in the illustration.
-
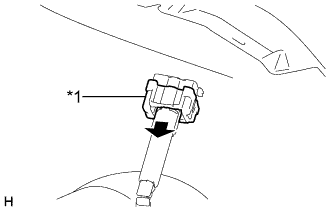
Text in Illustration *1 Headlight Cleaner Clamp B Pull down the headlight cleaner clamp B and remove it.
-
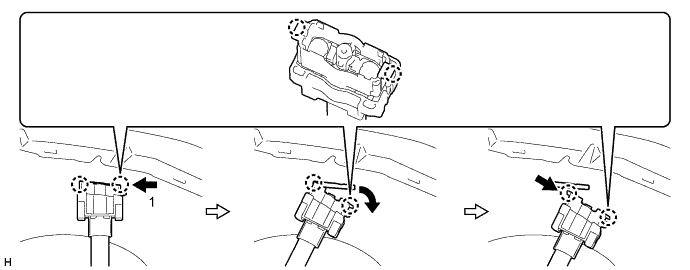
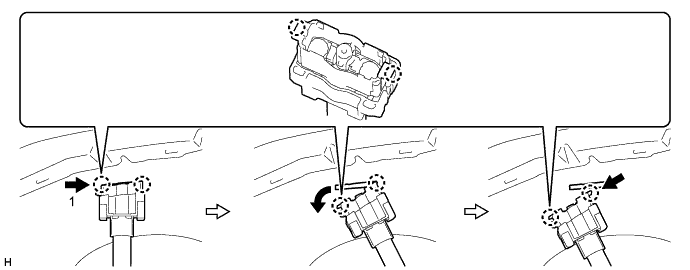
Push the tab shown by arrow 1, detach the 2 claws and remove the headlight washer actuator sub-assembly LH as shown in the illustration.
-
-
REMOVE HEADLIGHT WASHER ACTUATOR SUB-ASSEMBLY RH
-
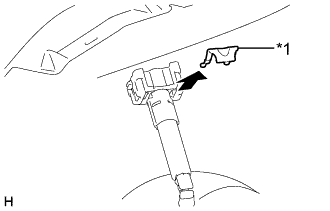
Text in Illustration *1 Headlight Cleaner Clamp Remove the headlight cleaner clamp as shown in the illustration.
-
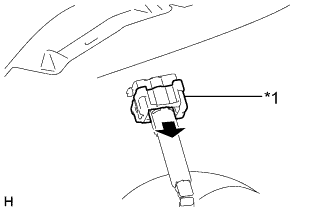
Text in Illustration *1 Headlight Cleaner Clamp A Pull down the headlight cleaner clamp A and remove it.
-
Push the tab shown by arrow 1, detach the 2 claws and remove the headlight washer actuator sub-assembly RH as shown in the illustration.
-