BACK DOOR DISASSEMBLY

-
REMOVE SPARE WHEEL COVER PAD (w/ Back Door Tire Carrier)
-
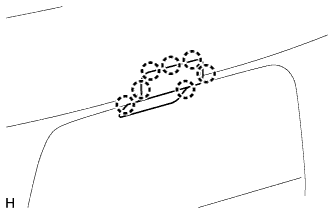
Detach the 7 claws and move the wheel cover pad out of the way.
-
-
REMOVE SPARE WHEEL COVER (w/ Back Door Tire Carrier)
-
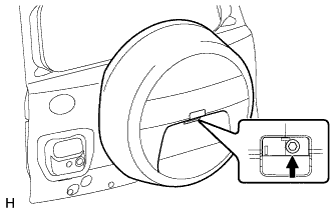
Remove the bolt.
-
Move the lever.
-
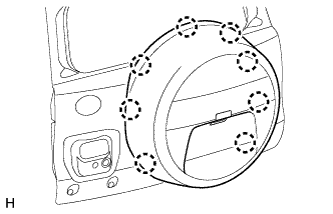
Detach the 8 claws and remove the spare wheel cover.
-
-
REMOVE SPARE TIRE (w/ Back Door Tire Carrier)
-
REMOVE NO. 2 SPARE WHEEL COVER (w/ Back Door Tire Carrier)
-
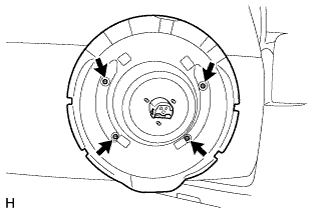
Remove the 4 screws and No. 2 spare wheel cover.
-
-
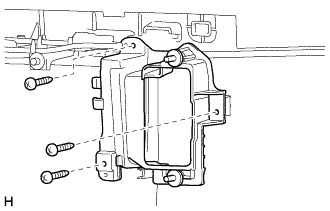
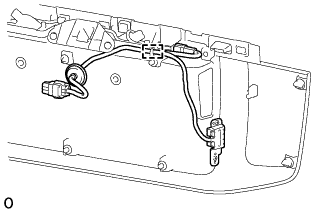
REMOVE TELEVISION CAMERA BRACKET (w/ Back Door Tire Carrier)
-
Disconnect the connector and detach the clamp.
-
Remove the 2 bolts and television camera bracket with rear television camera.
-
-
REMOVE REAR TELEVISION CAMERA ASSEMBLY (w/ Back Door Tire Carrier)

-
Disconnect the connector and remove the rear No. 2 window wire.
-
Remove the bolt and rear television camera.
-
-
REMOVE SPARE WHEEL CARRIER BRACKET SUB-ASSEMBLY (w/ Back Door Tire Carrier)
-
Remove the 2 bolts, 2 nuts and spare wheel carrier bracket sub-assembly.
-
Using E10 "TORX" sockets, remove the 2 stud bolts.
Note
If a stud bolt is deformed or its threads are damaged, replace it.
-
-
REMOVE BACK DOOR CENTER GARNISH
-
Detach the 4 clips and remove the back door center garnish.
-
-
REMOVE BACK DOOR SIDE GARNISH LH
-
Detach the 2 clips and claw and remove the back door side garnish.
-
-
REMOVE BACK DOOR SIDE GARNISH RH
-
Detach the 2 clips and claw and remove the back door side garnish.
-
-
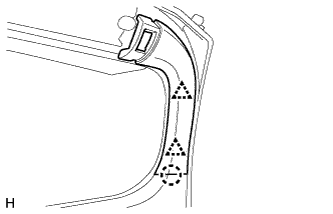
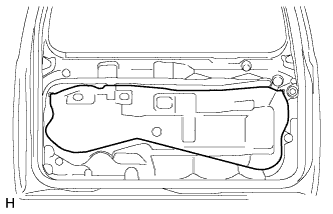
REMOVE BACK DOOR TRIM COVER
-

Remove the back door trim cover as shown in the illustration.
-
-
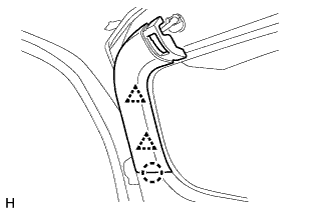
REMOVE UPPER TOOL BOX PANEL SUB-ASSEMBLY
-
Remove the upper tool box panel sub-assembly as shown in the illustration.
-
-
REMOVE TOOL CASE
-
Detach the 2 claws and remove the tool case.
-
-
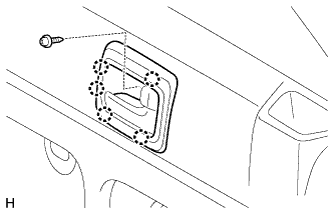
REMOVE BACK DOOR LOCK COVER (w/o Back Door Tire Carrier)
-
Using moulding remover B, detach the clip and 6 claws and remove the back door lock cover.
-
-
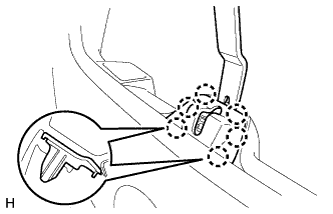
REMOVE BACK DOOR INSIDE HANDLE BEZEL (for Face to Face Seat Type)
-
Remove the screw.
-
Detach the 5 claws and remove the back door inside handle bezel.
-
-
REMOVE BACK DOOR TRIM PANEL ASSEMBLY
-
Detach the claw and remove the cover.
Tech Tips
Tape the screwdriver tip before use.
-
Remove the screw.
-
w/o Back Door Tire Carrier:
-
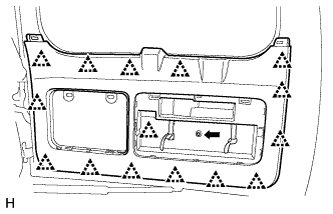
Remove the bolt.
-
Detach the 15 clips and remove the back door trim panel assembly.
-
-
w/ Back Door Tire Carrier:
-
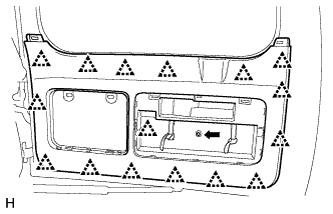
Remove the bolt.
-
Detach the 16 clips and remove the back door trim panel assembly.
-
-
for Face to Face Seat Type:
-
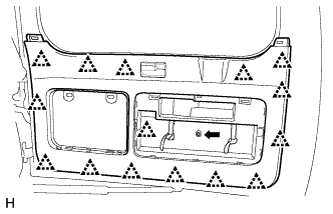
Remove the screw and bolt.
-
Detach the 15 clips and remove the back door trim panel assembly.
-
-
-
REMOVE BACK DOOR INSIDE HANDLE SUB-ASSEMBLY (for Face to Face Seat Type)
-
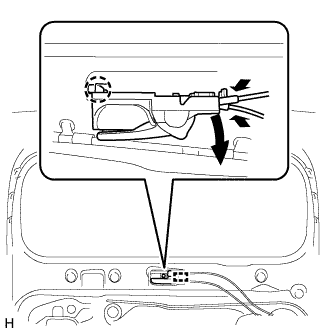
Detach the guide.
-
Detach the claws and remove the inside handle sub-assembly.
-
Disconnect the 2 cables from the inside handle sub-assembly.
-
-
REMOVE TOOL BOX BRACKET
-
Remove the 4 bolts and 2 tool box brackets.
-
-
REMOVE BACK DOOR SERVICE HOLE COVER
-
Remove the service hole cover.
-
-
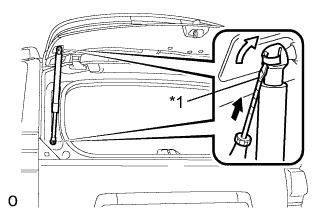
REMOVE BACK DOOR OUTSIDE HANDLE LH
-
w/ Back Door Tire Carrier:
-
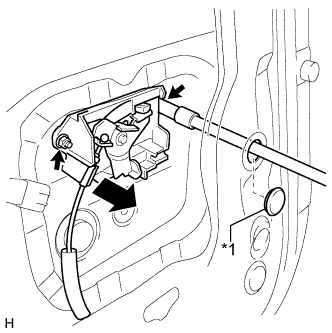
Text in Illustration *1 Hole Plug Remove the hole plug.
-
Remove the 2 nuts and back door outside handle.
-
Disconnect the cable.
-
-
w/o Back Door Tire Carrier:
-
Remove the 2 nuts and back door outside handle.
-
Disconnect the cable.
-
-
-
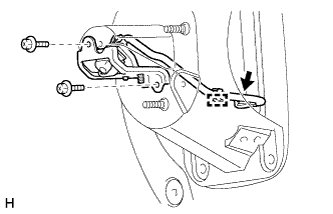
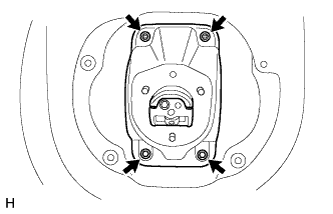
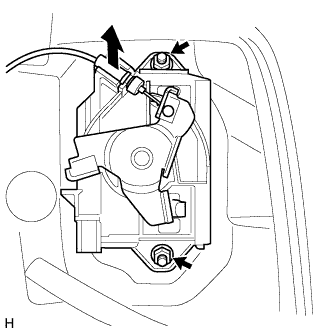
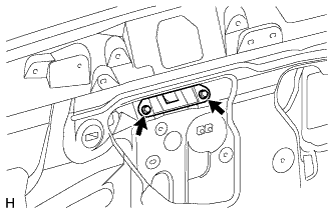
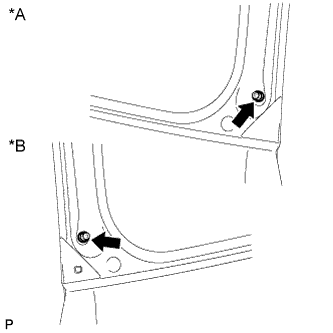
REMOVE BACK DOOR LOCK ASSEMBLY
-
Disconnect the connector.
-
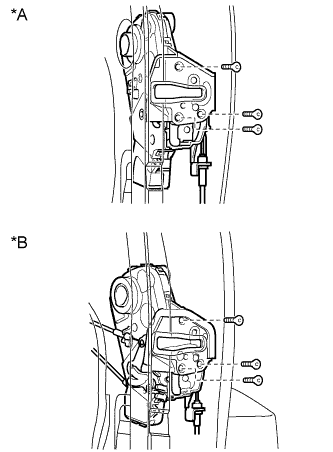
Text in Illustration *A for Standard Type *B w/ Back Door Tire Carrier, for Face to Face Seat Type Using a T30 "TORX" wrench, remove the 3 screws.
Note
Be careful when removing the bolts as the door lock may fall and become damaged.
-
Disconnect the cable and remover the back door lock assembly.
-
Remove the door lock wiring harness seal from the back door lock assembly.
-
-
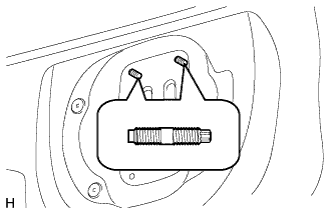
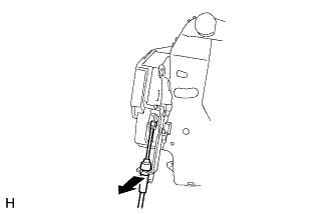
REMOVE BACK DOOR LOCK CONTROL CABLE ASSEMBLY
-
Disconnect the cable.
-
-
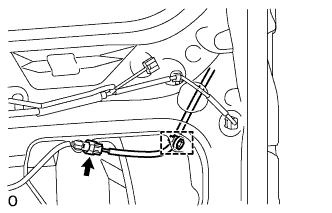
REMOVE REAR NO. 1 WINDOW WIRE (w/ Back Door Tire Carrier)
-
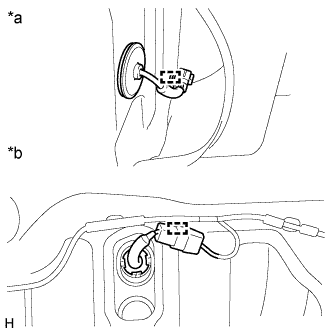
Text in Illustration *a Outer Side *b Inner Side Disconnect the connector.
-
Detach the 2 clamps and remove the rear No. 1 window wire.
-
-
REMOVE REAR TELEVISION CAMERA ASSEMBLY (w/o Back Door Tire Carrier)
-
Disconnect the connector.
-
Remove the 2 bolts and rear television camera.
-
-
REMOVE NO. 2 BACK DOOR GARNISH RETAINER (w/o Rear View Monitor System)
-
w/o Back Door Tire Carrier:
-
Remove the 2 screws and No. 2 back door garnish retainer.
-
-
-
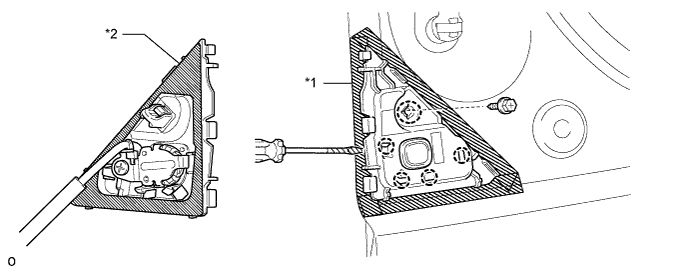
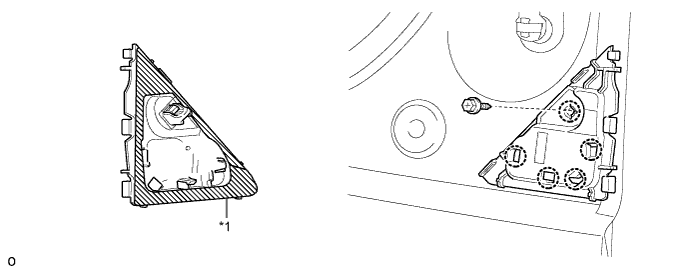
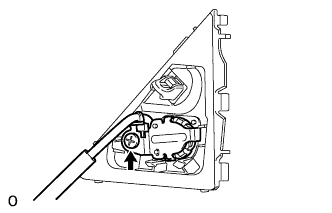
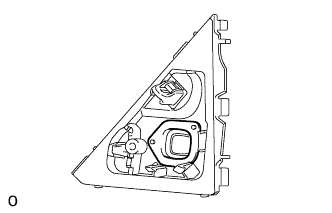
REMOVE LOWER BACK DOOR OUTSIDE GARNISH MOULDING LH (w/o Back Door Tire Carrier)
Text in Illustration *1 Protective Tape
-
Using a screwdriver, detach the 5 claws and remove the outside garnish moulding.
Tech Tips
Tape the screwdriver tip before use.
-
-
REMOVE LOWER BACK DOOR OUTSIDE GARNISH MOULDING RH (w/o Back Door Tire Carrier)
-
Detach the 5 claws and remove the moulding.
-
-
REMOVE LOWER BACK DOOR GARNISH SUB-ASSEMBLY OUTSIDE LH (w/o Back Door Tire Carrier)
-
Disconnect the connector and detach the clamp.
-
Remove the screw.
-
Detach the double-sided tape.
-
Using a screwdriver, detach the 5 claws and remove the outside garnish.
Note
Be careful not to damage the vehicle body.
Text in Illustration *1 Protective Tape *2 Double-sided Tape
-
-
REMOVE LOWER BACK DOOR GARNISH SUB-ASSEMBLY OUTSIDE RH (w/o Back Door Tire Carrier)
-
Remove the screw.
Text in Illustration *1 Double-Sided Tape - - -
Detach the 4 claws and remove the lower door garnish sub-assembly outside.
-
-
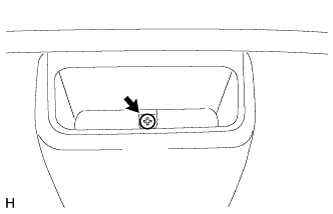
REMOVE GLASS HATCH OPENER SWITCH ASSEMBLY (w/o Back Door Tire Carrier)
-
Remove the screw and opener switch.
-
-
REMOVE SWITCH COVER (w/o Back Door Tire Carrier)
-
Remove the switch cover.
-
-
REMOVE NO. 2 BACK DOOR WEATHERSTRIP (w/o Back Door Tire Carrier)
-
Remove the No. 2 back door weatherstrip.
-
-
REMOVE BACK DOOR SIDE FEMALE STOPPER SUB-ASSEMBLY LH
-

Remove the 2 bolts and back door side female stopper sub-assembly.
-
-
REMOVE BACK DOOR NO. 2 STOPPER CUSHION
-
Remove the back door No. 2 stopper cushion.
-
-
REMOVE BACK DOOR NO. 1 STOPPER
-
Using a clip remover, detach the 2 claws and remove the back door No. 1 stopper.
-
-
REMOVE BACK DOOR PANEL CUSHION (w/o Back Door Tire Carrier)
-
Remove the 4 back door panel cushions.
-
-
REMOVE BACK WINDOW LOCK ASSEMBLY (w/o Back Door Tire Carrier)
-
Disconnect the connector.
-
Remove the 3 bolts and back window lock assembly.
-
-
REMOVE REAR NO. 1 SPOILER COVER (w/o Back Door Tire Carrier)
Text in Illustration *1 Fastening Tape
-
Detach the fastening tape and 5 clips and remove the rear No. 1 spoiler cover.
-
-
REMOVE REAR SPOILER COVER RH
Text in Illustration *1 Fastening Tape
-
Detach the fastening tape and 5 clips and remove the rear No. 1 spoiler cover.
-
-
REMOVE REAR SPOILER SUB-ASSEMBLY
-
w/o Back Door Tire Carrier:
Remove the rear spoiler sub-assembly Click here.
-
w/ Back Door Tire Carrier:
Remove the rear spoiler sub-assembly Click here.
-
-
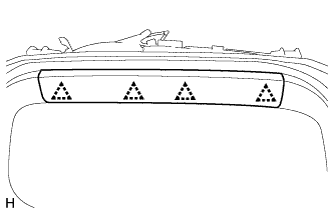
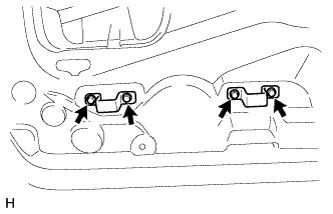
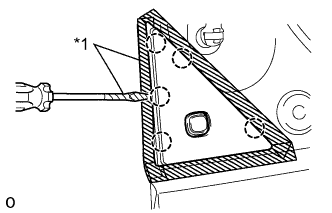
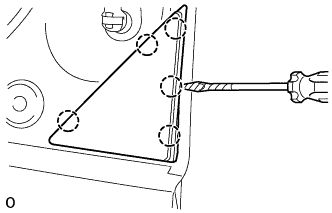
REMOVE NO. 2 BACK DOOR STIFFENER (w/ Back Door Tire Carrier)
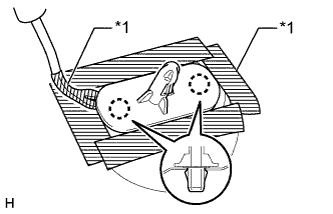
Text in Illustration *1 Protective Tape Tech Tips
Use the same procedure to remove the No. 2 back door stiffener on the other side.
-
Put protective tape around the No. 2 back door stiffener.
-
Using a clip remover, detach the 2 claws and remove the No. 2 back door stiffener.
Tech Tips
Tape the clip remover tip before use.
-
-
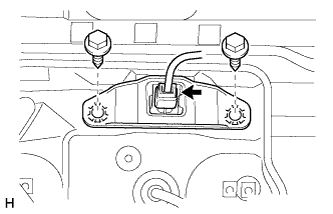
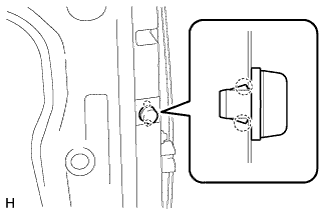
REMOVE REAR WASHER NOZZLE SUB-ASSEMBLY
-
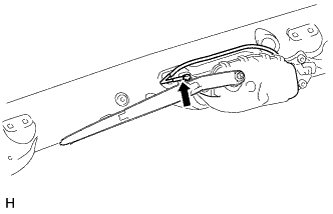
Disconnect the hose.
-
Detach the 2 claws and remove the washer nozzle.
-
-
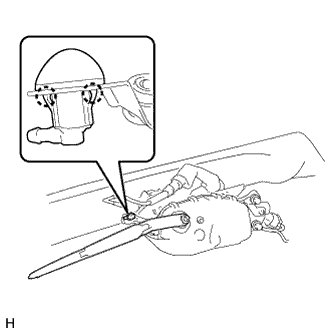
REMOVE REAR WIPER ARM
-
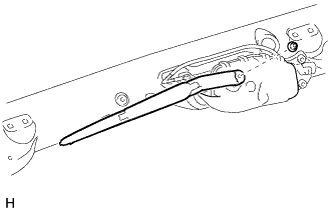
Remove the nut and rear wiper arm.
-
-
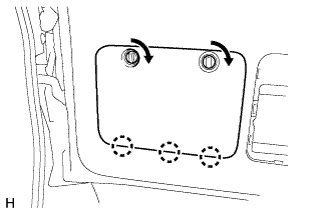
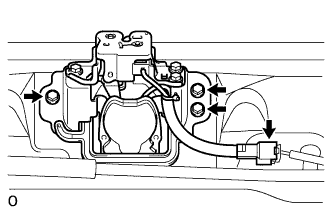
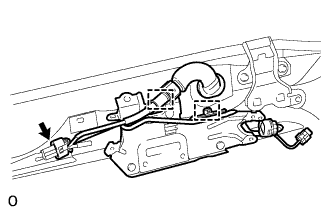
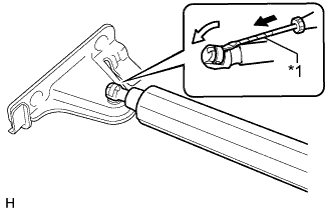
REMOVE REAR WIPER MOTOR ASSEMBLY
-
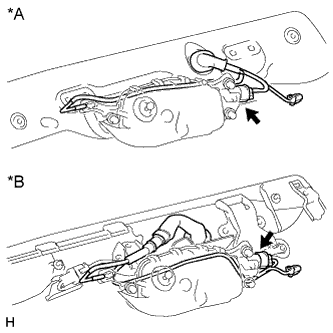
Text in Illustration *A w/ Back Door Tire Carrier *B w/o Back Door Tire Carrier Disconnect the washer hose and wiper motor connector.
-
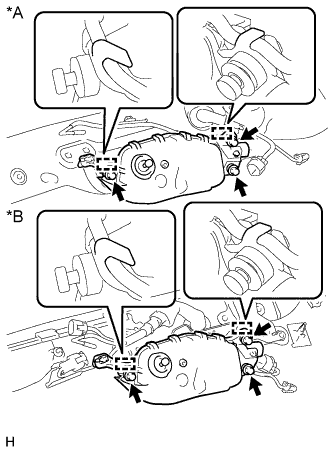
Text in Illustration *A w/ Back Door Tire Carrier *B w/o Back Door Tire Carrier Remove the 3 bolts.
-
Detach the 2 guides and remove the rear wiper motor.
-
-
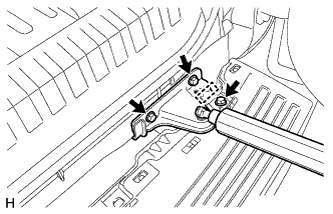
REMOVE NO. 1 BACK WINDOW WIPER MOTOR BRACKET (w/ Back Door Tire Carrier)
-
Using a clip remover, detach the clamp.
-
Remove the 3 bolts.
-
Using a clip remover, detach the 2 clips and remove the No. 1 back window wiper motor bracket.
-
-
REMOVE BACK DOOR LOCK STRIKER COVER (w/o Back Door Tire Carrier)
-
REMOVE BACK WINDOW STAY ASSEMBLY LH (w/o Back Door Tire Carrier)
-
Text in Illustration *1 Protective Tape Using a screwdriver, remove the 2 stop rings as shown in the illustration, and then remove the back window stay.
CAUTION:
Remove the back window stay while supporting the back door with one hand.
Tech Tips
Tape the screwdriver tip before use.
-
-
REMOVE BACK WINDOW STAY ASSEMBLY RH (w/o Back Door Tire Carrier)
Tech Tips
Use the same procedure described for the LH side.
-
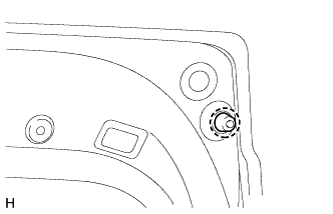
REMOVE BACK DOOR STAY BOLT (w/o Back Door Tire Carrier)
-
Text in Illustration *A for RH Side *B for LH Side Remove the 2 back door stay bolts.
-
-
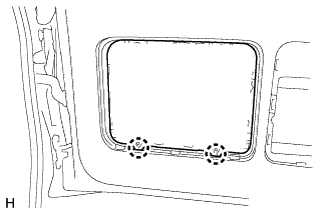
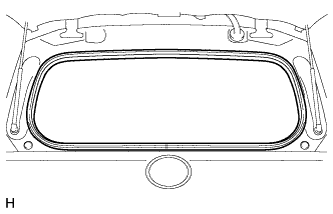
REMOVE BACK DOOR GLASS (w/o Back Door Tire Carrier)
-
Remove the connector and detach the 2 clamps.
-
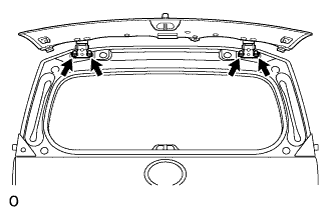
Remove the 4 bolts and back window glass.
-
-
REMOVE BACK DOOR CUSHION (w/ Back Door Tire Carrier)
-
Remove the 3 back door cushions.
-
-
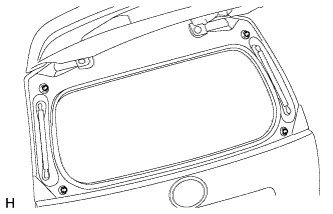
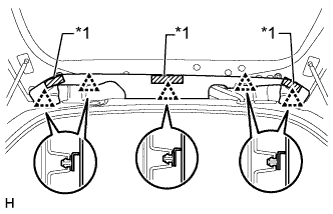
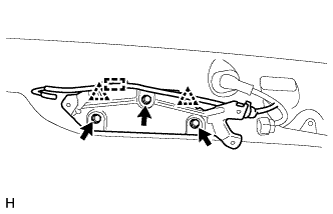
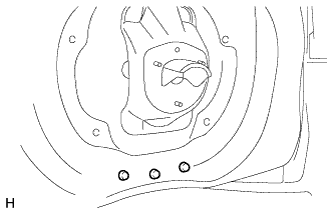
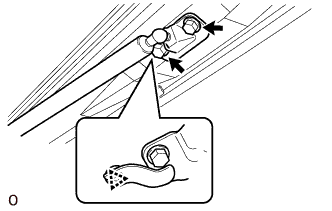
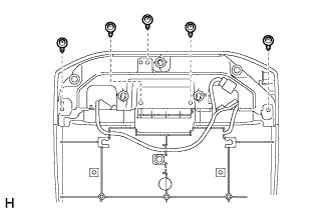
REMOVE REAR BUMPER BAR PLATE
-
Put protective tape around the rear bumper bar plate.
-
Detach the 14 claws and remove the rear bumper bar plate.
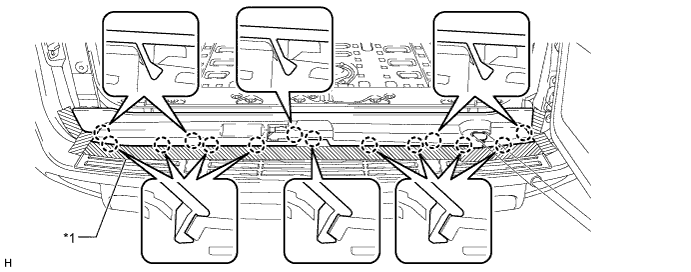
Text in Illustration *1 Protective Tape - -
-
-
REMOVE BACK DOOR CHECK
Note
-
If the back door check is detached from a ball joint, do not reuse it as the connection with the ball joint will be loose, resulting in the back door check falling off.
-
If the back door check is detached from a ball joint, it becomes non-reusable. Therefore, do not detach the back door check from a ball joint unless replacing it.
-
Remove the 2 bolts.
-
Using a clip remover, detach the clip and remove the back door check with back door lower damper stay bracket.
-
Detach the wire harness clamp.
-
Remove the 3 bolts and back door check with back door lower damper stay bracket.
-
-
REMOVE BACK DOOR LOWER DAMPER STAY BRACKET LH
Note
-
If the back door check is detached from a ball joint, do not reuse it as the connection with the ball joint will be loose, resulting in the back door check falling off.
-
If the back door check is detached from a ball joint, it becomes non-reusable. Therefore, do not detach the back door check from a ball joint unless replacing it.
-
The back door lower damper stay bracket on the back door side cannot be removed from the back door check. Therefore, if the back door check or back door damper stay bracket is replaced, prepare a new back door check and back door damper stay bracket.
-
Bumper side:
-
Text in Illustration *1 Protective Tape Using a screwdriver, remove the stop ring as shown in the illustration, and then remove the back door check.
Note
Tape the screwdriver tip before use.
-
-
-
REMOVE BACK DOOR OUTSIDE GARNISH SUB-ASSEMBLY
-
w/o Back Door Tire Carrier:
Remove the back door outside garnish Click here.
-
w/ Back Door Tire Carrier:
Remove the back door outside garnish Click here.
-
-
REMOVE LICENSE PLATE LIGHT CORD (w/o Entry and Start System)
-
w/o Back Door Tire Carrier:
Remove the license plate light cord Click here.
-
w/ Back Door Tire Carrier:
Remove the license plate light cord Click here.
-
-
REMOVE NO. 1 BACK DOOR GARNISH RETAINER (w/o Back Door Tire Carrier)
-
Remove the 3 screws and No. 1 back door garnish retainer.
-
-
REMOVE REAR LICENSE LIGHT COVER (w/ Back Door Tire Carrier)
-
Remove the 5 screws and rear license light cover.
-
-
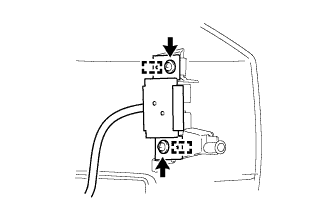
REMOVE BACK DOOR ELECTRICAL KEY SWITCH (w/o Back Door Tire Carrier)
-
Detach the clamp.
-
Remove the 2 screws.
-
Detach the 2 guides and remove the back door electrical key switch.
-
-
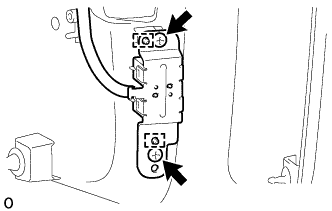
REMOVE BACK DOOR ELECTRICAL KEY SWITCH (w/ Back Door Tire Carrier)
-
Remove the 2 screws.
-
Detach the 2 guides and remove the back door electrical key switch.
-
-
REMOVE LICENSE PLATE LIGHT ASSEMBLY
-
w/o Back Door Tire Carrier:
Remove the license plate light Click here.
-
w/ Back Door Tire Carrier:
Remove the license plate light Click here.
-