-
Use the same procedure for RHD and LHD vehicles.
-
The procedure listed below is for LHD vehicles.
- Click here
REMOVE FRONT DOOR LOWER FRAME BRACKET GARNISH LH
-
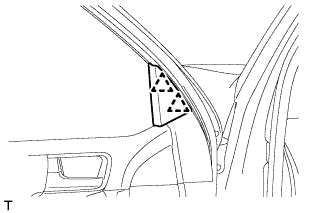
Detach the 2 clips and remove the front door lower frame bracket garnish LH.
-
- Click here
REMOVE NO. 2 DOOR INSIDE HANDLE BEZEL LH
-
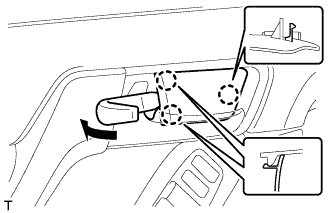
Using a moulding remover, detach the 3 claws and remove the inside handle bezel as shown in the illustration.
-
- Click here
REMOVE ASSIST GRIP COVER LH
-
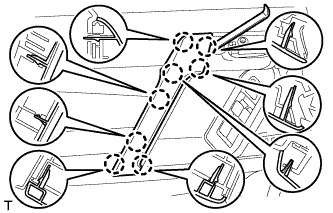
Using moulding remover A, detach the 8 claws and remove the assist grip cover.
-
- Click here
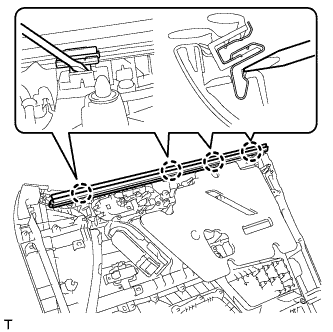
REMOVE FRONT DOOR TRIM BOARD SUB-ASSEMBLY LH
-
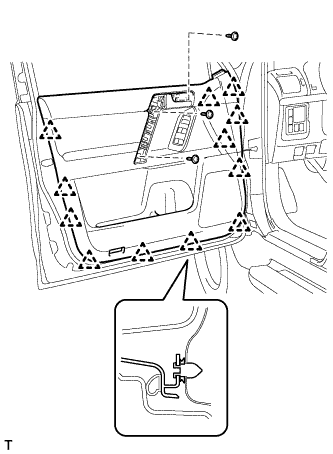
Remove the 3 screws.
-
Remove the 12 clips.
-
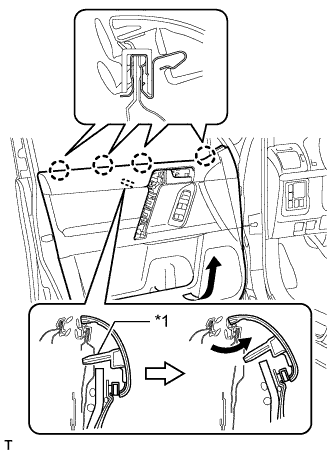
Pull out the front door trim board sub-assembly in the direction indicated by the arrow in the illustration.
Table 1. Text in Illustration *1 Reference Boss -
Raise the front door trim board sub-assembly to detach the 4 claws and remove the front door trim board sub-assembly together with the front door inner glass weatherstrip LH.
-
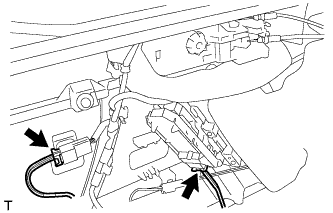
Disconnect the 2 connectors.
-
w/ Seat Position Memory System:
-
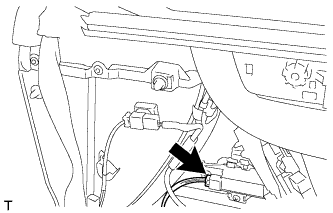
Disconnect the connectors.
-
-
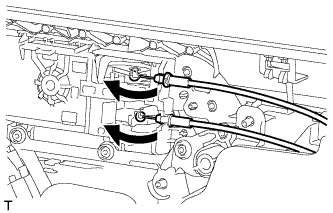
Disconnect the front door lock remote control cable assembly and front door inside locking cable assembly.
-
- Click here
REMOVE FRONT DOOR INNER GLASS WEATHERSTRIP LH
-
Using a screwdriver, detach the 4 claws and remove the front door inner glass weatherstrip from the front door trim board sub-assembly as shown in the illustration.
-
- Click here
REMOVE MULTIPLEX NETWORK MASTER SWITCH ASSEMBLY
-
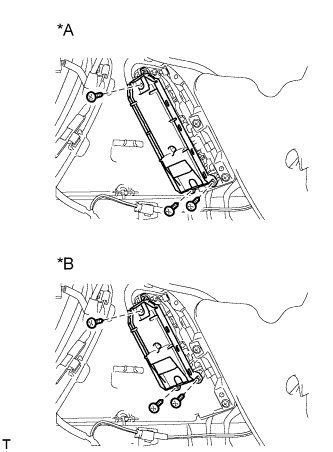
Remove the 3 screws and multiplex network master switch assembly.
Table 2. Text in Illustration *A for 5 Door *B for 3 Door
-