OCCUPANT DETECTION SENSOR INSTALLATION

Tech Tips
-
Use the same procedure for RHD and LHD vehicles.
-
The procedure listed below is for LHD vehicles.
-
INSTALL SEPARATE TYPE FRONT SEAT CUSHION PAD (OCCUPANT DETECTION SENSOR) (for Bench Seat Type)
-
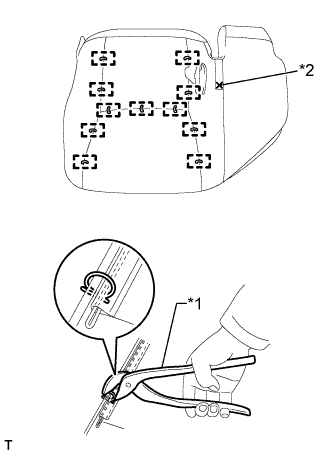
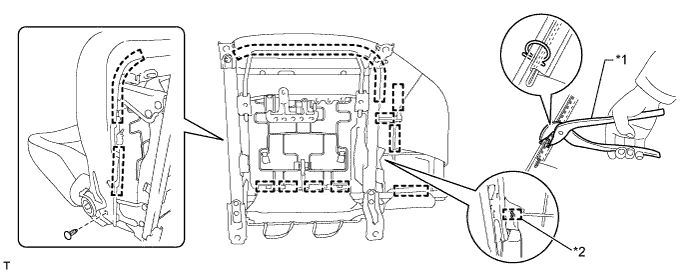
Text in Illustration *1 Hog Ring Pliers *2 Tack pin Using hog ring pliers, install the separate type front seat cushion pad to the separate type front seat cushion cover with new hog rings.
Note
-
Be careful not to damage the cover.
-
When installing the hog rings, avoid wrinkling the cover.
-
-
Using a tacker, install the separate type front seat cushion cover to the separate type front seat cushion pad with a new tack pin as shown in the illustration.
-
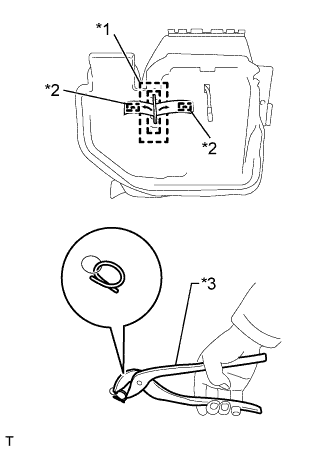
Text in Illustration *1 Hook *2 Hog Ring *3 Hog Ring Pliers Attach the hook.
-
Using hog ring pliers, install the separate type front seat cushion cover to the separate type front seat cushion pad with new hog rings.
Note
When installing the hog rings, avoid wrinkling the cover.
-
-
INSTALL SEPARATE TYPE FRONT SEAT CUSHION PAD (OCCUPANT DETECTION SENSOR) (for Separate Seat Type)
-
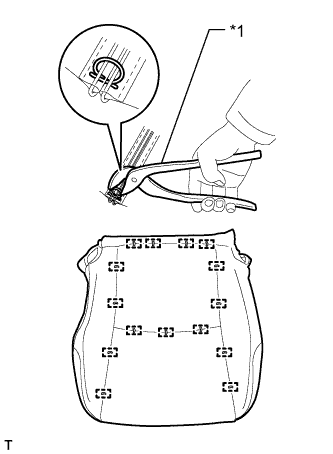
Text in Illustration *1 Hog Ring Pliers Using hog ring pliers, install the separate type front seat cushion pad (occupant detection sensor) to the separate type front seat cushion cover with new hog rings.
Note
-
Be careful not to damage the cover.
-
When installing the hog rings, avoid wrinkling the cover.
-
-
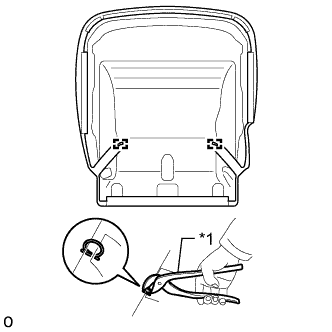
Text in Illustration *1 Hog Ring Pliers Type A:
-
Using hog ring pliers, connect the straps with new hog rings.
-
-
Text in Illustration *1 Tack Pin Type B:
-
Connect the straps with new tack pins.
-
-
-
INSTALL FRONT SEAT CUSHION COVER WITH PAD (for Bench Seat Type)
-
Set the front seat cushion cover with pad in place.
-
Attach the 2 clamps to install the connector holder.
-
Attach the hooks to install the front seat cushion cover with pad.
-
Using hog ring pliers, install new hog rings.
Note
-
Be careful not to damage the cover.
-
When installing the hog rings, avoid wrinkling the cover.
-
-
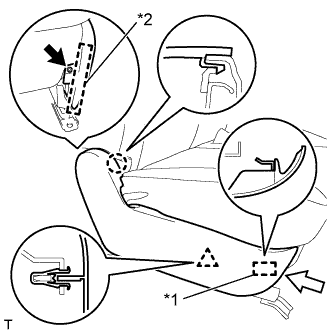
Install the clip.
Text in Illustration *1 Hog Ring Pliers *2 Hog Ring -
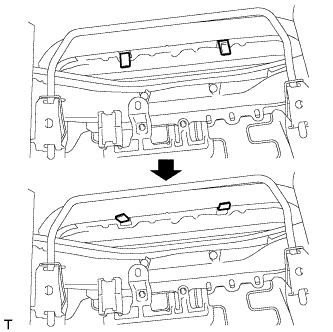
Return the 2 cushion edge tabs to their original positions.
Note
Be careful not to break the cushion edge tabs.
-
-
INSTALL FRONT SEAT CUSHION COVER WITH PAD (for Separate Seat Type)
-
Install the seat cushion cover with pad.
-
for Front Passenger Side:
Attach the claw to connect the connector.
-
Attach the hooks.
-
w/ Seat Heater System:
Connect the seat heater connector and attach the 3 wire harness clamps.
-
-
INSTALL FRONT SEAT INNER BELT ASSEMBLY RH (for Bench Seat Type)
-
Pass the front seat inner belt assembly RH through the band of the front seat cushion cover as shown in the illustration.
-
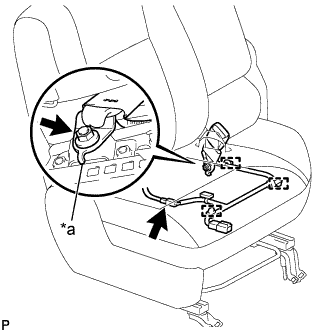
Text in Illustration *a Protruding Part Install the front seat inner belt assembly RH to the front seat assembly RH with the nut.
- Torque:
- 42 N*m { 428 kgf*cm, 31 ft.*lbf }
Note
Make sure that the protruding part of the front seat inner belt assembly RH is not positioned on top of the frame.
-
Attach the 3 wire harness clamps and connect the occupant detection sensor connector.
-
Install the front seat assembly RH Click here.
-
-
INSTALL FRONT SEAT INNER BELT ASSEMBLY RH (for Separate Seat Type)
-
Install the front seat belt anchor plate.
-
Install the front seat inner belt assembly RH to the front seat assembly RH with the nut.
- Torque:
- 42 N*m { 428 kgf*cm, 31 ft.*lbf }
Note
Do not allow the anchor part of the front seat inner belt assembly RH to overlap the protruding parts of the front seat adjuster.
-
for Manual Seat, Power Seat 4 Way Seat Type:
Connect the 2 connectors and attach the 3 clamps.
-
for Power Seat 8 Way Seat Type:
Connect the 2 connectors and attach the 6 clamps.
-
-
INSTALL FRONT SEAT INNER CUSHION SHIELD RH (for Separate Seat Type)
-
Attach the 4 claws to install the cushion shield.
-
-
INSTALL FRONT SEAT CUSHION SHIELD RH (for Power Seat)
-
Attach the 3 wire harness clamps and connect the seat wire connector.
-
Attach the 3 claws to close the wire harness cover.
-
Remove the clip attached to the separate type front seat cushion spring assembly and install it to the front seat cushion shield LH.
-
Attach the 2 clips, 3 claws and guide.
-
Attach the guide of the front seat No. 1 inner cushion shield LH and install the screw.
-
Connect the lifter motor connector.
-
-
INSTALL FRONT SEAT CUSHION SHIELD RH (for Bench Seat Type)
-
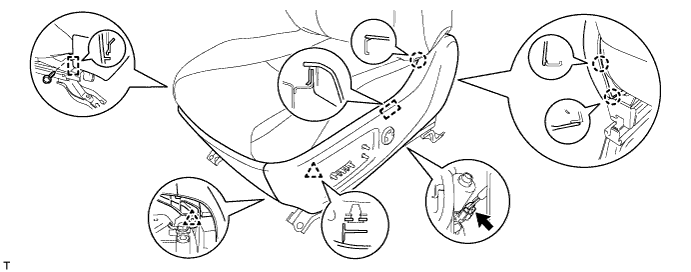
Text in Illustration *1 Guide *2 Hook Attach the guide and clip.
-
Attach the claw and hook to install the front seat cushion shield RH.
-
Install the screw.
-
Attach the 2 rubber bands.
-
-
INSTALL FRONT SEAT CUSHION SHIELD RH (for Manual Seat)
-
for Driver Side:
Attach the 5 wire harness clamps and connect the 2 connectors.
-
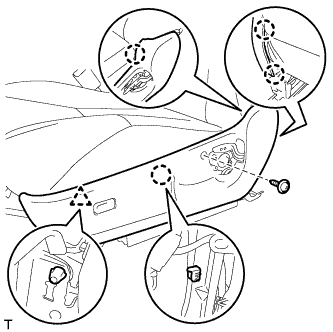
Attach the 4 claws and clip to install the cushion shield.
-
Install the screw.
-
-
INSTALL RECLINING POWER SEAT SWITCH KNOB (for Power Seat)
-
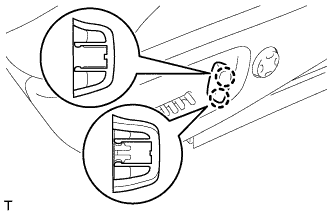
Attach the 2 claws to install the reclining power seat switch knob.
-
-
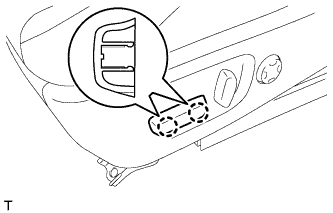
INSTALL SLIDE AND VERTICAL POWER SEAT SWITCH KNOB (for Power Seat)
-
Attach the 2 claws to install the slide and vertical power seat switch knob.
-
-
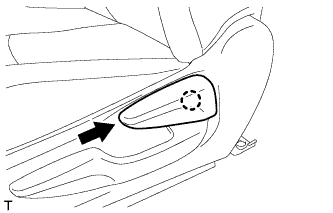
INSTALL RECLINING ADJUSTER RELEASE HANDLE RH (for Bench Seat Type)
-
Attach the claw to install the reclining adjuster release handle RH.
-
-
INSTALL RECLINING ADJUSTER RELEASE HANDLE RH (for Manual Seat)
-
Attach the claw to install the handle.
-
-
INSTALL FRONT SEAT ASSEMBLY RH
-
for Manual Seat:
Install the front seat assembly RH Click here.
-
for Power Seat:
Install the front seat assembly RH Click here.
-
for Bench Seat Type:
Install the front seat assembly RH Click here.
-