LUMBAR SWITCH (for Manual Seat) REMOVAL

CAUTION:
Wear protective gloves. Sharp areas on the parts may injure your hands.
Tech Tips
-
Use the same procedure for RHD and LHD vehicles.
-
The procedure listed below is for LHD vehicles.
-
REMOVE FRONT SEAT ASSEMBLY
-
Remove the front seat assembly Click here.
-
-
REMOVE RECLINING ADJUSTER RELEASE HANDLE LH
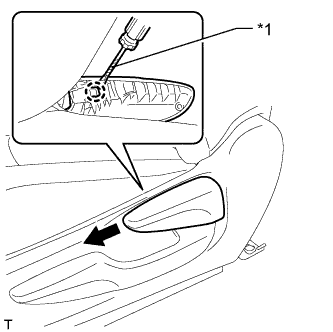
Text in Illustration *1 Protective Tape
-
Raise the reclining adjuster release handle to reveal the claw. Using a screwdriver, detach the claw and remove the handle.
Tech Tips
Tape the screwdriver tip before use.
-
-
REMOVE VERTICAL ADJUSTING HANDLE LH
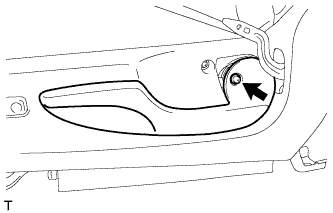
-
Remove the screw and handle.
-
-
REMOVE FRONT SEAT CUSHION SHIELD LH
-
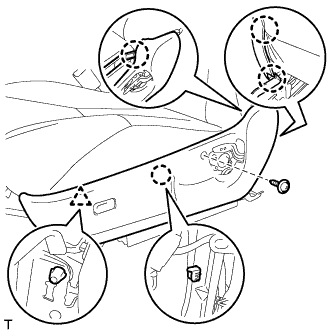
Remove the screw.
-
Using a moulding remover, detach the 4 claws and clip, and then remove the cushion shield.
-
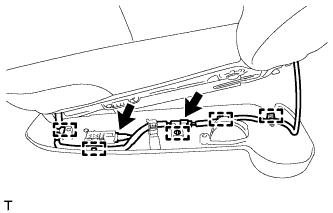
for Driver Side:
Detach the 5 wire harness clamps and disconnect the 2 connectors.
-
-
REMOVE LUMBAR SWITCH ASSEMBLY
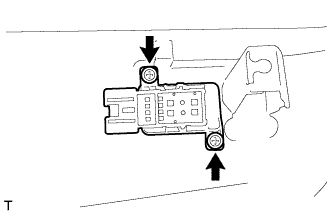
-
Remove the 2 screws and switch.
-