CURTAIN SHIELD AIRBAG ASSEMBLY REMOVAL

Tech Tips
-
Use the same procedure for the RH and LH sides.
-
The procedure listed below is for the LH side.
-
REMOVE ROOF HEADLINING ASSEMBLY
-
for 5 Door:
-
Remove the roof headlining assembly Click here.
-
-
for 3 Door:
-
Remove the roof headlining assembly Click here.
-
-
-
REMOVE NO. 2 AIR DUCT REAR SIDE (w/ Rear Cooler)
-
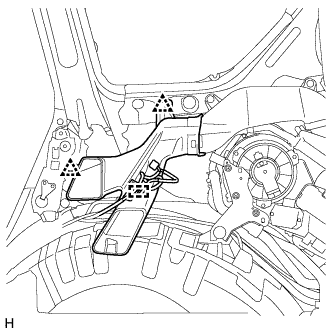
Detach the 2 clips.
-
Detach the clamp and remove the duct.
-
-
REMOVE NO. 1 AIR DUCT REAR SIDE (w/ Rear Cooler)
-
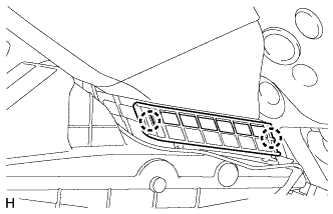
Detach the 2 claws and remove the cooler plate.
-
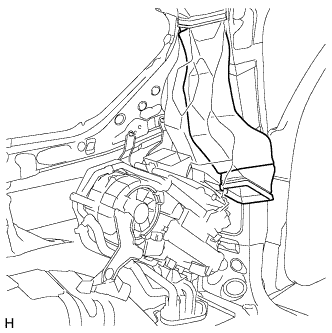
Swing the bottom of the duct sideways and remove the duct.
-
-
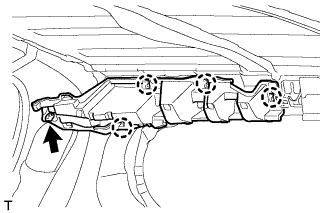
REMOVE REAR NO. 2 SIDE RAIL SPACER LH (for 3 Door)
-
Remove the clip.
-
Detach the 4 claws and remove the rear side rail spacer.
-
-
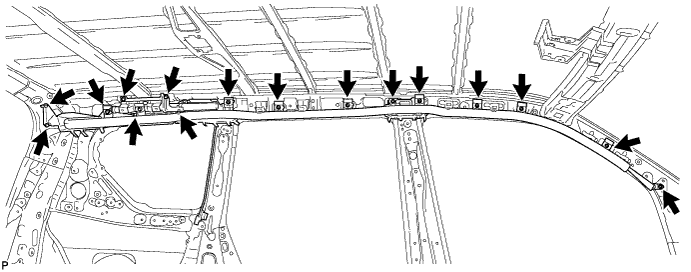
REMOVE CURTAIN SHIELD AIRBAG ASSEMBLY LH (w/o Rear No. 2 Seat)
-
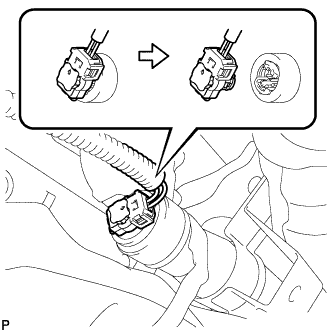
Disconnect the connector.
Note
When handling the airbag connector, take care not to damage the airbag wire harness.
-
Remove the 13 bolts and curtain shield airbag.
-
-
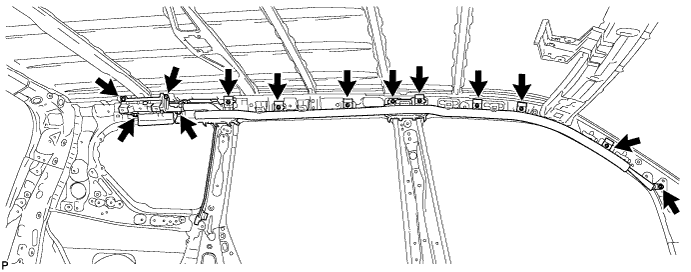
REMOVE CURTAIN SHIELD AIRBAG ASSEMBLY LH (w/ Rear No. 2 Seat)
-
Disconnect the connector.
Note
When handling the airbag connector, take care not to damage the airbag wire harness.
-
Remove the 17 bolts and curtain shield airbag.
-
-
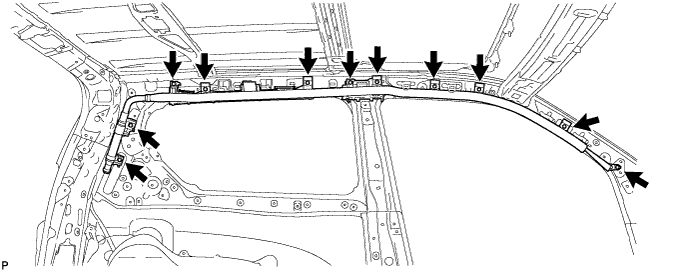
REMOVE CURTAIN SHIELD AIRBAG ASSEMBLY LH (for 3 Door)
-
Disconnect the connector.
Note
When handling the airbag connector, take care not to damage the airbag wire harness.
-
Remove the 11 bolts and curtain shield airbag.
-