ELECTRICAL KEY OSCILLATOR (for Luggage Compartment) REMOVAL

-
REMOVE TONNEAU COVER ASSEMBLY (w/ Tonneau Cover, for 3 Door)
-
Remove the tonneau cover.
-
-
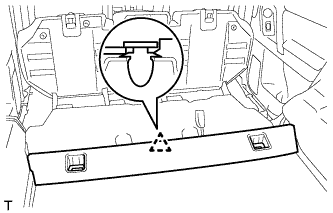
REMOVE MAT SET PLATE COVER (for 3 Door)
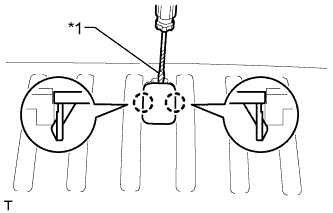
Text in Illustration *1 Protective tape Tech Tips
Use the same procedure for all mat set plate covers.
-
Using a screwdriver, detach the 2 claws and remove the mat set plate cover.
Tech Tips
Tape the screwdriver tip before use.
-
-
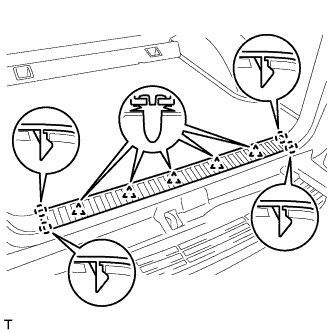
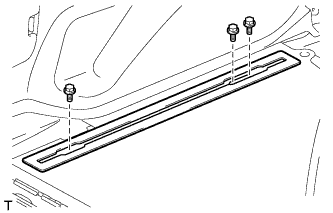
REMOVE REAR FLOOR MAT REAR SUPPORT PLATE (for 3 Door)
-
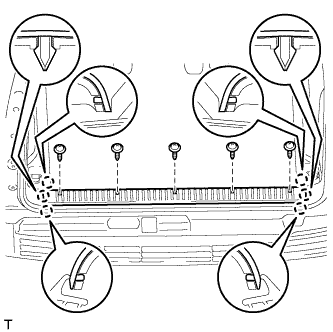
Remove the 5 screws.
-
Detach the 6 claws and remove the rear floor mat rear support plate.
-
-
REMOVE REAR FLOOR CARPET ASSEMBLY (for 3 Door)
-
Remove the rear floor carpet.
-
-
REMOVE REAR NO. 2 SEAT ASSEMBLY (w/ Rear No. 2 Seat, for 5 Door)
-
for Manual Seat Type:
Remove the rear No. 2 seat assembly Click here.
-
for Power Seat Type:
Remove the rear No. 2 seat assembly Click here.
-
for Face to Face Seat Type:
Remove the rear No. 2 seat assembly Click here.
-
-
REMOVE TONNEAU COVER ASSEMBLY (w/ Tonneau Cover, for 5 Door)
-
Remove the tonneau cover.
-
-
REMOVE FRONT LUGGAGE COMPARTMENT TRIM COVER (w/o Rear No. 2 Seat, for 5 Door)
Tech Tips
Use the same procedure for the other front luggage compartment trim cover.
-
Detach the 4 claws and remove the cap.
-
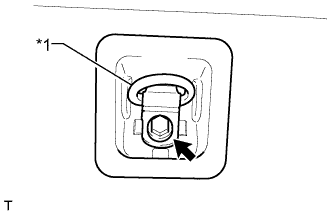
Text in Illustration *1 Luggage Hold Belt Striker Remove the bolt, luggage hold belt striker and front luggage compartment trim cover.
-
-
REMOVE NO. 1 DECK BOARD SUB-ASSEMBLY (w/o Rear No. 2 Seat, for 5 Door)
-
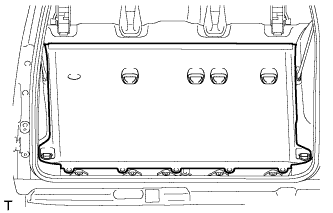
Detach the clip and remove the No. 1 deck board.
-
-
REMOVE REAR FLOOR MAT REAR SUPPORT PLATE (w/o Rear No. 2 Seat, for 5 Door)
-
Detach the 5 clips and 4 claws and remove the rear floor mat rear support plate.
-
-
REMOVE FLOOR SIDE RAIL LH (w/ Deck Rail, for 5 Door)
-
Remove the 3 bolts and floor side rail.
-
-
REMOVE FLOOR SIDE RAIL RH (w/ Deck Rail, for 5 Door)
Tech Tips
Use the same procedure described for the LH side.
-
REMOVE REAR FLOOR CARPET ASSEMBLY (w/o Rear No. 2 Seat, for 5 Door)
-
Detach the 4 claws and remove the rear floor carpet.

Text in Illustration *A w/o Deck Rail *B w/ Deck Rail *C for Face to Face Seat Type - -
-
-
REMOVE INDOOR NO. 3 ELECTRICAL KEY ANTENNA ASSEMBLY
-
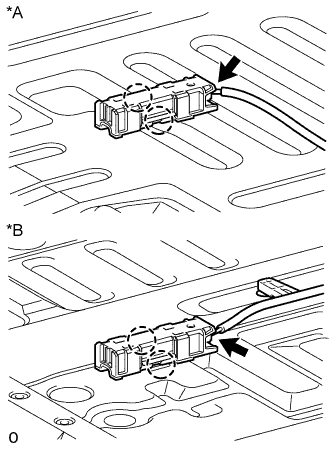
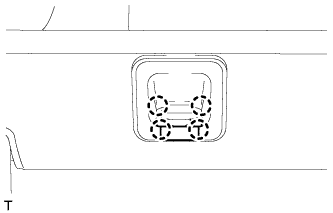
Text in Illustration *A for 3 Door *B for 5 Door Disconnect the connector.
-
Detach the 2 claws and remove the indoor No. 3 electrical key antenna assembly.
-