NOISE FILTER REMOVAL

-
REMOVE BACK DOOR CENTER GARNISH
-
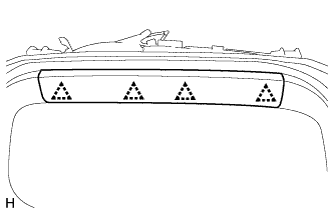
Detach the 4 clips and remove the back door center garnish.
-
-
REMOVE BACK DOOR SIDE GARNISH LH
-
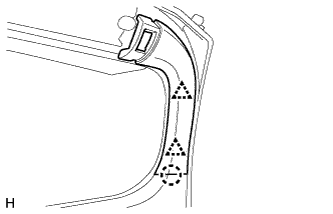
Detach the 2 clips and claw and remove the back door side garnish.
-
-
REMOVE BACK DOOR SIDE GARNISH RH
-
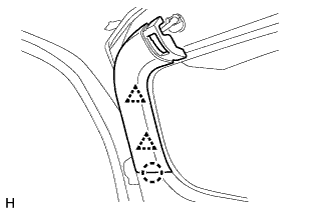
Detach the 2 clips and claw and remove the back door side garnish.
-
-
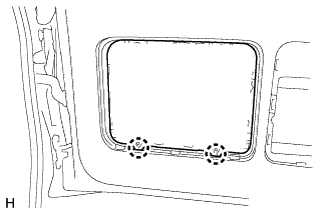
REMOVE BACK DOOR TRIM COVER
-

Remove the back door trim cover as shown in the illustration.
-
-
REMOVE UPPER TOOL BOX PANEL SUB-ASSEMBLY
-
Remove the upper tool box panel sub-assembly as shown in the illustration.
-
-
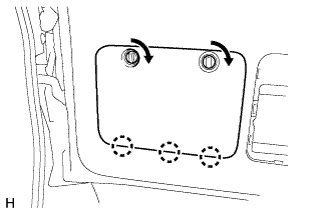
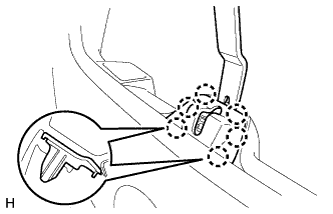
REMOVE TOOL CASE
-
Detach the 2 claws and remove the tool case.
-
-
REMOVE BACK DOOR LOCK COVER (w/o Back Door Tire Carrier)
-
Using moulding remover B, detach the clip and 6 claws and remove the back door lock cover.
-
-
REMOVE BACK DOOR INSIDE HANDLE BEZEL (for Face to Face Seat Type)
-
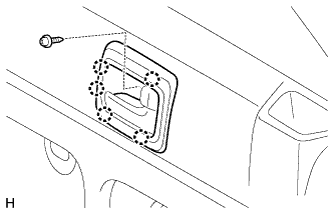
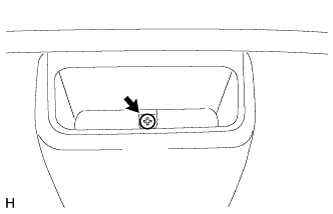
Remove the screw.
-
Detach the 5 claws and remove the back door inside handle bezel.
-
-
REMOVE BACK DOOR TRIM PANEL ASSEMBLY
-
Detach the claw and remove the cover.
Tech Tips
Tape the screwdriver tip before use.
-
Remove the screw.
-
w/o Back Door Tire Carrier:
-
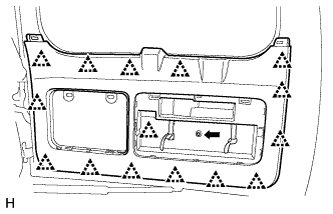
Remove the bolt.
-
Detach the 15 clips and remove the back door trim panel assembly.
-
-
w/ Back Door Tire Carrier:
-
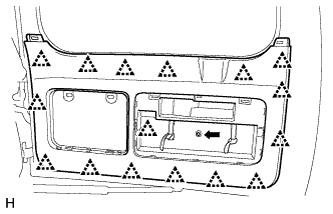
Remove the bolt.
-
Detach the 16 clips and remove the back door trim panel assembly.
-
-
for Face to Face Seat Type:
-
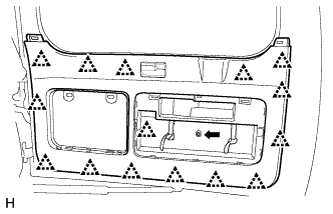
Remove the screw and bolt.
-
Detach the 15 clips and remove the back door trim panel assembly.
-
-
-
REMOVE RADIO SETTING CONDENSER
Note
If it is necessary to replace the radio setting condenser or terminal cover, both parts must be replaced as they are supplied as a set.
-
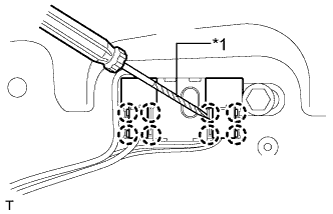
Text in Illustration *1 Protective Tape Using a screwdriver, detach the 8 claws and remove the terminal cover with wire harness from the condenser.
Tech Tips
Tape the screwdriver tip before use.
-
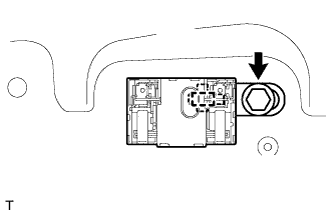
Remove the bolt.
-
Detach the clamp from the vehicle body and remove the condenser.
-