LUGGAGE SPEAKER (for 3 Door) REMOVAL

Tech Tips
-
Use the same procedure for the RH and LH sides.
-
The procedure listed below is for the LH side.
-
REMOVE REAR NO. 1 SEAT ASSEMBLY
-
for 60/40 Split Tumble Seat Type LH Side:
-
for 60/40 Split Tumble Seat Type RH Side:
-
-
REMOVE DOOR SCUFF PLATE ASSEMBLY LH
Text in Illustration *1 Protective Tape
-
Put protective tape around the door scuff plate.
-
Using a screwdriver, detach the 4 clips, 10 claws and 2 guides and remove the door scuff plate.
Tech Tips
Tape the screwdriver tip before use.
-
-
REMOVE FRONT DOOR OPENING TRIM WEATHERSTRIP LH
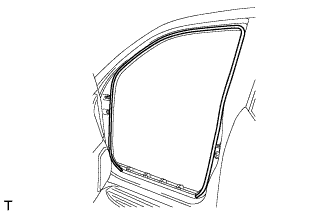
-
Remove the front door opening trim weatherstrip.
-
-
REMOVE TONNEAU COVER ASSEMBLY (w/ Tonneau Cover)
-
Remove the tonneau cover.
-
-
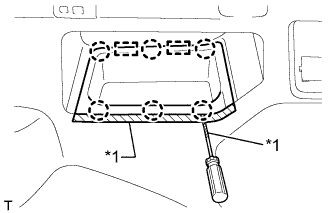
REMOVE MAT SET PLATE COVER
Text in Illustration *1 Protective tape Tech Tips
Use the same procedure for all mat set plate covers.
-
Using a screwdriver, detach the 2 claws and remove the mat set plate cover.
Tech Tips
Tape the screwdriver tip before use.
-
-
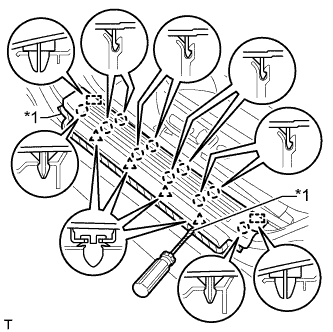
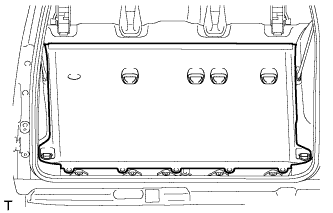
REMOVE REAR FLOOR MAT REAR SUPPORT PLATE
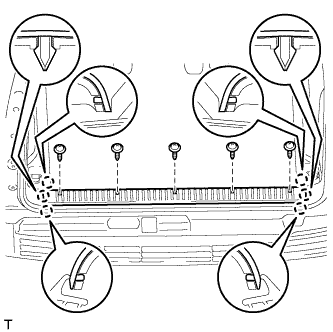
-
Remove the 5 screws.
-
Detach the 6 claws and remove the rear floor mat rear support plate.
-
-
REMOVE QUARTER TRIM COVER HOLE LH
-
Detach the 2 claws and 2 guides and remove the quarter trim cover hole.
-
-
REMOVE REAR FLOOR CARPET ASSEMBLY
-
Remove the rear floor carpet.
-
-
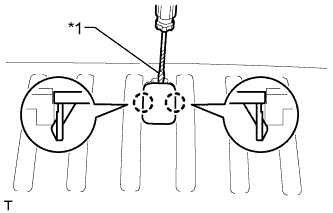
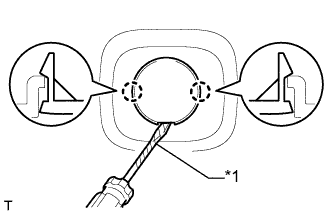
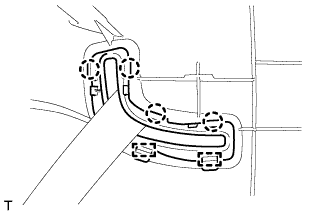
REMOVE NO. 1 LUGGAGE COMPARTMENT TRIM HOOK
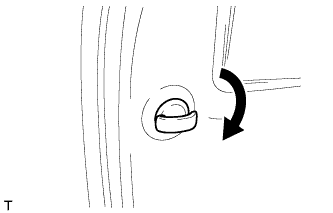
Tech Tips
Use the same procedure for the other No. 1 luggage compartment trim hook.
-
Remove the luggage compartment trim hook by turning it clockwise.
-
-
REMOVE NO. 1 TONNEAU COVER HOLDER CAP (w/o Tonneau Cover)
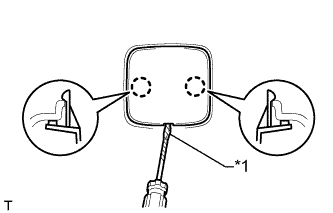
Text in Illustration *1 Protective tape Tech Tips
Use the same procedure for the other tonneau cover holder cap.
-
Using a screwdriver, detach the 2 claws and remove the tonneau cover holder cap.
Tech Tips
Tape the screwdriver tip before use.
-
-
REMOVE FRONT DECK SIDE TRIM COVER (w/ Tonneau Cover)
Text in Illustration *1 Protective tape Tech Tips
Use the same procedure for the other front deck side trim cover.
-
Using a screwdriver, detach the 2 claws and remove the front deck side trim cover.
Tech Tips
Tape the screwdriver tip before use.
-
-
REMOVE QUARTER TRIM POCKET TRAY
Text in Illustration *1 Protective tape
-
Put protective tape around the quarter trim pocket tray.
-
Using a screwdriver, detach the 6 claws and 2 guides, and remove the quarter trim pocket tray.
Tech Tips
Tape the screwdriver tip before use.
-
-
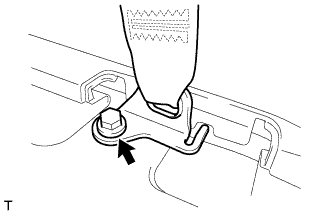
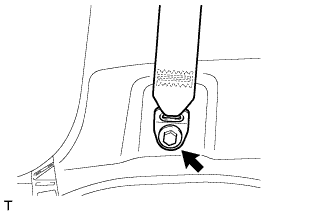
REMOVE OUTER LAP BELT ANCHOR COVER
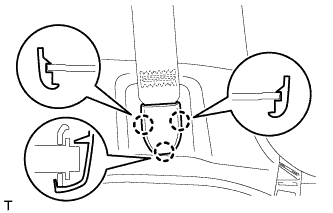
Tech Tips
Use the same procedure for the other outer lap belt anchor cover.
-
Detach the 3 claws and remove the outer lap belt anchor cover.
-
-
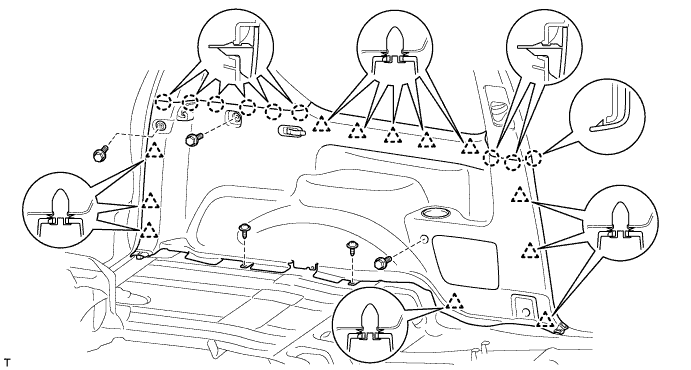
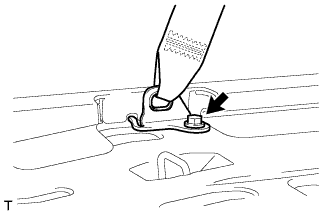
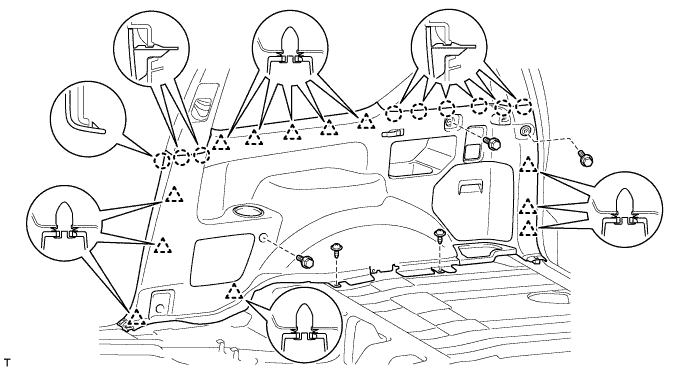
REMOVE DECK TRIM SIDE PANEL ASSEMBLY LH
-
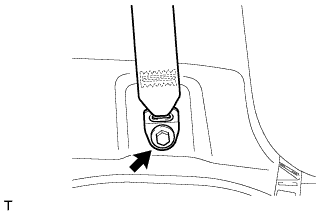
Remove the bolt and disconnect the front seat outer belt floor anchor.
-
Remove the bolt and disconnect the rear No. 1 seat outer belt floor anchor.
-
Remove the 3 bolts and 2 screws.
-
Detach the 9 claws and 12 clips and remove the deck trim side panel.
-
-
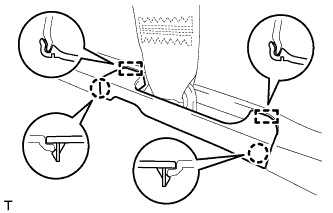
REMOVE REAR QUARTER TRIM PANEL ASSEMBLY LH
-
Detach the 7 clips.
-
Detach the 4 claws and 2 guides, pass the rear No. 1 seat belt floor anchor through the rear quarter trim panel and remove the rear quarter trim panel.
-
-
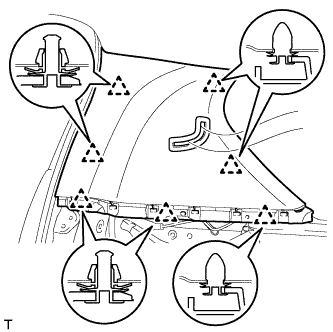
REMOVE REAR HEADER SPEAKER ASSEMBLY
-
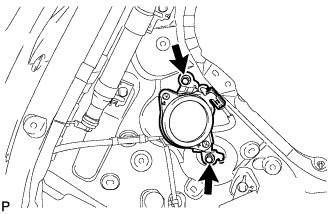
Disconnect the connector.
-
Remove the 2 bolts and rear header speaker assembly.
-
-
REMOVE DOOR SCUFF PLATE ASSEMBLY RH
Tech Tips
Use the same procedure described for the LH side.
-
REMOVE FRONT DOOR OPENING TRIM WEATHERSTRIP RH
Tech Tips
Use the same procedure described for the LH side.
-
REMOVE QUARTER TRIM COVER HOLE RH
Tech Tips
Use the same procedure described for the LH side.
-
REMOVE OUTER LAP BELT ANCHOR COVER
Tech Tips
Use the same procedure for the other outer lap belt anchor cover.
-
Detach the 3 claws and remove the outer lap belt anchor cover.
-
-
REMOVE DECK TRIM SIDE PANEL ASSEMBLY RH
-
Remove the bolt and disconnect the front seat outer belt floor anchor.
-
Remove the bolt and disconnect the rear No. 1 seat outer belt floor anchor.
-
Remove the 3 bolts and 2 screws.
-
Detach the 9 claws and 12 clips.
-
Disconnect the connector and remove the deck trim side panel.
-
-
REMOVE NO. 1 SPEAKER WITH BOX ASSEMBLY
-
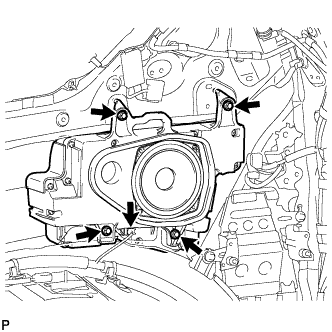
Disconnect the connector.
-
Remove the 4 bolts and No. 1 speaker with box assembly.
-