STEREO COMPONENT AMPLIFIER INSTALLATION

-
INSTALL NO. 2 AMPLIFIER BRACKET
-
Install the No. 2 amplifier bracket with the 2 screws.
- Torque:
- 3.0 N*m { 31 kgf*cm, 27 in.*lbf }
-
-
INSTALL NO. 1 AMPLIFIER BRACKET
-
Install the No. 1 amplifier bracket with the 2 screws.
- Torque:
- 3.0 N*m { 31 kgf*cm, 27 in.*lbf }
-
-
INSTALL NO. 2 AMPLIFIER COVER
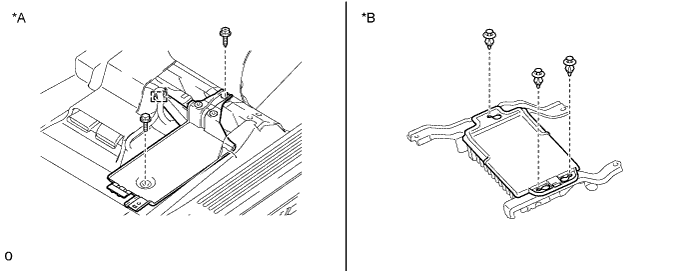
Text in Illustration *A w/ Seat Heater System *B for JBL Made, w/o Seat Heater System
-
w/ Seat Heater System:
-
Install the No. 2 amplifier cover with the bolt and screw.
- Torque:
- for Bolt
- 8.0 N*m { 82 kgf*cm, 71 in.*lbf }
-
Attach the clamp.
-
-
for JBL Made, w/o Seat Heater System:
-
Attach the 3 clips to install the No. 2 amplifier cover.
-
-
-
INSTALL STEREO COMPONENT AMPLIFIER ASSEMBLY
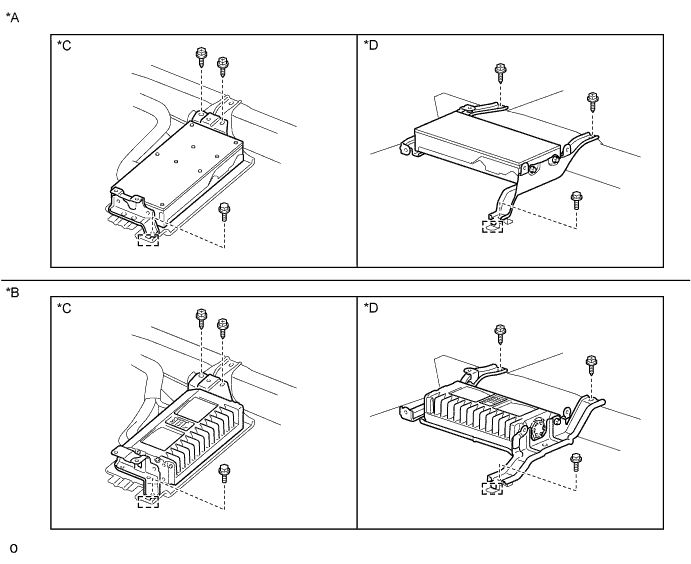
Text in Illustration *A for Pioneer Made *B for JBL Made *C w/ Seat Heater System *D w/o Seat Heater System
-
Attach the guide to install the stereo component amplifier assembly.
-
Install the bolt and 2 screws.
- Torque:
- w/ Seat Heater System Bolt
- 8.0 N*m { 82 kgf*cm, 71 in.*lbf }
- w/o Seat Heater System Bolt
- 4.5 N*m { 46 kgf*cm, 40 in.*lbf }
-
Connect each connector.
-
-
INSTALL AMPLIFIER COVER
-
w/ Seat Heater System:
-
Install the amplifier cover with the 3 clips.
-
-
w/o Seat Heater System:
-
Install the amplifier cover with the 3 screws and clip.
- Torque:
- 3.0 N*m { 31 kgf*cm, 27 in.*lbf }
-
Attach the clamp.
-
-
Return the floor carpet to its original position.
-
-
INSTALL FRONT SEAT ASSEMBLY RH
-
for Manual Seat Type:
-
for Power Seat Type:
-
for Walk in Seat Type:
-
for Bench Seat Type:
-
-
CONNECT CABLE TO NEGATIVE BATTERY TERMINAL
Note
When disconnecting the cable, some systems need to be initialized after the cable is reconnected Click here.
-
CHECK SRS WARNING LIGHT