REAR DIFFERENTIAL LOCK CONTROL SWITCH REMOVAL

Tech Tips
-
Use the same procedure for the RH and LH sides.
-
The procedure listed below is for the LH side.
-
REMOVE INTEGRATION CONTROL AND PANEL ASSEMBLY
-
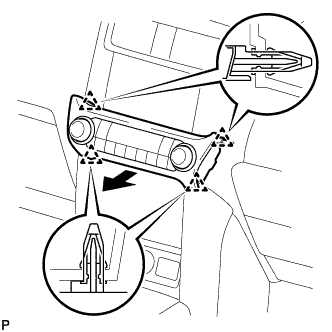
Detach the 4 clips.
-
Disconnect the connector and remove the integration control and panel assembly.
-
-
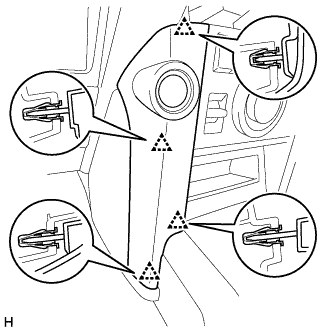
REMOVE INSTRUMENT PANEL FINISH PANEL END LH
-
Detach the 4 clips and remove the instrument panel finish panel end LH.
-
-
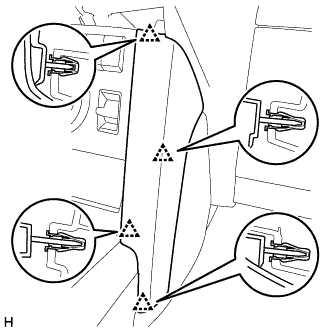
REMOVE INSTRUMENT PANEL FINISH PANEL END RH
-
Detach the 4 clips and remove the instrument panel finish panel end RH.
-
-
REMOVE NO. 1 INSTRUMENT PANEL FINISH PANEL CUSHION
Tech Tips
Use the same procedure described for the No. 2 instrument panel finish panel cushion.
-
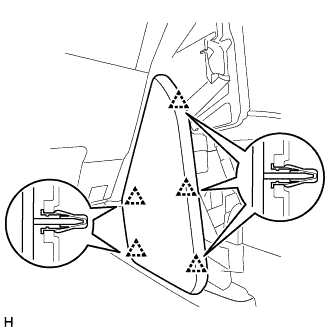
REMOVE NO. 2 INSTRUMENT PANEL FINISH PANEL CUSHION
-
Detach the 5 clips and remove the No. 2 instrument panel finish panel cushion.
-
-
REMOVE FRONT CONSOLE UPPER PANEL GARNISH
-
w/o Seat Heater System:
-
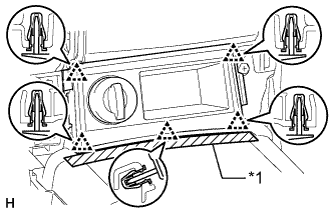
Text in Illustration *1 Protective Tape Put protective tape around the front console upper panel garnish.
-
Detach the 5 clips and remove the front console upper panel garnish.
-
Disconnect the connector.
-
-
w/o CRAWL:
-
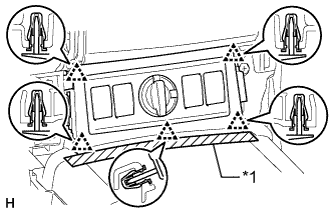
Text in Illustration *1 Protective Tape Put protective tape around the front console upper panel garnish.
-
Detach the 5 clips and remove the front console upper panel garnish.
-
Disconnect each connector.
-
-
w/ CRAWL:
-
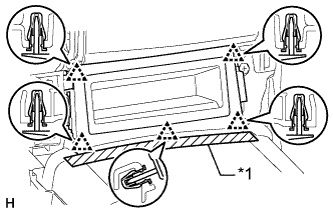
Text in Illustration *1 Protective Tape Put protective tape around the front console upper panel garnish.
-
Detach the 5 clips and remove the front console upper panel garnish.
-
-
-
REMOVE CENTER CLUSTER MODULE SWITCH (REAR DIFFERENTIAL LOCK CONTROL SWITCH)
-
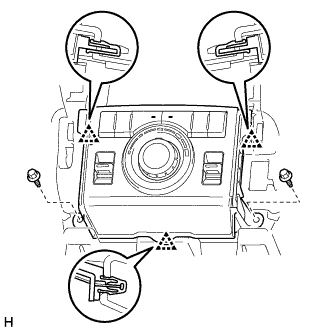
Remove the 2 bolts.
-
Detach the 3 clips.
-
Disconnect the connector and remove the center cluster module switch (rear differential lock control switch).
-
-
REMOVE CENTER CLUSTER MODULE PANEL
-
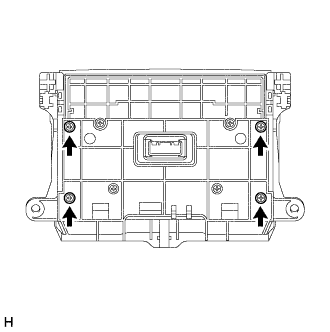
Remove the 4 screws and center cluster module panel from the center cluster module switch (rear differential lock control switch).
-